Andfit https://www.andfit.co.nz Community Gym in Auckland City Mon, 18 Jan 2021 06:08:20 +0000 en-US hourly 1 https://www.andfit.co.nz/wp-content/uploads/2019/11/cropped-A_Black-32x32.png Andfit https://www.andfit.co.nz 32 32 Why we don’t do Fitness Shortcuts https://www.andfit.co.nz/no-to-fitness-shortcuts/ Sun, 17 Jan 2021 23:10:45 +0000 https://www.andfit.co.nz/boost-metabolism-copy/ The post Why we don’t do Fitness Shortcuts appeared first on Andfit.

]]>
Have you been pitched 30 day get-lean-quick formulas yet? What are you going to do for the rest of the year though to maintain your results, if any? Here is how to avoid fitness shortcuts which hurt us and how to find those who help us.

January is International Shortcut Month!

Yesterday, you set some new year’s resolutions. Today, you were thrilled to discover that you could achieve them all EASILY AND FAST in the next 30 days! Woohoo—what will you do with the rest of your year??!

Yes, we’re talking about the get-lean-quick and crash diets, and the zero-money-down gym sign-up programs that prey on people like us.

There ARE shortcuts to fitness. But these are definitely not part of it.

WHEN DOES A FITNESS SHORTCUT HURT US?

To help us identify what can help us and what can hurt us in the midst of the fitness offers, we are going to use a four-question test that we took from Seth Godin’s blog:

  1. Is it repeatable? Can I keep doing this for a long time?
  2. Is it non-harmful? What are the downstream effects on my health?
  3. Is it additive? Will it improve over time?
  4. Can it survive the crowd? Does it have to be a secret?


Here are a few examples of some fitness trends (which you might have probably being pitched on your Facebook feed today). Let’s hold them up to the four-question test to find out their shortcut validity.

THE 30 DAY GET-LEAN-QUICK / XYZ DIET 
  1. Is it repeatable? Can I keep doing this for a long time, or is it a crash diet? 

People use different types of diets to shave weight off all the time , like ketosis, high-fat diets, paleo….. And if you’re trying to beat a sugar addiction, a short intermitting fasting diet might actually help.

But can I sustain this for the rest of my life? Unfortunately ALL quick “diets” are a quick fix which your body can not sustain for all your life.

If you stop eating certain nutrients, your body will lose the ability to process them, thus creating digestion issues when you try to reintroduce these nutrients into your daily routine.

If you stop eating carbs, you’ll become less resistant to insulin in the short-term and start burning more fat instead of glucose… but your body will also start slowing down during exercise as fat is a slower source of energy than carbs.

  1. Is it non-harmful? What are the downstream effects on my health?

Rapid weight loss, crash dieting, or any unsustainable practice will always have a rebound effect. While cutting sugars can have amazing benefits on your health in the long term, you have a relationship with food and one-night stands with diets will always come back to haunt you.

  1. Is it additive? Will it improve over time?

Diets give you a clear “good and bad” line and it’s great to feel so much in control of your nutrition. Unfortunately, this doesn’t last and is not sustainable in life. Everyone knows the term “yo-yo dieting” by now.

  1. Can it survive the crowd? Does it have to be a secret?

Dieting together with a group of friends or colleagues or gym buddies is easier as you’ll be more likely to stick to the plan. SHOULD you stick to it? See above.
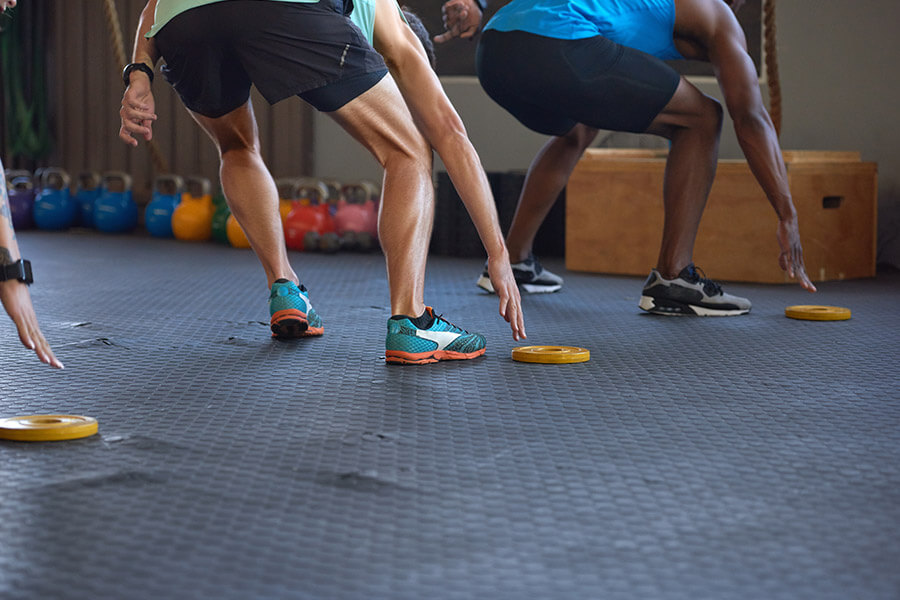
JOINING A GYM
  1. Is it repeatable? Can I keep doing this for a long time?

Yes. You can join a gym and keep going for years and years. What’s best and what we promote is coached fitness, but even a $7 access-only gym will benefit you long term (if you show up).

2. Is it non-harmful? What are the downstream effects on my health? 

There probably are no negative effects. Very few people get injured in the gym. When they occur, injuries are usually overuse problems (you keep repeating the same workout or movements like bench press every single Monday and leg extensions every Friday).

3. Is it additive? Will it improve over time?

Yes. Training with weights has a compounding effect. You get stronger, your muscles improve your metabolism, and you get better and leaner… UNLESS you keep sticking to the same program every month, like the same old 3-sets-of-8-reps. Your body need constant variety to improve in all aspects.

But in general, running becomes more fun the longer you run, weightlifting becomes more fun the longer you lift, and CrossFit-style workouts get even more exciting over time.

4. Can it survive the crowd? Does it have to be a secret?

Regular gyms will see a huge influx of new members until mid March (the average date most new members quit, except in coaching gyms like Andfit where people stick around for years).

Regular gyms also will never really “fill” as many members almost never show up after the initial frenzy. Here at Andfit we’re the opposite, as we have a membership cap of 14 people per class.

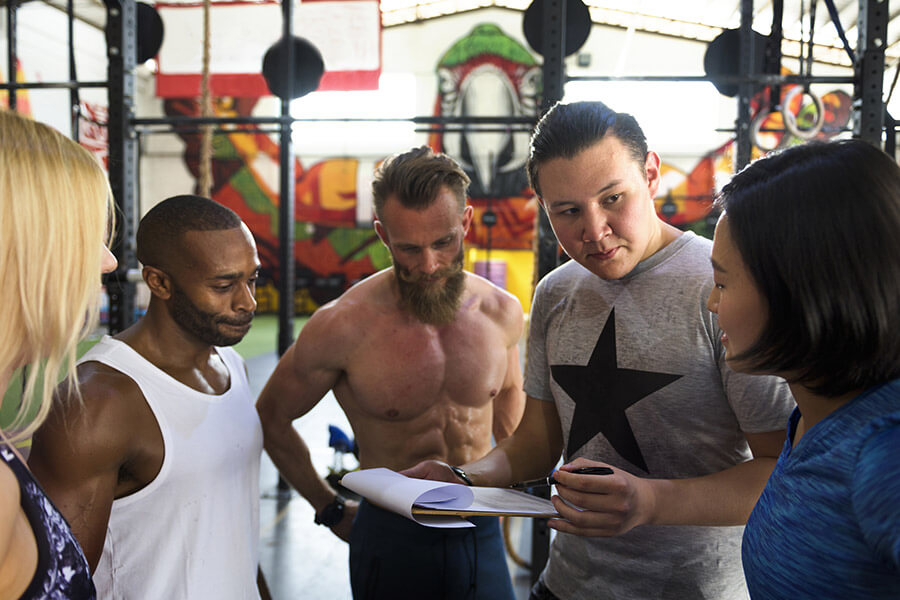
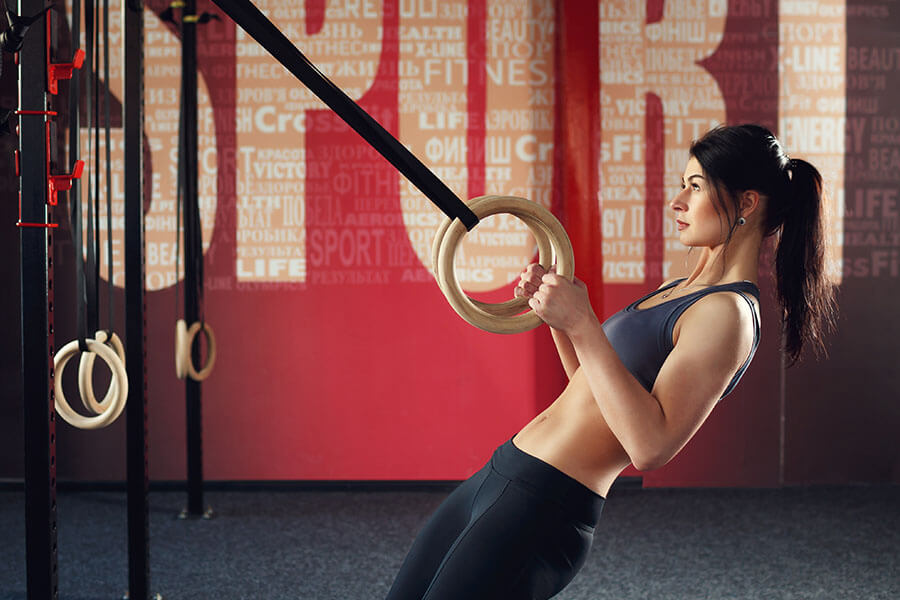
JOINING A COACHING GYM OR A PERSONAL TRAINER
  1. Is it repeatable? Can I keep doing this for a long time?

Yes. Many of our members have been doing CrossFit for over 6 years, and still love it. And yes, you can keep doing it for a long time.

Many people are concerned about injuries before starting however, these rarely happen unless you workout alone, unsupervised when technique hasn’t settled yet or you skip the warm up in a class, which is meant to warm all the muscles you need in the workout, thus drastically reducing the likelihood of injury.

In same cases, CrossFit-style training has even fixed chronic problems such as back pain after accidents. Try to believe.

  1. Is it non-harmful? What are the downstream effects on my health? 

Yes. Here at Andfit we offer personalised training in a group environment. This means we work 1:1 with our members to measure progress and set goals, so you can really track and improve your fitness.

  1. Is it additive? Will it improve over time?

Yes. When an objective source measures your results (CrossFit-style training is very easily measurable and coaches are working with you at all time to set goals and measures), they can point to what’s working and help you focus more. 

  1. Can it survive the crowd? Does it have to be a secret?

No. Coaching businesses are anti-crowd. Because of the 1:1 relationships involved, coaching businesses can’t take 1,000 clients. And this is probably the SECRET recipe for a life-long healthy relationship with your fitness. 

LOOK FOR THE RIGHT FORMULA

You’re going to get pitched this week. Be wary of the fitness shortcuts around the Internet. Use the four-question test and if you think what you’ve been pitched is unsustainable, don’t buy. Look elsewhere for the right formula.

Get in touch below if you’d like to know more about what we do at Andfit.

Happy fitness!

Book your No Sweat Intro

Want to start your fitness journey with us?
Come in for a friendly chat with our coaches to find out how Andfit can help you reach your potential. Book here!

The post Why we don’t do Fitness Shortcuts appeared first on Andfit.

]]>
How to boost your metabolism https://www.andfit.co.nz/boost-metabolism/ Tue, 05 Jan 2021 20:03:27 +0000 https://www.andfit.co.nz/fatigue-training-copy/ The post How to boost your metabolism appeared first on Andfit.

]]>
Chances are you have blamed your weight gain on your “slow” metabolism. But it isn’t that easy. So let’s find out what’s going on with metabolism and how physical activity and weightlifting can fix it.

Chances are you have blamed your weight gain on your “slow” metabolism. Or you are giving up dieting and exercising after seeing no results because of a genetically-inherited slow metabolism. My mum has a “slow” metabolism, I have it too. But it isn’t that easy. So let’s find out what’s going on with metabolism and how to fix yours.

Your metabolism is the rate at which your body burns energy.

Your body uses calories for energy, like your car uses gas for energy.

When you eat, your body either uses the calories as fuel for activities, such as exercise, or stores them as heat—in the form of energy or fat.

When you eat too many calories, you store them as fat. Calories from sugar are more likely to be stored as fat because sugar tricks your body into thinking “here come a lot of calories.” But this topic is for another time. 

HOW DO WE BURN THOSE CALORIES?

You want a FAST metabolism, meaning your body burns a LOT of calories. If you’re trying to lose weight, you need to burn more calories than you eat.

One simple way out of it is to eat less and do more physical activity. But it isn’t that easy again. There are three main ways you burn calories:

1.BASAL METABOLIC RATE. That is the number of calories your body burns when you’re not moving to stay alive, like energy used to keep your hearth beating, to breath, to digest…

This is measured as “basal metabolic rate,” or BMR: the energy needed to keep your body functioning while at rest, which is approximately 70% of your total calories consumption. This number differs based on age, gender, height, weight and genetics.

2. FOOD DIGESTION. It costs a bit of energy to digest food. Not much. It takes slightly more energy to break down proteins and fats than to break down carbs.

This is around 10% of your total daily calories intake, at best. Known as diet-induced thermogenesis, thermic effect of food, or TEF.

3. PHYSICAL ACTIVITY, which burns approximately 20 to 25% of your calories intake. Your activity level and intensity affect this percentage. The more you move, the more you burn.

Walking and shopping don’t count for much. You will not lose weight mowing the lawn or taking one flight of stairs every day. An hour of intense aerobic exercise might burn up to 20% more calories. 

Adaptive thermogenesis can also be a tiny component of your metabolism, but it only really applies if you’re exposed to cold climates when your body would use calories to keep warm.

That’s it.

PHYSICAL ACTIVITY BOOSTS YOUR METABOLISM

While you don’t have much control over the speed of your basal metabolism, you can control how many calories you eat and how many calories you burn through physical activity. 

Creating a caloric deficit is the first step to losing fat. However, your body has a set point and it wants to stay there. That’s why crash dieting doesn’t work long term.

Severe calories restriction might cause you to lose weight fast, but it slows down your metabolism and has other negative consequences. Your body tries to become more efficient as a life-preserving measure to keep you from starving. As a consequence it adapts everything from your thyroid, to your degree of fatigue, to how much you sweat because your body is trying to conserve energy.

Accounting for between 20 and 25 per cent of our metabolism, physical activity is the largest component of metabolism that we can control.

The more active you are, the more calories you burn.

Aerobic exercise is one of the most efficient way to burn calories and includes activities such as running, rowing, bicycling, swimming and bodyweight exercise depending on the intensity. As a general goal, try to include at least 30 minutes of physical activity every day.

If you want to lose weight or meet specific fitness goals, then you need to increase the time you spend on physical activity even more. Even on rest days, try to be as active as possible, taking the stairs more often and parking farther away at the store. Active recovery such as walking or a gentle hike is also a great way to keep your metabolism active.


WEIGHTLIFTING AND YOUR METABOLISM

Another very efficient way to burn calories is to increase your muscle mass. That means lifting weights.

The more muscle you have, the higher your BMR (Basal Metabolic Rate) will be. The less muscle you have, the lower your BMR will be. Muscle burns calories to stay alive more than fat tissue does, at least 3 times more.

You burn calories right after exercise, when your muscle feeds itself. The more muscle you have, the more calories you burn off.

While more muscle doesn’t mean you’ll torch your metabolic rate and become a human calorie-burning furnace, weight training is pretty important for fat loss.

The benefits of muscle building exercise to burn fat include:

  • A contribution to total daily energy expenditure at rest
  • More muscle does boost energy burn during exercise
  • Reduced fatigue when performing cardio activities
  • Better sports performance, fitness, and strength
  • Improved insulin sensitivity which may help control calorie intake


So creating a caloric deficit is the first step to losing fat. But it’s not the only and most efficient step. Physical exercise, and strength training in particular, can be one of the most effective way for losing weight. The second step: Cut out bad sugar (check out how to beat your sugar cravings here).


Need help in figuring your metabolism out? Come meet our expert coaches and find out how we can help you out in your health journey. Book your No Sweat Intro below.

Book your No Sweat Intro

Want to start your fitness journey with us?
Come in for a friendly chat with our coaches to find out how Andfit can help you reach your potential. Book here!

The post How to boost your metabolism appeared first on Andfit.

]]>
New Year Resolutions Reloaded https://www.andfit.co.nz/new-year-resolution-reloaded/ Tue, 29 Dec 2020 20:08:35 +0000 https://www.andfit.co.nz/fatigue-training-copy/ The post New Year Resolutions Reloaded appeared first on Andfit.

]]>
We hate to spoil it for you, but New Year Resolutions almost never make the cut. Luckily, with some adjustments we can turn them into long term plans and we can set ourselves up for success. Ready? Let’s get it!

We hate to spoil it for you, but New Year Resolutions almost never make the cut. Why? They are often unrealistic (too much too soon), short term focused and why are we waiting until the 1st of January to make the change?

Luckily, with some adjustments we can turn them into long term plans and we can set ourselves up for success. Ready? Let’s get it!

New Year Resolutions can be extremely powerful if only….they worked. They don’t fail because they’re intricately bad resolutions. They fail because they are short sighted. 

“I`m going to start a new diet in January”, “I will never miss a class in 2021”, “I will lose 5kg in one month”, “I will handstand walk by February”.   These are all great scenarios, unfortunately they all have some flaws. Lacking a real plan, feeding on a burst of motivation which is not going to last, or based on drastic quick changes in your lifestyle which instead can take years to modify.

Let’s be real. All good resolutions need three things: preparedness, consistency and long term commitment.

PREPAREDNESS

We need to be prepared to change. Setting up to change our mindset from one day to the other is not going to happen, otherwise everyone would do it and wouldn’t wait until the beginning of the new year to do so.

Being READY to change means being willing to change for a specific reason. Which is YOUR reason? “I want to lose 5kg and maintain my weight to feel better and fitter when I run the marathon next year”, “I want to learn how to handstand to join the Open in the RX division in February”

If you can not find YOUR reason behind your resolution, but you’re just following someone’s else dream or benchmark, then your resolution is doomed from the start. 

Find YOUR WHY and your resolution will start taking up a more concrete shape.

CONSISTENCY

As boring as it sounds, consistency is the key. We all love the initial burst of motivation that fires up our souls and get us started in the pursue of our resolutions. The problem is, motivation dies off as fast as it sprouts. 

While motivation will make you smash the first few weeks, consistency  will keep you going through the first difficulties and beyond. “To lose 5kg before the marathon next year I need to consistently go to the gym 3 times a week and run twice a week. I also need to gradually cut out added sugars from my diet and only eat out once a week” 

Knowing HOW to reach your goal and WHAT to do to get you there is what will help you plan your year and break it down into smaller steps til the finer details. 

Once you know HOW and WHAT, you will find it easier to be committed to your plan every single day.  Motivation will die off eventually while consistency will keep you going, creating long lasting habits.

LONG-TERM COMMITMENT

In order for you to reach your resolutions, you need a long-term plan.

“Too fast and too soon” goals are not going to happen. We typically overestimate our ability to get where we want. Think of today: how many plans are you going to postpone until tomorrow because you overbooked yourself? 

What we all need is to break down our big resolution into smaller achievable steps, make it sustainable in the long period. “I want to lose 5kg before the Marathon in March. I am going to lose 1kg every 2 weeks and maintain my final weight for the final 2 weeks before the Marathon”

This resolution is more attainable because you have smaller goals to achieve every 2 weeks (you can even break it down in smaller steps, i.e. losing 0.5kg every week for 3 months) and it’s not too fast, too soon. You give yourself 3 months to lose 5kg which is a very sustainable goal.

It’s this simple. Long term commitment not only set you up for success, but also make it easier to follow through your newly created habits after you reach your goal. You’ve reached and maintained your healthy weight for the Marathon. What stops you now from keeping up the good work and maintain those healthy nutrition habits you put in place?

NEW YEAR RESOLUTIONS RELOADED

Don’t get us wrong, we’re all about setting up goals for yourself and see you succeeding. So what about all your dreamy resolutions for the new year? 

Take them one by one and analyse them. Make sure the three key elements to success are there: preparedness, consistency and long term commitment.

Find your why, set up a long-term plan, break it down into smaller steps, create daily habits and commit to them. 

Last but not least, surround yourself by people who believe in you. We at Andfit wish you will reach all your amazing goals in the New Year.


Not so simple? We’d love to help you! Come and have a chat with us about your New Year Resolutions and let’s make them real!

Book your No Sweat Intro

Want to start your fitness journey with us?
Come in for a friendly chat with our coaches to find out how Andfit can help you reach your potential. Book here!

The post New Year Resolutions Reloaded appeared first on Andfit.

]]>
Get out of your comfort zone https://www.andfit.co.nz/get-out-of-comfort-zone/ Tue, 22 Dec 2020 21:55:45 +0000 https://www.andfit.co.nz/habits-fitness-journey-copy/ The post Get out of your comfort zone appeared first on Andfit.

]]>
Only when you stop letting fears and anxiety hold you back, will you start to make those major breakthroughs in life. And the magic happens just outside of your comfort zone. Find out how to push past your boundaries with us!

“Life begins at the end of your comfort zone.”

Neale Donald Walsch


Simply put:

Only when you stop letting fears and anxiety hold you back, will you start to make those major breakthroughs in life.

Unfortunately, we as human beings often force ourselves into boundaries (our comfort zone) and we refuse to push past.

We’re ruled by habits. We do things the same old way because it’s comfortable.

But the risk in staying firmly inside our comfort zones is that it creates psychological barriers that can lead to nervousness and anxiety when we are confronted with something new every time.

With time this can also lead to limitations and to the belief that we can not achieve or do something.

How to get out of your comfort zone

There are no fancy formulas to overcome our fears. Like everything in life, what has to happen first is for us to take the decision to get out there and play. 

To help you in the journey we have put together 7 steps to follow to get you on the right track. So let’s take the first!

1. Get Information
Anxiety usually comes from a fear of the unknown. Usually we imagine the worst-case scenario of what could happen when we push past the boundaries of what makes us feel safe.

To break through your comfort zone, you need to first educate yourself. Talk to people who have done the same thing, i.e. your coaches or gym buddies. Read books or articles on the subject. Check out videos on the Internet or documentaries about this subject.

Information is power. And the more you know about something, the less scary and more powerful you’ll feel.

2. Have a Plan
Create a step-by-step plan to reach your goal to get out of your comfort zone, using the S.M.A.R.T. goals scheme and breaking it down into smaller benchmarks.

Once you’re clear on the specific steps to take, you need to create a S.M.A.R.T. goal around it.

Specific – What specifically do you want to achieve? Vague goals lead to vague, half-hearted attempts to reach them

Measurable – How will you measure your progress and know when you’ve achieved the goal?

Attainable – Is the goal something that you are physically capable of achieving?

Relevant – Is my goal realistic and results-based?

Time-Bound – What is the time-limit for achieving the goal?

For example, if your goal is to increase your cardiorespiratory fitness, and you think running is the right kind of cardio exercise for you, then a S.M.A.R.T. goal might be something like:

“To be able to run for 45 minutes non-stop at 6km/hr, within the next 3 months”

For each S.M.A.R.T. goal, you then need to create benchmarks by using concrete, quantifiable criteria. These are mini-goals that put you one step close to pushing past your comfort zone.

BENCHMARKS

Week 1: Run 10 minutes at 6km/hr, walk 1 minute, repeat (twice a week)

Week 2: Run 12 minutes at 6km/hr, walk 1 minute, repeat (twice a week)

………

3. Hold Yourself Accountable
Remember, the journey starts from yourself.

Playing the “blame game” won’t get you anywhere. It does not help if you attribute every positive result to good luck and characterize every negative result as something that just happened to you or it’s someone else’s fault. 

When you take full responsibility for everything happening in your life, you want to tell your friends and family about what you’re trying to do.

You want them to give you that ‘push’ as you’re pushing your boundaries. They will make it hard for you to quit because you know you’ll look foolish if you did. 

Use a diary or an app to keep you on track or, even better, find a buddy to share your adventure. Show up for the other person, provide honest feedback to each other and keep strategising together.

In the fitness world, coaches are the most valuable “accountability partners” you can ask for! If you need any help with your goals, reach out!

4. Take Baby Steps
Way too often when people decide to start exercising or tackling a particular movement, they begin by doing too much. Progress takes time. Start easy and be consistent.

Goal maintenance is all about forming good habits.

Forming habits is about consistently pairing your cues with your routines (specific behaviours), and your routines with your rewards.

Complete the neurological loop enough times, and the routine becomes habit.

EXAMPLE

ROUTINE: ‘Pack / prepare jogging gear each night’.

CUE: ‘after dinner’ (preceding action)

REWARD: ‘watch an episode of my favorite show’

Completing the loop would look like this:

“Every night after dinner (CUE), I’m going to pack / prepare my jogging gear (ROUTINE), so that I can watch an episode of my favorite show (REWARD)”

5. Aggressive Challenges
To really blast through your comfort zone, you sometimes need to shock your “normal” in order to become comfortable with being uncomfortable.

A rapid-fire approach to do this is to take up an “aggressive challenge”, do something that makes you scared or uncomfortable.

You won’t have time to think about your fear. Instead you’ll be so busy pushing your boundaries that you forget about what used to make you scared.

Identify a competition/race/event/group you can join to push your limits and motivate yourself towards your goal.

Find extra motivation by taking this to the altruistic side and racing for a charity/cause like Breast Cancer Awareness or an Environmental Organisation like Kiwis for Kiwi.

6. Remain Positive
Recognize that you will have negative outcomes sometimes. It’s a natural part of the process.

Don’t allow negativity to creep into your mind. Remind yourself that it’s going to happen.

The trick here is to create the mantra of “next”.

Whenever you have a negative experience, you quickly identify the mistake that you’ve made and simply say “next” as you move on to achieve your goal.

7. Keep Expanding your Comfort Zone
Never stop expanding your comfort zone. Even if you arrive at your stated goal it’s important to keep pushing those boundaries.

Look for new challenges. Find stuff that you would never imagined you would do.

Like running the marathon after you ran the half marathon for the first time. Or you could work on another skill completely (once you can do a butterfly pull-up, you can aim for handstand walk).

Your Comfort Zone will Expand

The good thing about the comfort zone is that it’s flexible and malleable.

With each action you take outside of your comfort zone, it expands as you become accustomed to pushing your boundaries.

And once you master that new skill or action, it eventually becomes part of your comfort zone.

This is great news for you because it means that you can constantly increase and improve upon the behaviors that you’re comfortable with.

ASK FOR HELP

If you need help with your next fitness challenge, we are an email away!

We offer a monthly FREE Athlete Check-in every first Saturday of the the month – BOOK HERE

Or you can get in touch with us to set up a time to talk to us – WRITE US

Book your No Sweat Intro

Want to start your fitness journey with us?
Come in for a friendly chat with our coaches to find out how Andfit can help you reach your potential. Book here!

The post Get out of your comfort zone appeared first on Andfit.

]]>
Are you ‘really’ tired? https://www.andfit.co.nz/fatigue-training/ Thu, 17 Dec 2020 04:04:25 +0000 https://www.andfit.co.nz/consistency-over-perfection-copy/ The post Are you ‘really’ tired? appeared first on Andfit.

]]>
It happens sometimes when you ask around the gym how people feel, they say “I’m tired!”. The second question everyone should ask is “Which type of ‘tired’?”.

That’s right, there are actually two types of fatigue: the real one and the fake one. And how you respond to each couldn’t be more different.

Crossfit-style and functional training can be intense, especially for beginners. It’s perfectly normal to feel tired, ‘not as sharp and energetic as you’d like’, after a week of workouts. It’s also perfectly normal to take one or two day break to recover from that nasty squat-row-pullups-snatch session. 

However, it is not uncommon to still feel sluggish after resting. That’s why it’s so important to distinguish between two types of fatigue:

  1. Real fatigue, when your mind-body system is truly tired
  2. Fake fatigue, when your mind-body system is tricking you into feeling tired because you’re in a rut

It’s crucial to understand which ‘fatigue’ we’re experiencing as each type requires a very different response. While the real fatigue asks for resting and recharging your batteries, the fake fatigue calls for acting or better reacting to the exhaustion in a dynamic way.

DIFFERENTIATE ‘REAL’ FROM ‘FAKE’ FATIGUE

Physical fatigue may be the easier of the two sensations to discern. Very sore muscles, increased heart rate, decreased speed in your running or lifting are all signs of physical fatigue. Psychological fatigue, however, may be more complicated to assess.

One useful signal that you’ve been pushing too hard through real fatigue for too long is the feeling of burnout, which can sometimes take several months to recover from. 

To avoid burnout the safest and easiest bet is to treat your exhaustion as it were real fatigue. Take one or two days off. Sleep more. Walk in nature and do something different, relaxing for yourself. Change your routine slightly to avoid too much pressure on your body and mind.

If all of this does not work after some weeks and you are still feeling tired and void of energy, then you are probably experiencing fake fatigue and this requires real action.

Exhaustion from depression is an extreme example of “fake” fatigue. Your brain is tricking you into staying in bed all day, causing a sense of paralysis and dullness. What you feel, however, is not caused by lack of sleep, expenditure of physiological resources or something wrong with your body. Otherwise, taking action (getting up from bed and working your way out of it) would only aggravate the situation.

“FAKE” FATIGUE IS REAL

Fake fatigue can happen on a smaller scale to everyone. You might feel stuck in your progress at the gym, thus experiencing some kind of exhaustion and frustration because you are not improving as you wish you’d do. You might be putting off a big project at work as you feel “tired” and deprived of motivation. 

There is no a go-to solution for everybody as everyone is different. As you get more and more conscious of your feelings, a good practice is to pay attention to how you feel and what works best for you in that particular occasion. With time you’ll become better at differentiating between real and fake fatigue and will also find approaches to overcome both kind of fatigue.


If you need help figuring out how to progress or get into action and beat your fatigue, come chat with one of your Andfit coaches today!

Book your No Sweat Intro

Want to start your fitness journey with us?
Come in for a friendly chat with our coaches to find out how Andfit can help you reach your potential. Book here!

The post Are you ‘really’ tired? appeared first on Andfit.

]]>
Swimming for CrossFit https://www.andfit.co.nz/swimming-for-crossfit/ Wed, 09 Dec 2020 19:24:12 +0000 https://www.andfit.co.nz/hypertrophy-workout-crossfit-copy/ The post Swimming for CrossFit appeared first on Andfit.

]]>
Adding swimming into your CrossFit training will benefit you in so many ways.

At Andfit we believe in making it varied and be prepared for anything so why just stick to the usual weightlifting and gymnastics?

With the right coaching and programming for your swimming you will see huge progressions both in and out of the pool.

As a former professional Waterpolo athlete, I can’t hide my enthusiasm when I see swimming showing up more and more in CrossFit competitions.

Growing up along the seaside in Genoa, Italy, I’ve spent more time in the water than on land as a child. Before 12 I was already competing at national level and my life was at the swimming pool five days a week, two times a day, plus the usual match over the weekends. I loved it, I was in top shape and that was fun!


Even though there were not many guidelines regarding training outside the pool, I was diligently hitting the gym three times a week to improve my strength. I found cross-training was giving me that competitive edge I could not achieve with water-based training only.

Here I am, many years later, owning my own CrossFit-style gym and teaching swimming in my spare time, combining my two passions.

As a CrossFit coach, I actively encourage our athletes to hit the pool to vary their training protocols and the demands they place on their body. Swimming, a multi-joint discipline that places high demand on both the aerobic and anaerobic energy systems, is a good fit for CrossFitters as many of the physical attributes required in the water are also applicable to CrossFit, such as coordination, speed, endurance, strength, and so on. Plus, it’s great for active recovery.

Likewise, swimmers would benefit from incorporating low-impact CrossFit workouts into their programming too.

Why Swimming and CrossFit?

CrossFit was born from the idea to make it varied and be prepared for anything, to become the “quintessential athlete”.

So why just stick to the usual weightlifting and gymnastics? Adding swimming into your CrossFit training will benefit you in so many ways and help you become a better athlete.

As a waterpolo player and swimmer and as a Crossfit proponent I’ve always known the benefits of both disciplines and I can draw many parallels between the two disciplines.

I truly believe swimming complement CrossFit training in many ways and can be an athlete’s best friend when used to improve your general physical preparedness and your recovery without the high impact on joints seen on land.

1. Total Body Disciplines

Both Crossfit and swimming are total body disciplines. You use arms, legs, back and core all at once. Instead of working one set of muscle groups at a time, you are working multiple groups simultaneously and repeatedly, which is where the first parallel between the two sports emerge.

2. Good for Your Heart

Both swimming and Crossfit are brilliant for cardiovascular development. Not only your lung capacity but also your endurance and stamina will increase with time.

The intention of CrossFit is to exercise our bodies to such a high intensity and attempt to maintain that intensity for as long as possible. And even when we reach the brink of exhaustion, we keep going to improve ourselves. As a swimmer I’m very familiar with this feeling of oxygen debt, lactic acid and muscle fatigue, especially after some interval training consisting of multiples 100m, 50m or 25m sprints.

3. More Endurance

Both are great for muscular endurance. Your shoulders, legs and core do A LOT when either swimming or doing a CrossFit workout and this improve their ability to cope with repetitive intensity. 

4. Active Recovery & Injury Prevention

Swimming is low impact and can help with taking the “load” off and alleviating stress put on the joints during land exercises while maintaining high intensity. That’s why swimming is fantastic as active recovery on your “rest” days.

In addition, if you have an injury or a niggle, swimming is a great thing for you to help you heal faster as there is little impact on the joints and you are supported by the water.

5. Better Breathing Control

Swimming can also teach you better breathing control which you can then apply to your training “on land”.

It can aid in helping build an aerobic base and improved lung capacity, along with coordination of arms and legs. There aren’t many activities that will force you to take notice of your breathing. In swimming, this is fundamental in order to move efficiently… or move at all.

Frequency and Programming

Athletes training for health and longevity should at the very least try to get down to the pool 1 time per week for an hour. Anything upwards of that is a bonus.

It doesn’t have to be about boring swimming up and down doing length after length. As Crossfit, swimming is a highly technical sport and requires a lot of detailed practice to become more proficient in. With the right coaching and programming anyone can see huge progresses both in and out of the pool.

What I usually recommend to my students and athletes is to start with the fundamentals and use lots of drills to get better over all and enjoy swimming much more. And of course, like in any other sports, consistency is the key to improve in swimming too. 

So get your swimsuit and goggles ready and

hit the pool with us this Summer!


NEXT DATES

In 2021, we will meet at Parnell Baths at 9am on the following dates:

  • Sunday, January 10th
  • Sunday, February 28th
  • Sunday, March 28th

Get in touch at for more details. See you there!

Book your No Sweat Intro

Want to start your fitness journey with us?
Come in for a friendly chat with our coaches to find out how Andfit can help you reach your potential. Book here!

The post Swimming for CrossFit appeared first on Andfit.

]]>
Keep it healthy, keep it joyful https://www.andfit.co.nz/christmas-fitness-tips/ Thu, 03 Dec 2020 19:21:43 +0000 https://www.andfit.co.nz/nutrition-absorption-copy/ The post Keep it healthy, keep it joyful appeared first on Andfit.

]]>
We know we are all tempted to indulge over the Christmas holidays - social gatherings, beverages, treats…But what about our nutrition and fitness goals? Here are some guidelines for everyone to still enjoy all the festivities of the season while getting through the Christmas period without too much impact on our health and waistline.

For most of us Christmas is a time to celebrate with family, friends, colleagues. However, trying to navigate social gatherings, beverages, and treats can become a source of stress for many of us as we struggle to maintain our nutrition and fitness goals afloat. So let’s talk about how to enjoy the festivities without sabotaging all our efforts.

The holidays provide some challenges to our nutrition and fitness goals. Social events can definitely lead to eat foods you normally don’t eat, and very likely to increase alcohol and dessert consumption. 

It is also the time of the year when we take a deserved break from our normal routine. Less hours at the office, travels, family reunions. Unfortunately, with routine changes we tend to skip one too many gym workouts, sit at a table for too long, and put behind our fitness goals.

8 tips for a healthier Christmas

Here are our top 8 tips for a healthier Christmas while enjoying all the good things the holidays always bring. Let’s start!

    1. Don’t Sit Down All Day

We know it’s easy to get stuck at the table the whole day in front of so many delicacies and drinks. Plan ahead to avoid sitting for too long and encourage the whole family to take a walk after meals or play outdoors. The more activity, the better!

2.  Set Fitness Goals

Holidays can disrupt your routine a little, but there is no need to give it all up because you miss a couple of sessions at the gym. Plan your holidays so that you incorporate at least 2 to 3 workouts per week, even away from home. Activities such as running, hiking or riding a bike can be done anywhere.

3. Go Easy on the Booze

While avoiding a fresh glass of Sav with your New Year Eve’s dinner or the usual drinks at your company’s Christmas function can be difficult, overindulging in too much alcohol can be easily avoided by alternating an alcoholic beverage with water or club soda and opt for healthier alternative to sugary drinks such as fruit mocktails or smoothies.

4. Don’t Go In Hungry

Start your day with a healthy breakfast and drink plenty of water before holiday gatherings.

Without an empty stomach you will feel less tempted to graze the whole buffet table. Skipping meals might also disrupt your usual routine and make it more difficult for you to stick to your goals afterwards.

5. Think Before You Eat

Wolfing down any treat popping in front of you won’t make your Christmas any merrier, especially if you eat your food mindlessly.

Slow down as you eat and try to enjoy the tastes and smells of what’s in your plate. Make an effort to select what you really want to eat and make it a special occasion, something to be savoured slowly.

6. Don’t Forget Veggies and Fruits

It’s true, Christmas traditional menus don’t allow for much space for veggies and fruits. Nothing stops us to change things up a bit, though.

This year try to include healthy portions of fruit and veggies in your plates to still get all the good vitamins and minerals our body needs over the holidays. There are plenty of ideas on the internet. Get creative!

7. Get Your Sleep

Too often we overestimate our ability to recover after big parties and hangovers. The truth is, our bodies need to rest and sleep is essential for the good functioning of our brain and bodies. Get your 8 to 9 hours of sleep a day and feel refreshed after too much partying.

8. Don’t Stress, Be Merry

Too often we tend to stress over the holidays – overspending, overeating, over drinking, overcooking for the whole family, cleaning…

Remember to take a deep breath and take time to make good memories with the ones you love. It’s helpful to leave the table from time to time, take some fresh air and mentally list all the good things happening in your life.

Ask for help

We hope this helps you stick to your nutrition and fitness goals through the holidays. If need more accountability over this period, don’t hesitate to get in touch with us for expert nutrition and fitness advice.

Have a happy and healthy holiday season from your Andfit Team!

Join our 6 Week Nutrition Program

Want to focus on building healthy habits for good?

We run a Six Week Nutrition Program twice a year for our community to help them create healthy sustainable habits for a lifetime.

If you are interested, leave us your details and we will be in touch soon.
Talk soon!

The post Keep it healthy, keep it joyful appeared first on Andfit.

]]>
Don’t be perfect https://www.andfit.co.nz/consistency-over-perfection/ Wed, 25 Nov 2020 21:12:16 +0000 https://www.andfit.co.nz/beachbody-being-body-confident-copy/ The post Don’t be perfect appeared first on Andfit.

]]>
Better be perfect or consistent to progress? We only achieve real long-term progress when we consistently do things better - even if only slightly better. Perfection is a myth and a short term fix. Consistency wins!

It is common that we strive for perfection in most endeavours. In fitness and nutrition this can translate into reaching the perfect PR,  win that CrossFit competition, having the perfect ABs…

Being “perfect” picture this glorious moments in our mind. What is “perfection” though? No one would ever have the same answer. Because perfection doesn’t exit. 

While perfection – or better striving to reach our ultimate goals – is not a bad thing overall, we must realize that it is an endless journey. In this journey, we have to make sure we don’t sacrifice progress and consistency in the search for “perfection”.

PERFECTION DOESN’T EXIST

If you reach for perfection at all times, once you have hit an error in your day, you begin to feel as though you have failed at life. An imperfect day of eating or a less-than-average performance one day may lead you to cease your efforts all together. 

The amount of work and stress involved in trying to be perfect, or even close to it, will make you miserable. It becomes a “all or nothing” game that, once you have lost, you are likely to give up.

You can recover from one unhealthy meal without overturning your progress. You can progress in your training even without hitting PRs continuously.

The key to further improve our behaviours and get closer to our goals is to look for consistency, not perfection.

CONSISTENCY WINS

Consistency creates long-term habits. It also incorporates the idea that fitness is a journey, not a destination.

You cannot have progress or reach an objective if you don’t consistently show up and put in the work. You can´t expect to hit your desired PR if you come only once a week at the gym. You can’t maintain your ideal weight ongoing through a two week weight loss program. Reaching your goals is not about quick fixes and being “perfect” for a short time.

Extremes like fad diets, over-the-top exercise routines, etc…can only lead to burnout, metabolic imbalances and low energy, if not malnourishment and injuries. 

They also lead to short-term results and eventually loss of enthusiasm and drive.

On the other side, consistency will keep you coming back. Even when it’s not followed by immediate progress. Once you get in that habit and fitness becomes part of who you are, plateaus or imperfect days are easily overcome.

Since you built up consistency, getting to do those extra things to push you past your plateau should be a piece-of-cake. And that’s when you progress and get closer to your goals.


ADAPTATIONS HAPPEN OVER THE LONG TERM

Many important adaptations happen over a long time.

The best athletic performances don’t happen overnight. It’s the fruit of years of training and hard work. You can not build good nutritional habits or muscle endurance in any “few weeks programs”. 

Many of the most important skills in the health and fitness area take time to master. Being consistent is the only way to have a long-lasting effect. Everything else, including perfection, is momentary.

The key to progress is to consistently do things better – even if only slightly better. That’s why:

  • Doing five minutes of mobility work each day will improve your mobility much more than not doing anything at all or a yoga session once a month.
  • Spending an extra minute during each workout to try a new movement (like double unders) will pay off in the long term than never attempting the movement for fear of failure.
  • Giving occasionally in to eat banned goodies on a Saturday night might help you satisfy your cravings and stay on track with your nutrition for the rest of the week.

Don’t get caught up on trying to be perfect in everything you do, because perfect is unattainable. Chase progress, improvement and empowerment. 

It is more important for you to do something and do it with mistakes (and as coaches we will guide you, keep you safe and efficient) than not do anything because of the fear that it won’t be perfect.

If you need help figuring out how to progress, or be more consistent at the gym or in your nutrition, come chat with one of your Andfit coaches today!

Book your No Sweat Intro

Want to start your fitness journey with us?
Come in for a friendly chat with our coaches to find out how Andfit can help you reach your potential. Book here!

The post Don’t be perfect appeared first on Andfit.

]]>
10 Simple Habits for Your Fitness Journey https://www.andfit.co.nz/habits-fitness-journey/ Wed, 18 Nov 2020 20:07:19 +0000 https://www.andfit.co.nz/improve-rowing-copy/ The post 10 Simple Habits for Your Fitness Journey appeared first on Andfit.

]]>
As human beings we tend to overcomplicate life. And fitness is not spared. But what if we keep things simple for once and incorporate few key guidelines in our life to truly get back into track?

It’s easy to get lost in the midst of fitness and nutrition offerings nowadays. Every day a new trend is born – follow this Keto diet, join this new Sculpt programme, calculate your fat-burning hearth rate…

But does fitness have to be that complicated? Amid all this noise, we often overlook what works best. It’s too simple. Too obvious.

The most successful lifestyles might not be sexy but they are simple. They often involve incorporating the most simple habits into our every day life in a consistent sustainable way.

So let’s just simplify things. Because no matter who you are or what you do, we believe there are some simple rules that can guide your fitness journey. And it doesn’t need to be complicated. 

Top 10 Simple Habits You Can Start Today

Let’s be honest. Simple doesn’t mean easy. If you are serious about improving your lifestyle, you need to be consistent and committed to make these guidelines work for you.

Once you do this, you can truly enjoy the power and effectiveness of your new lifestyle. Ready? Here we go!

  1. Move Every Day
    Exercise is by far the most important, transformational lifestyle habit there is. It leads to positive changes across every arena of life. Our body should move at least 15-30 minutes per day. The quality of movement is also important. Don’t prioritise quantity over quality. Check in with a coach regularly to correct your posture and technique, don’t leave it to too late.
  2. Take Rest Days
    And recovery is the most underestimated habits of all. Yet, it can make a huge difference in your active days. If you recover and rest properly, you will feel so much more energised during the next day’s workout. Rest also means “active recovery” such as hiking, walking, swimming, yoga…as long as you heart rate is not pushed to extremes. You can choose to actively recover also during gym days. Instead of concentrating on intensity, make sure you focus on moving well but slower.
  3. Warm Up & Cool Down
    Other two overlooked aspects of fitness. Warm up and cool down properly at all times. We mean it! Whether you follow your coach’s instructions or you are getting ready for your run, get yourself warm by mimicking the same movements you would do in the workout/run without weight or intensity. After working out, stretch those sore muscles, take time to cool down your body and bring down your heart rate. Appreciate what your body has just been through.
  4.  Be More Playful
    Take your fitness seriously and work hard. However, always do it with a smile on your face! Fitness doesn’t have to become a compulsion nor a stressful race to be the best at all times. Add in some play and fun, take a friend along your class and have a laugh together, accept your “no” moments and don’t overdo it. Challenging is good, stressful is not! 
  5.  Apply Fitness to Other Areas of Life
    Fitness can be anything everywhere. Getting stronger and fitter at the gym is great. Now it’s time to apply your improved fitness to other areas of life.It can be anything from a new fitness activity (a new sport, a half marathon, a multi-day hike…) to everyday’s chores (take the stairs instead of the elevator, carry your grocery in only one go, feel less tired when cleaning the house…).
  6.  You Are Unique
    As human beings we sometimes tend to take everything as a competition against others, putting our body and mind under unnecessary stress. However, your fitness journey is your fitness journey.Everyone is unique and has their unique strengths and weaknesses. Don’t fall into the comparison trap! Work towards your unique goals and enjoy your unique journey.
  7.  Learn From Experts
    Do-It-Yourself might work until a certain point. After that, everyone needs a coach, a friend, a teacher to improve further.Listen and learn from people more experienced than yourself, whether it’s your coach at the gym or your nutritionist or your physiotherapist or your yoga instructor…We need other people in order to grow. So be open to learn every day.
  8.  Get Outside
    The more you can be outside exposed to fresh air and sunlight, the better your mindset will be. Try to challenge your body more by getting outside. Hiking, running, walking are great for this.So don’t frown next time you see a 800m run in the workout. Rain or shine, your body and mind will rejoice afterwards!
  9.  Eat Well
    Too often we hear we should follow that strict diet to loose those extra pounds or getting more muscly. Again, it doesn’t have to be complicated. Keep your nutrition simple.Focus on eating more vegetables, avoid processed food and added sugars, and drink plenty of water. The more consistent you can be in your nutrition habits, the more positive changes you will see in your body and lifestyle.Remember, it’s simple, not easy. You will have “no” days, so it’s important you accept them and keep going.
  10.  Sleep Well
    Make sleep a priority to let your body heal and rejuvenate. A good approach is 7 to 9 hours. Also, allow yourself some wind-down time and a pre-bed routine to help get more consistent sleep every night. As with exercise and nutrition, it’s about quality, not quantity. Try meditation and avoid exposure to computers or phones before bed time. 
Grow and Learn Every Day

As with any top ten list, broad generalisations guarantee imperfection. YOU are unique, so is your fitness journey. 

We recommend you to focus on what works best for YOU and only start with one or two habits at a time.

And always remember to ask for help if it’s too hard. We need other people in order to grow and learn every day.

Book your No Sweat Intro

Want to start your fitness journey with us?
Come in for a friendly chat with our coaches to find out how Andfit can help you reach your potential. Book here!

The post 10 Simple Habits for Your Fitness Journey appeared first on Andfit.

]]>
We are what we absorb https://www.andfit.co.nz/nutrition-absorption/ Thu, 12 Nov 2020 04:32:39 +0000 https://www.andfit.co.nz/beat-sugar-cravings-copy/ The post We are what we absorb appeared first on Andfit.

]]>
Many of us know nutrition can be the key to a better performance at the gym or in everyday life. What many of us ignore is that even a “perfect” diet is not enough without maintaining proper digestive health. Ultimately, we are not what we eat, we are what we absorb.

The popular phrase “You are what you eat”  is certainly true. Yet it’s just incomplete as it’s based upon the assumption that what we’re putting into our mouth is actually being absorbed by our body. We’re actually not what we eat, but what we digest and absorb.

If you are concerned about PRs and improving your gym or race performance, you have probably already looked into dialing in your nutrition and switching to high quality foods. But how can we make sure those good nutrients are actually absorbed by our bodies?

Focusing on your digestion can be key to a wide range of benefits that can improve performance, like better nutrient absorption, better immunity, and maybe better mental health.

Our body is a complex system

Our body is an extremely complex system, made of tissues, organs and cells. To properly nourish our body, our cells need to absorb macro and micro nutrients in order to regenerate. 

In today’s society, we definitely eat enough calories (if not too many), yet many of us are still malnourished as many nutrients we need never make it to our cells. Eating junk or processed food (the so called “empty calories”) is only one of the reasons for the lack of nutrients’ absorption in our diet. 

Even with a clean healthy diet and high-quality foods, most of our complex body systems are not running optimally due to stress: over-exercising, under-eating or eating too much, under-recovering (lack of high quality sleep), prescription medicines and exposure to myriad environmental pollutants. And the list goes on.

Assuming our food choice are already good and clean, how can we ensure our body is absorbing the nutrients we’re giving it?

The Bowel Transit Time Test

A test that can help us find out how good we break down and absorb the nutrients from our food is the Bowel Transit Time. Optimally it should take between 12 to 24 hours for food to completely move through our digestive tract. 

You can use tablets of charcoal (found at the pharmacy), which will stain your stool black or gray, and thus provides a conveniently visible medium for measuring the transit time.

  1. Swallow 5 grams of charcoal tablets on an empty stomach and write down the time
  2. Write down the time when you see a black/grey stool during your next bowel movements
  3. Calculate the number of hours between the time you ingest the tablets and the time you saw the black stool. This is your Bowel Transit Time.

This test is a great first step towards getting to know our body better. However, we do recommend talking to a qualified nutritionist or doctor and get your blood tested for a better picture of your current health.

5 tips to absorb nutrients in our diet

With all the above in mind, there are a few simple tips that can help our body absorb the nutrients we’re feeding it….if we are feeding it those high-quality foods in the first place.

  1. Mindful Eating
    Digestion starts with the very thought of food, then the sight, the smell and finally the taste. Eating is not about wolfing down lunch on the go or eating high energy bars for breakfast and hoping that will do! You must take time to eat in a calm, unhurried atmosphere. For example, do not eat in front of your keyboard or cellphone. Try to get out in the sun and enjoy your meal, reducing stress to a minimum. When the fight or flight mechanism of our sympathetic nervous system is engaged, our parasympathetic rest and digest mechanism won’t click. In simple terms, if your body is in a stressful environment, it will not rest and digest properly. That also works in reverse. Having a healthier gut may help to make you less susceptible to stress.

2.  Eating Enough Macro- and Micro-nutrients

It is simpler than you might think. Eating high quality whole and unprocessed foods as well as making a goal to eat a variety of fruits and veggies will help you meet your nutrient goals. Fancy supplements or crazy juice cleanses are not necessarily required.

To start with, the human body needs 4 Macronutrients to thrive: Protein, Carbohydrates, Fat, and Water. To make sure our body perform all its functions properly (building muscles, regulating hormone production, maintaining homeostasis…) we need to balance all these 4 Macronutrients in our diet. Everyone’s needs are different depending on exercise, stress, lifestyle…

Don’t let us forget Micronutrients – vitamins and minerals – which play a vital role in retaining muscles, building our immunity, promoting brain health and, last but not least, digesting our food. As our body does not produce Micronutrients, we need to get them from outside (from our food or from supplements only if necessary).

3. Food Combining

Feeding our body all Macro- and Micro-nutrients is still not enough. The absorption of key minerals is affected by certain foods. So we need to know how to combine our food, beverages and supplements to make sure we are not affecting mineral absorption.   

For example, polyphenols and tannins in foods and beverages such as cocoa, coffee, black tea, walnuts, blackberries and blueberries may reduce iron absorption, especially if in conjunction with meals. On the other hand, eating Vitamin C-rich foods such as lemons, peppers, or broccoli in conjunction with Iron-rich foods may improve your iron absorption.

Did you know eating raw or partially cooked vegetables with healthy fats like olive oil or avocado can enhance the absorption of fat-soluble vitamins A, D, E, and K? 

Food combining is a great way to streamline the digestive process and ensure you’re efficiently and effectively getting what you need from the foods you’re eating. Do some research or ask your nutritionist and get creative with your food!

4. Recovery

We can never stress it enough. Recovery (getting enough deep sleep with consistency) can also help with your digestion among many other benefits.

When we’re sleep deprived, our body produces more of the appetite stimulating hormone which reduces our willpower and induces us to overeat, especially junk food.

In addition, sleep deprived people release more cortisol, a hormone that some research has shown it can contribute to indigestion. 

5. Repopulate our Intestine

Your gut environment is home to 100 trillion bacteria (about one and a half kilo worth) living within your intestinal tract.

Unfortunately, our stressful lifestyle, the overuse of antibiotics, consumption of processed foods and exposure to environmental pollutants, to name a few, can wipe out the beneficial bacteria necessary to enhance immunity, promote health and help us absorb the nutrients from our food.

Consider a high quality probiotic supplement to help repopulate your gut with beneficial bacteria. Don’t go for the cheapest or most available – quality is key when it comes to supplements!

Everyone is unique

When you tackle your stress levels, maintain a wholesome balanced diet and properly recover, you should start seeing the first positive effects of better health on your body. Adding a focus on nutrient absorption will then make a real difference.

Because everyone’s health profile is unique to them, take some time to examine exactly what’s going well and not so well in your lifestyle. And talk to a nutritionist or doctor before making radical choices.

Come and talk to our team for more tips and recommendations!

Join our 6 Week Nutrition Program

Want to focus on building healthy habits for good?

We run a Six Week Nutrition Program twice a year for our community to help them create healthy sustainable habits for a lifetime.

If you are interested, leave us your details and we will be in touch soon.
Talk soon!

The post We are what we absorb appeared first on Andfit.

]]>
From #BeachBody to #BodyConfident https://www.andfit.co.nz/beachbody-being-body-confident/ Wed, 04 Nov 2020 22:54:49 +0000 https://www.andfit.co.nz/power-of-visualisation-in-training-copy/ The post From #BeachBody to #BodyConfident appeared first on Andfit.

]]>
Like every other year, Summer is at our doors and we start stressing out that we are not quite #BeachBody ready. Deja vu?
What if all we need is to be more #BodyConfident instead? Here are 5 steps to take to start feeling more confident about our body from today!

Statistics don’t lie. About 45% of men and more than 50% of women struggle with body image problems in most researches around the world. 

Body image is unfortunately not something a lot of people talk about, but it’s SO important for our mental health and the quality of our lives.

Having body confidence means feeling comfortable in your own skin and not comparing yourself to others. It doesn’t mean you have to lose 10 kilos or fit into those jeans sitting in the back of your closet.

When you feel comfortable and confident, EVERYTHING in your life gets better. If we truly want to make each day on this earth great, it all starts with the relationship we have with ourselves.

What is BODY CONFIDENCE?

Body confidence is accepting – and celebrating! – your own body as it is at this very moment. And it’s also celebrating the same thing in others.

No body shaming. No pressure to fit into a cookie-cutter image.

It means appreciating and loving yourself for being uniquely YOU, as you are right now in this moment!

It starts at a very young age and applies to both men and women.

Did you know that six out of 10 girls in New Zealand withdraw from activities because of poor body confidence? And that nearly 28% of male college students who participated in a study about body image were at risk of developing an eating disorder?

For women, it can mean you might feel like you’re not thin enough (or you’re too thin), your butt is too small (or too big), your arms are not toned (or too toned), or it could even be that your hair is too curly – or too straight (or there might not be enough of it!).

For men, it can be tied into the size of their muscles, the state of their abs, their height, skin, or hair loss.

What is NOT body confidence?

A negative body image can cause such an amount of negative energy and unnecessary pressure and stress that it can easily turn into lack of confidence, anxiety in social contest and even into depression or eating disorders.

Our world is flooded with messages in the media and in our society about how we should look, act, dress, think and believe.

Without alternative role models that challenge the media stereotype, we are often left with just the media’s messages of how we should look and be. The ironic thing is, even the people pictured in those “ideal” photos don’t look that way in everyday life!

But …

How to boost your body confidence from today

What if, for right now, you started appreciating your body for its amazing, one-of-a-kind uniqueness? For all the incredible things it can do?

These are 4 steps you can take today to start feeling more confident about yourself almost immediately!

1. Keep Words Positive

This very first step is to watch the words you use to talk about yourself and others. Are you always very critical and focused on the negative and things you don’t like? 

  • Then you need to redirect your energy to notice your positive traits. Your inner voice should be encouraging and respectful of yourself and others. 
  • Show respect for people of different shapes, sizes, abilities, and appearance. You don’t know their journey, so be respectful and don’t judge.
  • Love yourself and others for what you all are. Write down at least 10 of your positive traits and do the same for your best friend or relative or partner. Read them aloud to them.
  • Don’t criticize yourself in front of others. This can lead the way to more criticism from others as they will think it’s ok to be critical of you, too.

2. Less Social Media, More Positive Role Models

Remind yourself of why you use Social Media every time you find yourself scrolling the Gram uncontrollably. They are there to help us stay connected, not to detract value to our life.

  • Start by unfollowing those feeds which make you feel you don’t measure up and leave a mark on your self-confidence and mental health. 
  • Select carefully few positive role models who inspire and empower you to be yourself and love what your body can do. Lately some CrossFit athletes have started to post pictures of themselves before and after competitions to show their followers what their real self look like on normal days. It’s not only sculpted bodies and lean abs at all times. 
  • Think critically of the media. Don’t buy into every ad campaign that is designed to make you feel bad about how you look so that you go buy their product.
  • Limit your social interactions to stay connected with people that you admire and love and that love you in return for what you are. Negativity does only bring more negativity around!

3. Focus on What Your Body CAN Do

How many times you’ve heard “I need to get fit first, before going to the gym?”

Deep down we all know the opposite is true. Nobody will wake up one day magically feeling “fit enough” to step into the gym. Have faith in what your body can do and:

  • Don’t end up relying on external validation such as the scale, the mirror, and other people to tell you how you feel about yourself and what your body can or cannot do.
  • Start taking pride in all of the amazing things your body CAN do – and start loving it for its hard work to support you in your daily life (from simple functions like breathing to complicated movements like a workout at the gym)
  • Exercise has huge benefits not only for your body, but for your mind and mood too. Lower levels of stress, increased energy levels and social interaction during physical activity will boost your confidence in your body image and in yourself.

4. Set Healthy Goals

If your health and fitness goals feel like a punishment or if you set unrealistic goals which entangle you in strict rules, it’s time to create better goals which empower you and add value to your life.

  • Set goals not rules. Make sure your goals are healthy and about more than just weight or physical appearance. For example, when it comes to workouts, what if instead of trying to fit into a certain size pants, you went after a fun or performance-based goal, like training for a 10K, hitting a squat PR, or joining a football training camp? 
  • Focus on feeling better rather than looking better. True health and fitness is about what’s on the inside and appreciating what our bodies can DO rather than what they look like. And this means prioritising our nutrition, physical exercise and mental health. If a diet or a strenuous training regimen doesn’t make us feel energised and better, that might not be a healthy approach to our life. Focus on how you FEEL (energised, athletic, vibrant) rather than how you look!
  • Ask for help. Whether to a friend, your partner or your coach. Don’t be afraid to open up about your goals to other people. They might have been there before you or they might give you another perspective about yourself and your body.
The CONFIDENT you

Next time you’re hitting the beach or taking off your shirt at the gym, remember to be the real YOU. The real authentic, genuine and unapologetic YOU. The CONFIDENT you. 

When you feel confident, you become to feel empowered to step outside your comfort zone and more full and meaningful possibilities start to open up for you.

Remember, love your body and it will love you in return.

Book your No Sweat Intro

Want to start your fitness journey with us?
Come in for a friendly chat with our coaches to find out how Andfit can help you reach your potential. Book here!

The post From #BeachBody to #BodyConfident appeared first on Andfit.

]]>
How to overcome your plateau at the gym https://www.andfit.co.nz/hypertrophy-workout-crossfit/ Tue, 27 Oct 2020 22:40:31 +0000 https://www.andfit.co.nz/improve-rowing-copy/ The post How to overcome your plateau at the gym appeared first on Andfit.

]]>
More muscle gets you stronger. How then to increase muscle mass to continue progressing in your fitness journey and avoid reaching a plateau? Hypertrophy can be the key.

More muscle gets you stronger. Not only that, but the further you progress along your fitness journey, the more important hypertrophy work becomes in order to continue progressing.

Although you will definitely make some newbie gains when starting CrossFit-style or functional training, in the long run you need to be doing some hypertrophy assistance work in addition to your usual Crossfit-style workout to better your physical performance and increase your muscle strength.

At Andfit our programming is adjusted so that we include hypertrophy components in our classes with regularity to guarantee a better balanced program and all the benefits that come with hypertrophy work. 

We strongly believe that understanding the “why” beyond hypertrophy helps us focus our efforts and get the most out of our time in the gym. Let’s get to it!

So what is “Hi-PER-truh-PHEE”?

Hypertrophy refers to an increase in muscular size achieved through exercise.

This can occur using any rep range. However, it’s generally accepted that about 3-5 sets in the 6-12 rep range elicits the best gains due to the ideal combination of resistance and time under tension. Hypertrophy also focuses on loads between 60-80% of your 1 rep max.

CrossFit-style training tends to be biased more towards metabolic conditioning than the weightlifting volume and progressive load necessary for muscle gains. In fact, when we see hypertrophy style programming, it is typically associated with bodybuilding style training. However, the benefits of it for CrossFit athletes can not be argued.

The Benefits of Hypertrophy Training

Whether you want to break through strength plateaus or just live a more robust and healthy life, more muscle plays a positive role.

We use hypertrophy work to look, feel and perform better. Sounds pretty good to us! 

  1. More Power
    First and foremost, hypertrophy training is going to result in increased strength. 

Is it possible to build muscle using heavy weights and low reps? Of course. However, for well-trained athletes, it doesn’t always work as well as using lower weights with high rep schemes.

Hypertrophy training can help us build muscle and create a better strength foundation. If an athlete normally squats two to three times a week during a strength building block, a hypertrophy block may have them squatting once a week, with two or three secondary exercises for building muscle and strength in the legs and hips, such as lunges, step-ups, or even more isolative exercises such as glute bridges.

Regularly targeting a given muscle group or groups when the athlete plateaus can help spur new growth and more power.

2. More Endurance
Having more muscle result in improvements in muscular endurance, which we all know is critical in CrossFit. 

Basically, building lean muscle helps you get more intensity out of your training, accelerating you towards your goals. Both newer and more advanced athletes can benefit from this, but for newer athletes especially, it’s a great way to create an endurance baseline that will make you last longer under fatigue.

3. Better Technique
We are also going to see improvements in technique from hypertrophy training. 

This training is a great opportunity for us to reduce the intensity of our workouts and focus on a lot of perfect reps with relative lightweight. 

In addition, targeting a particular muscle or group of muscles to improve strength will help us eliminate a weak spot and improve mechanics.

Often, when an athlete breaks down at a given part of a lift, the breakdown represents a relative lack of strength in a particular muscle or muscle groups.

Fortifying the area in question with muscle mass via targeted exercises can help the athlete eliminate weak spots which improve their mechanics.

4. Injury Prevention
Not only does hypertrophy training helps you squat, deadlift, pull, push, press and row heavier but also safer! 

When you think of isolation movements like bicep curls, skull crushers and leg extensions, these types of movements are fantastic toward improving our joint and tendon’s ability to slide and absorb force. 

Thickened tendons are less likely to get injured than smaller or thinner ones. Hypertrophy training can make the tendons thicker which will help reduce the risk of injuries. 

Also, as we age, the loss of muscle is one of the main causes of many serious injuries due to falls. Preserving muscle mass, or increasing it, will reduce the risk of this happening.

5. Better Metabolic Health
More muscle growth not only boosts performance, but it improves your metabolic health. 

Lean muscle helps create a healthy and higher than average metabolism. Since muscle is so active compared to body fat (it takes more energy to maintain more muscle), it raises our Basal Metabolic Rate (BMR), which is the amount of energy you’d burn when you are at rest.

The higher your BMR, the more calories your body burns at rest. Add strength training and conditioning to your workout and you’ve got a recipe for fat loss. 

6. Looking Good
Aside from the functional benefits listed above, adding muscle can be also rewarding when you start seeing the visuals of your labor. 

Call it what you want: toning, slimming, getting jacked…. Building muscle in a balanced training program creates the strong, athletic, healthy look many of us seek.

Not only even modest amounts of lean muscle can help you fill out your clothing better, but you’ll also become more confident in your skin.

Hypertrophy can be the key

We learnt that more muscle is healthy for metabolism, strength, function, injury prevention and self-esteem. And we learnt that hypertrophy training can help with all of these.

While many athletes often concentrate on strength programming which focuses primarily on loads of 80% and above for low reps along with conditioning work, they often leave out the middle ground – loads between 60-80% for moderately high reps – which is where hypertrophy can fill the gap.

At Andfit the goal is to create a program inclusive of all load and rep ranges. For this reason we include hypertrophy training in our classes along with strength and conditioning training. 

Next time you’re around, come and try us out!

Book your No Sweat Intro

Want to start your fitness journey with us?
Come in for a friendly chat with our coaches to find out how Andfit can help you reach your potential. Book here!

The post How to overcome your plateau at the gym appeared first on Andfit.

]]>
How to beat sugar cravings https://www.andfit.co.nz/beat-sugar-cravings/ Tue, 20 Oct 2020 02:33:29 +0000 https://www.andfit.co.nz/get-off-the-scale-copy/ The post How to beat sugar cravings appeared first on Andfit.

]]>
Choosing to kick cravings to the curb is a courageous first step in creating the ultimate healthy lifestyle. If anyone can succeed in this endeavor, it’s you. Start today with our tips!

Here’s the thing about sugar “addiction”. If you are trying to give up added sugar, you’re likely going to be hit with a craving for sugar anytime.

And if you fall for your sugar cravings one time too many while trying to cut added sugars out of your diet, you’re also likely to give up all your precious efforts towards a healthier diet sooner than expected.

The solution? Beat your sugar cravings before they manifest or as they come, because they are coming.

Choosing to kick cravings to the curb in order to focus on your nutrition is a courageous first step in creating the ultimate healthy lifestyle. If anyone can succeed in this endeavor, it’s you.

So how to tackle your cravings head on and start feeling great?

What causes sugar cravings?

First, you need to know what causes the cravings before even thinking of stopping them. Remember, know your enemy first.

As with many things in your body, food cravings are caused by:

  • your brain, which is responsible for memory, pleasure, and reward. Your brain remembers how much you liked a certain kind of food and wants to make sure you’re happy while still getting the nutrients you need.
  • an imbalance of hormones which can be triggered by anxiety and stress. Research shows that a high level of a particular hormone called cortisol, usually linked with a heightened emotional state (like extreme stress), can contribute to an increase in sugar cravings. In fact, when we eat sugar, we actually get another hormone called serotonin, which is calming and relaxing.

How to beat sugar cravings

Now that we know what can trigger our cravings, we can try different tactics to fight these triggers: our brain response and stress. 

Here are our tips to start your battle against sugar cravings:

  1. Do Not Punish Yourself
    We know we are going to experience sugar cravings from time to time as part of our effort to cut off added sugar from our diet.

Instead of getting frustrated and stressed for our downfalls (all emotional states which are very likely to trigger more cravings), let’s concentrate on being mindful while eating sugar. Really slow down while eating your sugary treat and give yourself time to connect to your feelings. You will end up realising you don’t need that treat that much and you will start putting the treat away before you finish the whole icecream bowl.

This is a great way to still feel like you’re getting to eat food that satisfies your cravings while working on controlling your emotional state and the quantity of sugar you eat.

It isn’t about restricting yourself from eating sugar and punishing yourself. It’s about treating sugar as something to be enjoyed in moderation and in small quantities.

2.  Be Prepared & Make the Swap
Having healthy snacks on hand makes it easier to say no when you’re given the opportunity to eat something sweet.

It also helps when you’re in a situation where maybe there aren’t healthy options around. Knowing you can enjoy your own food / snacks will make it easier to pass on ones you know won’t leave you feeling great.

It’s just you simply making a conscious choice to swap added sugar with “good sugar” or other alternatives. When you’re saying “I can’t eat it” or “I`m not allowed to enjoy xyz”, you’re setting up for failure. Think of all the things you CAN have instead. For example:

    • Swapping out bottled fruit juice for a fresh home-made smoothie for your afternoon break allows you to satisfy your sweet tooth with naturally occurring sugar.
    • Swap a packaged energy bar with a homemade granola bar as your mid morning snack will keep you energised with natural ingredients.

3. Change Habits
Write down on your diary when you experience sugar cravings and reach out for a treat, for example, while watching TV in the evening or mid afternoon when you start feeling tired from work.

Tackle these moments and change your habits into healthy choices. If you do this consistently and for long enough, your new habit will form and your brain will default to it without you even realising it. Two great tips are:

      • Brush your teeth after dinner when you start feeling a sugar craving. It will help you realise that you’re really not even hungry and that you’re not craving sugar anymore.
      • Cut down on unnecessary distractions while eating your treat, like scrolling on Instagram, checking your email or watching TV. You will be more in tune with your hunger cues and will only eat the necessary to satisfy your momentary craving or you won’t even eat at all. 

4. Consult your coaches or our nutritionist
Sometimes our willpower is not enough and we need external accountability to fall into the right track, especially at the beginning. In this case, don’t hesitate to reach out to our coaches and our recommended nutritionist. We are here to help!

Start today!

Nutrition is one of the most important factors to take care of when you start your journey towards a healthier you, together with physical exercise and sleep.

Don’t leave it “until Monday”. Act now. Here at Andfit we know something for a fact: you need to start your health journey somewhere and you need all the support you can have to keep going. We are here for you.

Start today!

Join our 6 Week Nutrition Program

Want to focus on building healthy habits for good?

We run a Six Week Nutrition Program twice a year for our community to help them create healthy sustainable habits for a lifetime.

If you are interested, leave us your details and we will be in touch soon.
Talk soon!

The post How to beat sugar cravings appeared first on Andfit.

]]>
5 tips to improve your rowing https://www.andfit.co.nz/improve-rowing/ Thu, 08 Oct 2020 22:53:36 +0000 https://www.andfit.co.nz/running-endurance-training-copy/ The post 5 tips to improve your rowing appeared first on Andfit.

]]>
Although rowing might seem a fairly easy movement, it deserves as much regular practice and proper technique drills as any other movement. Here are few easy tips to improve your rowing faster.

Here at Andfit we have very few “machines”. Rowers definitely steal the spotlight as one of the most used machines in our workouts. 

Although rowing might seem a fairly easy movement, it deserves as much regular practice and proper technique drills as any other movement to become more effective and powerful.

Nothing shows progress more than practice

Expect to see great returns if you invest the time to adjust your rowing technique. Few adjustments every day produce gains for the long term and you’ll notice you’ll start to enjoy this valuable machine more.

To make your life easier we put together few tips to fine-tune your rowing for better results and timing. Here we go!

  1. Save Your Grip
    Place your hands on the outside of the handle and keep your fingers light and loose, applying only the necessary energy to manoeuvre it. Hanging too hard on the handle will only result in extra work you don’t need and will wear your hands out faster.
  2.  Relax Your Arms
    Similar to your hands, your arms make up a very small percentage of your power output on the rower. Let your legs do most of the work as they’re supposed to.Don’t force your elbows into awkward chicken wings positions to pull harder, it’s an unnecessary energy expenditure. Instead, let your shoulders and elbows run naturally beside your torso, like at the bottom of a bench press. The rower handle should come to the bottom of your sternum, not to your collarbone.
  3. Find The Most Direct Path
    Unless you’re preparing to row a boat, you don’t need to scoop the handle up and down. The most direct and efficient way to save energy and improve your rowing is by moving the handle in a straight path. Basically, the chain should maintain a straight line from the catch to the base of your sternum for the entire time you’re on the rower.
  4.  Think: legs – knee – arms, arms – knees – legs
    To ensure you maintain that straight line, use this flow of the rowing stroke to remember which body parts move when: legs – knee – arms, arms – knee – legsFrom the catch, with your back straight, (1) drive your legs back first. As soon as (2) the handle reach your knees, extend your legs completely while starting to lean back. Only when your torso is roughly at an 11.00 o’ clock position, (3) pull back with your arms.On the recovery, (1) first release your arms out. Then start to swing forward to 1:00 o’clock position with your back, and only after (2) the handle is past your knees, begin to (3) move your legs to the starting catch position.At no point you shouldn’t have to move the rower handle around you knees. If this happens, ask your coach to check your form and pinpoint where you break the straight line.
  5.  Let Your Legs Do The Work
    Your legs are the true heroes on the rower. Make sure you push your feet into the pads to drive from your whole legs, not just from your quads.

Your seat and the handle should move at the same pace while your legs are working. In addition, avoid leaning forward (in the catch position) or back too much with your torso and shoulders.

Remember, your legs should do most of the work, not your upper body.

Ready, set, row!

Rowing is very popular at Andfit and although it might seem a fairly simple exercise, it does require some fine-tuning to get the most out of it and pound out those meters in better time and more effectively.

Ready, set, row!

Book your No Sweat Intro

Want to start your fitness journey with us?
Come in for a friendly chat with our coaches to find out how Andfit can help you reach your potential. Book here!

The post 5 tips to improve your rowing appeared first on Andfit.

]]>
The Power of Visualisation https://www.andfit.co.nz/power-of-visualisation-in-training/ Tue, 06 Oct 2020 20:48:07 +0000 https://www.andfit.co.nz/train-your-mindset-copy/ The post The Power of Visualisation appeared first on Andfit.

]]>
Whether it’s performance anxiety before a competition or simply the pressure of completing a workout or difficult movement, visualisation can prepare both mind and muscles for an excellent workout and result in increased performance success. Try to believe!

Science has proven that if you think about something over and over again and with enough intensity, your brain can’t actually tell the difference between whether or not you have actually done what you are thinking about or just imagined it.

This is where the power of visualisation lies. Visualisation involves using all your senses to create a mental image of a physical task like performing a lift, movement or a workout exactly the way you want it to go, before actually attempting it.

Believe you can complete the task

Visualising yourself doing something can make you believe you can complete the task. Then you will have the confidence to succeed and you will most likely do it correctly too.

As our coaches will tell you, this process is particularly important for weightlifting as some lifts like the snatch take 0.0001 seconds to perform, which gives you no thinking time during the exercise. So using visualisation is key to moving better and breaking through your plateaus.

How to use visualisation

Most workouts at Andfit can be very mental. You can either believe you will succeed or think that you will fail.

Visualizing is a good tool to try to stay in control of your mind or accomplish a new feat. It is easy enough to do and it does really help in the long run. 

You can follow the below steps to use visualisation next time you are at the gym:

  1. Set Your Goal
    Decide what you want to accomplish by visualizing. This can be a lift, running, gymnastic movement, yoga pose, or a hundred other different goals. Once you have a clear idea, then you can continue with the process.
  2. Picture Yourself Doing the Movement
    In your mind, the clearer you can picture yourself doing something, the more effective this process will be. Even small details, like what you are wearing or your exact hairstyle of that day, can make the process more effective.
  3. Watch Yourself Going Through the Motions
    When you’re ready, watch yourself going through the motions. The more you break the movement down in smaller moments, the better your mind will figure out how you need to perform the movement.
  4. Use All Your Senses
    Often, athletes only use their visual sense for visualisation. Don’t forget to visualise your feelings, sound, thoughts, body position, and even smell and taste, which can help make the visualization even more vivid and effective.
  5. Get Ready to Do It in Real Life
    After watching it in your mind, you’re ready to do it in real life. Get in the correct setup and take a deep breath. In your mind you know you can do it, so keep this positive attitude even in real life. And just go for it!
  6. Ask Your Coach
    Visualization takes time to implement and your coach at Andfit can help you get the most out of it. Even if you cannot get it right the first time, go through the process again and go for it again. Accomplishing your goal will feel amazing!
Practice makes perfect

Visualization can help you perform a movement that you thought you could not do, learn new skills or reinforce old ones. It can also create familiarity when competing at a new box and reduce anxiety when performing an unfamiliar workout.

Generally it’s best to start practicing it in a quiet environment with few distractions. You can start by imagining your box and gear first and then move on to more complicated mental imagery until you perform the full movement in your mind.

Ready? Take a deep breath and give it a go. Try to believe!

Book your No Sweat Intro

Want to start your fitness journey with us?
Come in for a friendly chat with our coaches to find out how Andfit can help you reach your potential. Book here!

The post The Power of Visualisation appeared first on Andfit.

]]>
Get off the scale https://www.andfit.co.nz/get-off-the-scale/ Wed, 30 Sep 2020 05:05:03 +0000 https://www.andfit.co.nz/why-diets-dont-work-copy/ The post Get off the scale appeared first on Andfit.

]]>
Here is why we don’t have a scale at Andfit and how you can track progress in weight loss and achieve better body transformation without obsessing with the number on the scale.

Let us ask you something. Do you weigh yourself daily or multiple times in a week and freak out if the number you see on the scale increase by a mere half kilo? 

Is your mood easily affected by that number on the scale and ruin your day or even your whole week?

Have you already implemented a fitness and diet regimen to prevent weight gain from happening but the scale still stresses you out?

If you answered yes to these questions, then a scale can only turn into an unhealthy obsession that focuses too much on a number and disregards other key health factors.

Can the scale lie?

The short answer is Yes!

The scale doesn’t just reveal fat loss. You can step on a scale and see a weight loss of several kilos, but that weight loss may not even be from fat; it could be from water loss.

In addition, your weight can fluctuate a lot, even in a single day, and that fluctuation can depend on so many factors such as what and when you eat, drink, exercise and even sleep.

Important Note: Muscle is more dense than Fat

That’s why, if you have been training hard and losing body fat, you might see no change in the number on the scale or even see an increase, because you have been gaining lean muscle mass. Well done!

Start chasing your “healthy” weight, not your “ideal” weight

Many people constantly chase an “ideal weight”, a number on the scale whether it’s your perfect BMI or your college weight.

You can achieve better body transforming results and be much happier during the process if you stay off the scale and start chasing your “healthy” weight.

Weight should never be the only determining factor of how ‘healthy’ someone is. When on the quest to be healthier, focusing on sustainable, eating habits and an appropriate training regimen which keep us energized and help us maintain our appearance with ease without stressing out, are much more useful long term measures than the number on the scale.

Here’s your new “scale”

How do we know when we reach our “healthy” weight?

As mentioned, this is not a number on the scale but rather a set of indicators which will tell you if you are on the right path to become the healthier version of yourself. 

So how will you track your progress? Here are some indicators you can use as your new “scale”:

  1. How you feel.
    Do you feel strong and healthy? Do you feel better than ever? Do you have more energy? Are you performing well in the gym, or other activities? Do you find daily tasks easier?
  2.  Improved self-confidence and body image.
    This is much more than how you look in the mirror. Regular exercise makes you feel stronger and more capable on the outside as well as on the inside thanks to its instant mood-enhancing effect.
  3.  How your clothes fit.
    With fat loss and muscle gain you will notice a difference in how your clothes fit on you. As muscles are more dense than fat, you might have to go for a smaller size after all.
  4.  Better mood and less stress.
    Eating a balanced diet, exercising consistently, and getting lots of sleep are some of the greatest ways to alleviate stress and anxiety. For example, working out releases feel-good chemicals called endorphins which are responsible for that high you feel post-workout.
  5.  Less cravings.
    As a result of better eating habits and more willpower, you will notice your body will start craving less and less junk food and more nourishing nutrients.
  6.  Better check ups.
    What’s going on inside you is as much important as what’s going on on the exterior. If you commit to become a healthier version of yourself, you will be less at risk of a number of health issues from diabetes to high blood pressure to high cholesterol, which are associated with a poor lifestyle. 
  7.   Use a smart scale.
    You can still track your body weight from time to time without obsessing too much. In that case, we recommend using a smart scale, which can track other measures of health besides weight, such as your body composition.
Why we don’t have a scale at Andfit

Some time ago we have been asked why we don’t have a scale at the gym.

This is what we believe: our healthy weight is more than a number on the scale and we can reach it by following a long-term healthy lifestyle which encompasses good nutrition, exercise and mindset training.

Come in for a free consultation to find out how we can help you achieve your healthy weight!

Join our 6 Week Nutrition Program

Want to focus on building healthy habits for good?

We run a Six Week Nutrition Program twice a year for our community to help them create healthy sustainable habits for a lifetime.

If you are interested, leave us your details and we will be in touch soon.
Talk soon!

The post Get off the scale appeared first on Andfit.

]]>
How running improves your box scores https://www.andfit.co.nz/running-endurance-training/ Fri, 25 Sep 2020 07:19:27 +0000 https://www.andfit.co.nz/train-your-mindset-copy/ The post How running improves your box scores appeared first on Andfit.

]]>
Running is the simplest, most natural way to improve your endurance and thus, your overall performance at the gym. So next time running comes up in a workout, show up and run! (and use these simple tips to improve your running form)

Cardiovascular endurance is a key component to success in functional and CrossFit-style workouts. It can be built in a number of ways, but we mainly associate it with rowing, biking or running. 

Out of the three, running is the simplest, most natural way to improve our endurance and make us better athletes. But it’s probably for its simplicity that fewer people will show up for class on running days.

Work out longer and build up your stamina with running

We know, running is not as glamorous as lifting heavier weight or learning to do a muscle-up or walking on our hands. Yet, adding running in workouts – or even just running on rest days – can improve your overall performance and scores at the box.

Not only will it help you work out longer, but it will also help you tackle other workouts without getting exhausted after the first round. 

Become a more efficient and happy runner

Like every other movements we do at Andfit, we focus on teaching good running mechanics which are essential to make us more efficient and reduce our risk of injury. They might also make running more enjoyable and less “boring”.

So let us tell you about four simple strategies to implement in your next workout:

  1. Maintain good body position
    There are three things to focus on which can help you maintain a neutral position and avoid unnecessary tightness in your body: (1) keeping your core muscles engaged; (2) having your arms relaxed at your sides with your forearms parallel to the ground; and (3) having your eyes focused forward as you run.
  2.  Let gravity pull you forward
    Now that your body is in proper position, slowly and just slightly start to lean forward, bending at your ankles and keeping your hips in line with your core and legs. Then start picking up your legs (one after another) to “catch” yourself as you fall forward. Let gravity work for you and keep the momentum going.
  3. Improve your foot strike
    Push off from the ball of your feet (instead of just lifting them). This will help you propel forward better rather than running on your toes or striking with your heel. Also think about landing your feet lightly and gently to reduce foot impact and risk of injury.
  4.  Use rhythmic belly breathing
    Deep abdominal breathing (known as diaphragmatic breathing) allows you to take in more air and to use oxygen more efficiently. You’ll also be less likely to experience side stitches. Find a good breathing rhythm to follow and maintain it during the workout.
  5.  Ask your coach
    Everyone is different and there is no exact mechanics that fits all. So ask your coach to check your form, give you tips to win the run in a workout and get running!
These are only the start!

Running might seem like a simple task, but there is a lot to take into consideration to reach good running mechanics and these are only the start. 

Next time you want to improve your endurance and you see running comes up in a workout, challenge yourself to show up, listen to your coach and use the opportunity to work on your running skills. 

And remember, every time you run, you are up to improve your box scores!

Book your No Sweat Intro

Want to start your fitness journey with us?
Come in for a friendly chat with our coaches to find out how Andfit can help you reach your potential. Book here!

The post How running improves your box scores appeared first on Andfit.

]]>
How to train your mindset https://www.andfit.co.nz/train-your-mindset/ Thu, 24 Sep 2020 04:51:25 +0000 https://www.andfit.co.nz/why-diets-dont-work-copy/ The post How to train your mindset appeared first on Andfit.

]]>
We train our bodies every day, but not enough of us train our minds as often as we should. Get your pen and diary ready to dig into this with us!

As the Mental Health Awareness Week came to an end last week, we believe we should always remind ourselves of the importance of our mental health.

For this reason, few month ago Andfit started a year long journey into becoming more compassionate with the Compassion Course from NYCNVC (New York Centre for Non Violent Communication).

Every week we are sharing all the learnings and practices from this course with our community. This is a wonderful and difficult journey through understanding ourselves better and create more compassion in our lives.

A fitter, stronger mind for a richer, healthier life

We realised we train our bodies every single day at the gym, but not enough of us train our minds as often as we should. Just like you are not born with your physical body set in stone, your mindset is malleable too.

A fitter, stronger mind facilitates a richer, more meaningful, healthier life; just as a fitter, stronger body allows for a healthier existence.

Better than physical training

At Andfit we know we can do better than physical training and our aim is to integrate mindset training into our culture.

After all, when we sign up at the gym, we’re not just looking for a more capable body. We’re looking for the confidence, resilience, and the freedom that body brings.

Where do we start to improve our mindset?

So how do we improve our mindset? Where do we start? 

There is no right or wrong in mindset training. The journey is different and unique for each one of us, but there are definitely some tips you can follow to improve it quicker and with purpose. Here we go!

  1. Write it down
    The power of journaling is underrated. Just like we head to Wodify or any gym app to register our best time, PRs and the number of reps done today, nothing prevents us to take 5 mins a day to write down our feelings, beliefs, frustrations…. Getting it out physically is the start: we know where we are.
  2.  Imagine it
    How do we get where we want? Imagine your perfect day, think big. Just like we set up to get a handstand walk by Christmas, we can also set up to achieve better communication, less stress, more self-respect, more courage and so on.
  1.  Scale it
    Break down your path to your perfect day into smaller measurable steps over a period of time. Just like we scale the workouts to get to the RX movement, we need to scale our mindset training too.
  2. Learn from the past
    Do you remember that time you blew up and could not finish the workout because you didn’t scale it properly? That’s the time you learnt to take more smaller breaks to get it to the end. Your mindset needs the same adjustments: learn from your mistakes and readjust your course towards your perfect day.
  3. Celebrate progress
    Praising yourself will get you there faster than punishing yourself. We all need a little reward to know we are on the right path and keep going. Write down your wins every day and celebrate your progress.
  4. You are not alone
    Don’t be afraid to ask for help – to your family, friends, your coaches & gym buddies.
Mental health matters

We have proved to the world just what our body is capable when it comes to our physical potential. Olympic or CrossFit athletes always blew us away with what we considered impossible only a few decades ago. We have only marginally improved our mindset along with this.

Now, more than ever, the world is starting to recognise that growing mentally is just as important as growing physically.

Mental health matters and at Andfit we mind.

Book your No Sweat Intro

Want to start your fitness journey with us?
Come in for a friendly chat with our coaches to find out how Andfit can help you reach your potential. Book here!

The post How to train your mindset appeared first on Andfit.

]]>
Why diets don’t work https://www.andfit.co.nz/why-diets-dont-work/ Thu, 17 Sep 2020 21:36:55 +0000 https://www.andfit.co.nz/overcome-muscle-soreness-2-copy/ The post Why diets don’t work appeared first on Andfit.

]]>
Diets don't work and usually backfire. So how to find your healthy weight? Discover some tips to develop healthy and SUSTAINABLE eating habits.

You can’t lose weight without controlling your nutrition.

If you’re trying to lose fat by joining a gym — but not changing the way you eat — it won’t work in the long term. Not even by joining Andfit workouts, which are the best in Auckland CBD (smiley face!).

What about a “diet”?

Although we loosely use it to describe any type of eating regimen, we do often associate it with negative terms such as restriction, rigidness and deprivation.

Not only. We know from different research conducted on traditional diets that diets are not actually effective in helping people lose weight and keep it off (check this study published in the International Journal of Obesity). 

What CAN we do to control our weight?

So if diets don’t work and they usually backfire, what CAN we do to control our weight?

  1. Create healthy habits.
    If a diet only focuses on food choices – “eat that, don’t eat that” – it does not touch on deep rooted beliefs and behaviours – “why we eat this”. Knowing “why” can help us make sustainable changes in our eating habits. 
  2.  Track positive changes.
    Just writing it down makes a huge difference. Record it in a blank notebook or use apps like MyFitnessPal. We like MyFitnessPal because you can work together with your coach on the platform.
  3. Mindful eating. Mindful eating is a great approach to pay attention to our emotions while we eat and honour our body’s hunger cues instead of our cravings.
  1.  Focus on “more” rather than less
    Instead of limiting yourself (“eat that, don’t eat that”), adopt a positive mindset focusing on “more”. By including more fruits and vegetables, more healthy fats and naturally occurring sugars, more exercise and more water intake. Your body will naturally be satiated with fiber-rich, healthy meals and will not crave for unhealthy options anymore. Subscribe to our 
  1. Look at the whole picture
    Though eating plays a crucial role in our ability to maintain a healthy weight, all too often, we discount other factors that contribute to our waistline, including exercise, quality sleep and mental health. An imbalance in any of these areas will cause great damage to our eating efforts.

Whenever you see a new diet on TV or in a magazine, ask yourself: “Can I eat this way forever?” If not, it’s not worth consideration. Save yourself a lot of pain today and guilt in the future.

Healthy eating is a lifestyle choice, not a diet.

The bottom line is: Healthy eating is a lifestyle choice, not a diet. Establishing the basics for a positive relationship with our body and food is the key to long-lasting and sustainable eating behaviours and ultimately to reach our healthy weight.

Keep it simple. Come work out with us!

Join our 6 Week Nutrition Program

Want to focus on building healthy habits for good?

We run a Six Week Nutrition Program twice a year for our community to help them create healthy sustainable habits for a lifetime.

If you are interested, leave us your details and we will be in touch soon.
Talk soon!

The post Why diets don’t work appeared first on Andfit.

]]>
Feeling the burn? https://www.andfit.co.nz/overcome-muscle-soreness-2/ Thu, 10 Sep 2020 02:21:28 +0000 https://www.andfit.co.nz/overcome-muscle-soreness-copy/ The post Feeling the burn? appeared first on Andfit.

]]>

Taking care of your body is an important part of CrossFit and high intensity training. Here’s how to ease the pain of tired muscles.

Feeling the burn? When you train at high intensity and under load, muscle soreness is part of the process.

Don’t be put off by those aches and pains! Instead, learn how to take care of yourself to minimise the impact of your workout.

These tips will help you recover from your workouts faster: 

  1. Stretch. Every day.
    Even if you’re not hitting the gym, gentle stretching will keep your muscles in good condition. Not sure what works best? Check out this video.
  2.   Get plenty of sleep.
    When you’re snoozing, your muscles take the opportunity to repair and rebuild themselves. Put your feet up and make sure you get enough.
  1.  Keep coming in for class
    The best thing you can do for aching muscles is keep moving! This prevents you from becoming stiff and even more sore.
    If the thought of walking into the gym is giving you heart palpitations, don’t be a stranger! Talk to your trainer about adjusting the intensity while you are getting used to your new fitness routine.
  1. Eat good, clean food
    You’re wasting all that effort if you hit the drive-through after a your workout. Do some research into getting enough fresh veg, lean protein, carbs and fats to help your body perform at its best.
    Staying healthy doesn’t have to be all about expensive supplements. A balanced, healthy diet that is right for you will do the trick.
  2. Drink lots of water
    Every drop counts! Staying hydrated helps your muscles recover and keeps your body functioning at its optimum level. Keep up your consumption throughout the day, not just while you train.

As the saying goes, “No Pain, No Gain!” However, there is a difference between soreness and injury. You know your body best so if you’re worried you have pushed yourself too far, give your trainer a call. We’re here to help!

The post Feeling the burn? appeared first on Andfit.

]]>
DAY 45 https://www.andfit.co.nz/day45/ https://www.andfit.co.nz/day45/#respond Tue, 12 May 2020 21:44:20 +0000 https://www.andfit.co.nz/day44-copy/ WARMUP 3 rounds of 6 x Dive Bombers 20 x Walking Lunges 6 x Scorpions (each side) 20 x Air Squats _________________ 2 rounds of 20 x Hip Thrusts Strength 7 Sets 1 Knee to Feet Jump + 2 Broad Jumps 000,130,300,430,600,730,900 Metcon  20 Min AMRAP 3 Clean and Jerks 12 Bent Over Rows 36...

The post DAY 45 appeared first on Andfit.

]]>
WARMUP

3 rounds of

6 x Dive Bombers

20 x Walking Lunges

6 x Scorpions (each side)

20 x Air Squats

_________________

2 rounds of 20 x Hip Thrusts

Strength
7 Sets

1 Knee to Feet Jump
+
2 Broad Jumps

000,130,300,430,600,730,900

Metcon 

20 Min AMRAP

3 Clean and Jerks
12 Bent Over Rows
36 Double Unders

30 Seconds Rest Between Rounds

The post DAY 45 appeared first on Andfit.

]]>
https://www.andfit.co.nz/day45/feed/ 0
DAY 44 https://www.andfit.co.nz/day44/ https://www.andfit.co.nz/day44/#respond Mon, 11 May 2020 22:22:03 +0000 https://www.andfit.co.nz/day43-copy/ The post DAY 44 appeared first on Andfit.

]]>
WARMUP

3 rounds of

6 x Dive Bombers

20 x Walking Lunges

6 x Scorpions (each side)

20 x Air Squats

Strength

Laying Floor Press

5×12 R+L

or

5×12 Push Ups

or

5×7 Negative Push Ups

000,230,500,730,1000

Metcon 

12 Min AMRAP

200m Run

15 x Push Ups

30 x Split Jumps

The post DAY 44 appeared first on Andfit.

]]>
https://www.andfit.co.nz/day44/feed/ 0
DAY 43 https://www.andfit.co.nz/day43/ https://www.andfit.co.nz/day43/#respond Sun, 10 May 2020 23:30:11 +0000 https://www.andfit.co.nz/day42-copy/ The post DAY 43 appeared first on Andfit.

]]>
WARMUP

EMOM 12min

30sec Squat Hold + Thoracic Rotations

20 Pike Should. Taps

30 sec Duck Walk

30 sec Bear Crawl

_______________________

2 Rounds of

20 x Cherry Pickers

10 x Good Mornings

STRENGTH
5 Rounds of
12 x Glute Bridges As heavy as possible
+
12 x Straight Let Deadlift (Each Leg)000,300,600,900,1200
METCON 

For Time – 12 min cap

80 x Wall Balls/ 120 Air Squats
60 x ALT Implement Snatch
40 x Burpee Box Jump Overs / Burpee Broad Jumps

@9/6 (20/14)
@25/15 (55/35)
@60/50cm (24/20)

The post DAY 43 appeared first on Andfit.

]]>
https://www.andfit.co.nz/day43/feed/ 0
DAY 42 https://www.andfit.co.nz/day42/ https://www.andfit.co.nz/day42/#respond Sat, 09 May 2020 19:25:33 +0000 https://www.andfit.co.nz/day41-copy/ The post DAY 42 appeared first on Andfit.

]]>
WARMUP

TABATA 20sec ON – 10sec OFF

4min, 2 Rounds of

Air Squats

Down Ups

Bird Dog (L)

Bird Dog (R)

TABATA 15sec ON – 5sec OFF

3min, 3 Rounds of

Jumping Lunges

Skipping / Penguin Claps

Pike Push Ups

STRENGTH

Plyometrics

6 rounds of

3 x Weighted Vertical Jumps + 2 x Broad Jumps

000,130,300,430,600,730

METCON

For Time

100 Double Unders
10 Squat cleans or
20 Single Implement Squat Cleans

100 Double Unders
8 Squat cleans or
16 Single Implement Squat Cleans

100 Double Unders
6 Squat cleans or
12 Single Implement Squat Cleans

100 Double Unders
4 Squat cleans or
8 Single Implement Squat Cleans

100 Double Unders
2 Squat cleans or
4 Single Implement Squat Cleans

*Sub Double Unders for 150 Singles or 75 Mountain Climbers or 400m Run

The post DAY 42 appeared first on Andfit.

]]>
https://www.andfit.co.nz/day42/feed/ 0
DAY 41 https://www.andfit.co.nz/day41/ https://www.andfit.co.nz/day41/#respond Thu, 07 May 2020 21:05:38 +0000 https://www.andfit.co.nz/day40-copy/ The post DAY 41 appeared first on Andfit.

]]>
WARMUP

3 rounds of

400m run

10 x Drop Squats

10 x Burpees

________________

Hip Opener – Squat Hold

________________

3 rounds of

10 x Broad Jumps

10 x Air Squats

HERO WOD 

“Klepto”

4 Rounds for time of:

27 Box Jumps

20 Burpees

11 Squat Cleans

In honour of U.S. Air Force Major David “Klepto” L. Brodeur, 34, of Auburn, Massachusetts, died on April 27, 2011

The post DAY 41 appeared first on Andfit.

]]>
https://www.andfit.co.nz/day41/feed/ 0
DAY 40 https://www.andfit.co.nz/day40/ https://www.andfit.co.nz/day40/#respond Wed, 06 May 2020 21:18:33 +0000 https://www.andfit.co.nz/day39-copy/ The post DAY 40 appeared first on Andfit.

]]>
Warmup

3 rounds of

8 x Drop Squats

8 x Sit Ups

4 x Hand Release PU

then

Stretch Upper Chest

Stretch Front Rack

then

10 x Deadlifts Power Cleans

10 x Hang Power Cleans

Back Squat 

5×3 @80% of 1rm*

*or as heavy as you can

Bodyweight option: 5×10 Squat Tuck Jumps

000,200,400,600,800

Metcon 

11 Min AMRAP

10 x Push Ups

10 x Hang Power Cleans 

        or Swings

10 x TT Implement

The post DAY 40 appeared first on Andfit.

]]>
https://www.andfit.co.nz/day40/feed/ 0
DAY 39 https://www.andfit.co.nz/day39/ https://www.andfit.co.nz/day39/#respond Tue, 05 May 2020 20:57:25 +0000 https://www.andfit.co.nz/day38-copy/ The post DAY 39 appeared first on Andfit.

]]>
Deadlift 

4×7 @80% of 2rm

1×20 Good Mornings

000,230,500,730,1000

Metcon

For Time (10-12 min cap)*

2 rounds of

150 Double Unders/ 200 Single unders

30 Double / Single DB Hang Clusters

*slightly modified from the video demo

Warmup
50 x calf walkouts
3 mins of Double Unders *increase by 5 each time
 
2 rounds of
10 x Scorpions + 10 x Air Squat
10 x Inchworm + 20 x Mountain Climber
 
10 x Lumbar & Thoracic Stretch (5 each side)

The post DAY 39 appeared first on Andfit.

]]>
https://www.andfit.co.nz/day39/feed/ 0
DAY 38 https://www.andfit.co.nz/day38/ https://www.andfit.co.nz/day38/#respond Mon, 04 May 2020 20:04:44 +0000 https://www.andfit.co.nz/day37-copy/ The post DAY 38 appeared first on Andfit.

]]>
Metcon

For Time (15-18 min cap)

4 Rounds

400m Run / 100 DU / 150 SU / 75 Mountain Climbers
10m Broad Jump
3 Full Snatch/ 9 Hang DB Snatch

Metcon 

Midline

4 Rounds of

12 V-sits
+
30 Second Side plank (Each Side)

Rest 90 Seconds

Warmup

Tabata 8min

20on 10off

High Knees

Cossack Squats

Push Ups

Heel Touches


then: 2-3min Snatch warmup

The post DAY 38 appeared first on Andfit.

]]>
https://www.andfit.co.nz/day38/feed/ 0
DAY 37 https://www.andfit.co.nz/day37/ https://www.andfit.co.nz/day37/#respond Sun, 03 May 2020 23:38:49 +0000 https://www.andfit.co.nz/day36-copy/ The post DAY 37 appeared first on Andfit.

]]>
Strength

Strict Press

7 Rounds of 3 Reps Each Arm

000,130,300,430,600,730,900

Metcon

For Time – 12 min cap

21-15-9-15-21

STOH

Implement Facing Burpees

Warmup

3 Rounds of

5 x Dive Bombers

5 x Pike Push Ups

10 x Chicken Wings

10 x Back Extensions

10 x Jumping Lunges

The post DAY 37 appeared first on Andfit.

]]>
https://www.andfit.co.nz/day37/feed/ 0
DAY 36 https://www.andfit.co.nz/day36/ Sat, 02 May 2020 23:51:13 +0000 https://www.andfit.co.nz/day35-copy/ The post DAY 36 appeared first on Andfit.

]]>
Strength

5 Rounds of

12 Weighted Hip Thrusts

+

8 Straight Leg Deadlift Each Leg

000,300,600,900,1200

Metcon 

For Time – no time cap

5 Rounds of

10 Back Rack Lunge

100 Double Unders/ 150 Single Unders / 100 Mountain Climbers

Warmup

12min EMOM

8 x Perfect Stretches

16 x Hip Thrusts (8 x Glutes + 8 x Hamstrings)

16m Bear Crawl

The post DAY 36 appeared first on Andfit.

]]>
DAY 35 https://www.andfit.co.nz/day35/ Thu, 30 Apr 2020 22:08:23 +0000 https://www.andfit.co.nz/day34-copy/ The post DAY 35 appeared first on Andfit.

]]>
Hero Workout

“Lindsay”

10 Rounds for Time

3 Devil Presses

22 Alternating DB Lunges

19 Air Squats

Wear a Weight Vest or Bag (9/6kg)

Warmup

4mins AMRAP

3 Burpees

6 Lunges

9 Air Squats

2 rounds

30 Mountain Climbers

12 Hinge + Touch (each leg)

The post DAY 35 appeared first on Andfit.

]]>
DAY 34 https://www.andfit.co.nz/day34/ Wed, 29 Apr 2020 20:11:41 +0000 https://www.andfit.co.nz/day33-copy/ The post DAY 34 appeared first on Andfit.

]]>
Plyometrics

5 Rounds of

4 Single Leg Box Jumps (Each Leg)

+

3 Broad Jumps

000,200,400,600,800

Metcon 

For Time (15-18min cap)

2 Rounds

25 Hang Power Cleans
50 Double Unders
25 Push Press
50 Double Unders
25 Burpees to Target

Warmup 

2min Skipping Practice – Singles, Single Leg, Doubles

3 Rounds of

5 x Broad Jumps

5 x Burpees

10 x Single Leg Squats (5 each leg)

then

Front Rack Stretch

The post DAY 34 appeared first on Andfit.

]]>
DAY 33 https://www.andfit.co.nz/day33/ Tue, 28 Apr 2020 21:53:28 +0000 https://www.andfit.co.nz/day32-copy/ The post DAY 33 appeared first on Andfit.

]]>
Back Squat 

5×5 @70% of 1rm

or 5×10 Jumping Squats

000,200,400,600,800

Metcon 

For time – 12min time cap

Rx

1K Run / 250 DU / 300 Singles / 200 Mount. Climbers

30 Clean and Jerks*

Rx+

2 Rounds of

800m Run / 200 DU / 250 Singles / 150 Mount. Climbers

30 Clean and Jerks*


*KB, DB, Backpack…use any implement available.

If it’s a single arm, do 15 reps per arm alternating as you prefer.

Warmup 

400m Run

_______________

3 Rounds of

5 x Inchworms

10 x Drop Squats

15 x Pike Shoulder Taps

_______________

1min Squat Hold

The post DAY 33 appeared first on Andfit.

]]>
DAY 32 https://www.andfit.co.nz/day32/ Mon, 27 Apr 2020 20:59:51 +0000 https://www.andfit.co.nz/day31-copy/ The post DAY 32 appeared first on Andfit.

]]>
Deadlift 

4 Rounds of 7reps – Heavy

1 Round of 12reps – Medium

000,2.30,500,7.30,900

Metcon 

8 Min AMRAP

3 Deficit Strict HSPU or Deficit Pike Push Ups

6 Deadlift Heavy

9 Bent Over Rows

Warmup 

EMOM – 12min

12 x Floor Sweep

12 x Good Morning

12 x Impl. Strict Press

then

2 Rounds of

30sec Handstand Hold

*rest as needed

The post DAY 32 appeared first on Andfit.

]]>
DAY 31 https://www.andfit.co.nz/day31/ Mon, 27 Apr 2020 03:33:48 +0000 https://www.andfit.co.nz/day30-copy/ The post DAY 31 appeared first on Andfit.

]]>

Plyometrics

7 Rounds of

3 x Knee Jumps

000,100,200,300,400,500,600

*Rx+ To plate if applicable

*Scaled: Broad Jumps

Metcon 

20 Min AMRAP

7 Burpees to Target
9 Weighted Squats
24 Mountain Climbers

Warmup

2 Rounds of

10m x Toes Walk

10m x Heel Walk

10m x Duck Walk

10 x Down Ups

10 x Lunges (L+R)

The post DAY 31 appeared first on Andfit.

]]>
MyFitnessPal Guide https://www.andfit.co.nz/myfitnesspal/ Sun, 26 Apr 2020 02:32:09 +0000 https://www.andfit.co.nz/day01-copy/ The post MyFitnessPal Guide appeared first on Andfit.

]]>
1. Tap the + sign from anywhere in the app.

The big blue plus sign in the middle of the MFP toolbar will reveal options to add one of five things: status update, water, food, exercise, or weight. Tap the red food button in the middle to get to the food diary.

2. Which meal are you entering?

Tap the meal you want to document. You can enter your meals in any order.

You can add or change the names of your default meals only through myfitnesspal.com — you can’t do it through mobile app. For example, if you find yourself snacking a lot later at night, you might want to log those snacks separately from what you have during daytime hours. You’ll be surprised how fast that evening graze is costing you in calories!

3. Type the name of the food.

If what you ate was a brand-name item or from a well-established restaurant (fast food or otherwise), start with the brand name, then other descriptors. If not, just type as much as is needed to generate a list from which to choose. Chances are after the first few letters the item may appear; if not, finish typing and tap Search.

In many cases, you will find entirely too many options: several entries with the same or similar names, but conflicting nutritional data, and it will be hard to determine which one is the right one for your needs. Try for the best match. You might need to look up an item on the food company’s website to confirm which data is correct. Tap whichever one you think will work best, and the food’s nutritional values will appear.

4. Set the serving size.

Sometimes the only available serving size does not match what you ate. You may need to adjust one or both of them. Just tap on it and dial in the more accurate numbers for the serving. When you’re satisfied that it’s close enough, tap the check mark to log the food.

5. Add more food.

Keep going until you have added everything you ate and drank at that meal. You’ll notice at the top, your remaining calories have been reduced according to the number of calories you just consumed.

If this combination of foods is something you eat regularly, consider saving it as meal. Next time you eat it, you can select the whole meal instead of each individual item, saving you several taps and clicks and other extraneous gestures. To save a meal, tap the More button and tap Save Meal.

6. Add the rest of your meals throughout the day.

Continue in this fashion as the day goes along. Don’t forget to add your water consumption —drinking water is very helpful with weight loss and appetite control.

When you’re done logging food for the day, tap the Complete Entry icon to complete and save the entire entry. After a moment, MyFitnessPal will calculate how well you did in meeting your daily goals and then present you with an estimate of what you would weigh in 5 weeks if every day were like the one you just finished.

If you had a good day, seeing that will probably be exciting. If you didn’t do so well that day, the message might not be such a thrill, but hopefully will inspire you to do better the next day.

7. Scan an item’s UPC code.

Oops! You forgot about that Kind bar you scarfed down after the gym. If you need to add an item after you’ve completed the day’s entry, it’s not a problem; just go through the same steps.

The Kind bar has a bar code, so you can scan that and bring up all the info you need on the snack. If it looks right, just tap the checkmark to add the bar to your diary.

8. Import a recipe and Log the serving.

This feature works both on the desktop and on your mobile device.

What if you find a great recipe online (or elsewhere) you want to try, but you’re not sure how to log it in your diary. You want to be true to your nutrition journaling, but the recipe just doesn’t give you that kind of information.

MFP says “No sweat!” Just plug in the URL for the recipe (or type in the ingredients and total servings) and click Import Recipe.

After a few seconds, MFP spits out the familiar Nutrition Facts panel for your recipe. You can log a serving of it directly from this screen, before you forget! And now the recipe is in your database, so you won’t have to ever go to “all that trouble” again.

The post MyFitnessPal Guide appeared first on Andfit.

]]>
DAY 30 https://www.andfit.co.nz/day30/ Sat, 25 Apr 2020 23:27:06 +0000 https://www.andfit.co.nz/day29-copy/ The post DAY 30 appeared first on Andfit.

]]>
Metcon 

HERO Workout ‘Murph”

1 Mile Run (1600m)

100 Bent Over Row

200 Push Ups

300 Air Squats

1 Mile Run (1600m)

*Wear a backpack or a vest if possible

* Partition the workload however you please other than the run

i.e. 10 rounds of (30 squats + 20 pu + 10 rows) or 20 rounds of (15 squats + 10 pu + 5 rows) or other combinations…

Warmup

3 Rounds of

200m Run

3 x Dive Bombers

6 x Perfect Stretch

8 x Air Squats

The post DAY 30 appeared first on Andfit.

]]>
DAY 20 https://www.andfit.co.nz/day20/ Fri, 24 Apr 2020 04:16:48 +0000 https://www.andfit.co.nz/day28-copy/ The post DAY 20 appeared first on Andfit.

]]>
Metcon 

HERO Workout Georgie

21 Min time cap

BUY IN: 65 Sit ups

then AMRAP of

7 Burpees
11  Push Ups
22 Implement Swings

Warmup 

400m Run

_________

3 Rounds of

6 x Push Ups

8 x Good Mornings

12 x Burpees

_________

400m Run

The post DAY 20 appeared first on Andfit.

]]>
DAY 28 https://www.andfit.co.nz/day28/ Wed, 22 Apr 2020 21:20:18 +0000 https://www.andfit.co.nz/day27-copy/ The post DAY 28 appeared first on Andfit.

]]>
Deadlift 

3 x 3 Heavy

2 x 7 Slightly lighter

Every 2min*

000,200,400,600,800

*slightly faster than in the demo video

Metcon 

For Time (11-13 min cap)

10-9-8-7-6-5-4-3-2-1

Implement Thrusters

Implement Facing Burpees

Warmup 

3 Rounds

10 x Jumping Squats

6 x Down Ups

_________

1min Bottom Squat Hold

_________

8 x Lumbar+Thoracic Stretch

The post DAY 28 appeared first on Andfit.

]]>
DAY 19 https://www.andfit.co.nz/day19/ Tue, 21 Apr 2020 20:23:26 +0000 https://www.andfit.co.nz/day26-copy/ The post DAY 19 appeared first on Andfit.

]]>
Metcon

For Time – 16 min cap

100 Mountain Climbers
25 DBL DB/ Implement Box Step Overs
50 Deck Squats
25 DBL DB/ Implement Box Step Overs
100 Mountain Climbers

Midline

EMOM 5 Mins

45 Second Plank

Warmup 

3 rounds

12 x Split Jumps

12 x  Glute Pull Ins

24 x Mountain Climbers

12 x Hip Stretch Lizard

12 x Single Leg Squats

The post DAY 19 appeared first on Andfit.

]]>
DAY 26 https://www.andfit.co.nz/day26/ Mon, 20 Apr 2020 21:44:42 +0000 https://www.andfit.co.nz/day25-copy/ The post DAY 26 appeared first on Andfit.

]]>
Strength
Back Squat 

5 x 7 Heavy

000,230,500,730,1000

Metcon 

For Time -15 min cap

3 Rounds

150 DU / 200 Singles
15 Implement Hang Power Cleans
25 Push Ups

Warmup 

Tabata – 3 Rounds

20sec ON 10sec OFF

Down Ups

Jumping Lunges

Implement Push Press

_______________________

1 min bottom Squat

The post DAY 26 appeared first on Andfit.

]]>
DAY 25 https://www.andfit.co.nz/day25/ Sun, 19 Apr 2020 23:03:50 +0000 https://www.andfit.co.nz/day24-copy/ The post DAY 25 appeared first on Andfit.

]]>
Deadlift 
3 x 10 Heavy
1 x 20 Light
000,230,500,730
Metcon 

9 Min AMRAP

11 x Candle Sticks
22 x Weighted Implement Lunges

Warmup 

EMOM – 9 min

10 x Inchworms

10 x V-Ups

10 x Spiderman Lunges

The post DAY 25 appeared first on Andfit.

]]>
DAY 18 https://www.andfit.co.nz/day18/ Sun, 19 Apr 2020 02:18:35 +0000 https://www.andfit.co.nz/day23-copy/ The post DAY 18 appeared first on Andfit.

]]>
Plyometrics

EMOM 8 Mins

6 x Weighted Good Mornings

+

2 x Broad Jumps

Metcon

For Time – 18min Cap

5 Rounds

400m Run / 75 DU / 125 Singles
10 Burpees
10 HSPU/ Pike HSPU

Warmup 

2 Rounds of

10 x Air Squats

10 x Side Lunges

10 x Dive Bombers

then

200m Run

or  1 min Skipping

The post DAY 18 appeared first on Andfit.

]]>
DAY 23 https://www.andfit.co.nz/day23/ Fri, 17 Apr 2020 03:48:27 +0000 https://www.andfit.co.nz/day22-copy/ The post DAY 23 appeared first on Andfit.

]]>
HERO WOD
Loredo
6 Rounds for time of:
24 Squats
24 Push-ups
24 Walking Lunge Steps
400m Run

In honor of U.S. Army Staff Sergeant Edwardo Loredo, 34, of Houston, TX, was killed on June 24, 2010
Warmup 

Ladder

400m Run

____________________

5min

1,1,1,2,2,2,3,3,3…

Squat

Push Ups

Lunges

____________________

400m Run

The post DAY 23 appeared first on Andfit.

]]>
DAY 16 https://www.andfit.co.nz/day16/ Wed, 15 Apr 2020 21:09:59 +0000 https://www.andfit.co.nz/day21-copy/ The post DAY 16 appeared first on Andfit.

]]>
Strength
Deadlift 

Deficit Deadlift

5×8 Heavy
or
Good mornings (Weighted)

000,300,600,900,1200

Metcon

For Time

200 x Mountain Climbers
50 x DBL DB Hang Snatch or Swings
50 x Wall Balls or Implement Squats/Thrusters

Warmup

Tabata – 4min

20sec ON 10sec OFF

Mountain Climbers

Inch Worms

Broad Jumps

Jump Squats

Then 4 rounds of

8 x Good Mornings

4 x Snatches

The post DAY 16 appeared first on Andfit.

]]>
DAY 21 https://www.andfit.co.nz/day21/ Wed, 15 Apr 2020 03:34:38 +0000 https://www.andfit.co.nz/day-20-copy/ The post DAY 21 appeared first on Andfit.

]]>
Strength
Back Squat 

5 Rounds of 5 x Back Squats

000,230,500,730,1000

Then into

1 min ME back squats

Heavy!!!!!!!!!

Metcon 

12 Min AMRAP

50 Double Unders
15 Implement Box/Chair/Bench Step Overs

* Use any implement you have (DB, KB, Backpack…)
Warmup

3 Rounds

30 x Implement Hops

10 x Implement Lunges

10 x Implement Squats

_________________

1min Squat Hold 

6-10 x Squat Rotations

The post DAY 21 appeared first on Andfit.

]]>
DAY 15 https://www.andfit.co.nz/day15/ Tue, 14 Apr 2020 19:53:36 +0000 https://www.andfit.co.nz/day19-copy/ The post DAY 15 appeared first on Andfit.

]]>
Strength

Plyometrics

7 Rounds of

4 Broad Jumps for max distance

000,130,300,430,600,730,900

Metcon

For Time (15-18 min cap)

1.2k Run

100 Air Squats
75 Push Ups
50 Pull ups/ rows/ bent over rows

Break workload up however athlete chooses

*Wear a vest or ruck if applicable

Warmup

Tabata – 6min

20sec ON / 10sec OFF

Jumping Lunges

Down Ups

Kick Sits

The post DAY 15 appeared first on Andfit.

]]>
DAY 13 https://www.andfit.co.nz/day13/ Mon, 13 Apr 2020 02:33:13 +0000 https://www.andfit.co.nz/day18-copy/ The post DAY 13 appeared first on Andfit.

]]>
Shoulder Press 

Implement Strict Press

5×3 Heavy
1×10 Light

000,230,500,730,1000,1230

*Superset with 10-15 Tricep Dips Between Each Round

Metcon 

7 Min AMRAP

7 Pike or HSPU
1 Hang Squat Snatch
Or
5 Implement Swings

Warmup

3 Rounds of

20 x Shoulder Taps

20 x Toes Touches

20 x Air Squats

The post DAY 13 appeared first on Andfit.

]]>
DAY 18-old https://www.andfit.co.nz/day18old/ Sun, 12 Apr 2020 05:59:16 +0000 https://www.andfit.co.nz/day17-copy/ The post DAY 18-old appeared first on Andfit.

]]>
Strength

Deadlift 

Opt 1) 6×6 Heavy

or

Opt 2) 6×12 Light

or

Opt 3) 6×12 Good Mornings

Metcon 

For Time – 15 min cap

2 Rounds

800m Run

30 Burpee Box Jump Overs

or

30 Burpee to Target

@60/50cm (24/20)

Warmup

2 Rounds of

20 x Cherry Pickers

20 x Floor Sweeps

20 x Good Mornings

The post DAY 18-old appeared first on Andfit.

]]>
DAY 17 https://www.andfit.co.nz/day17/ Fri, 10 Apr 2020 06:12:32 +0000 https://www.andfit.co.nz/day16-copy/ The post DAY 17 appeared first on Andfit.

]]>
Hero WOD

“Chad Wilkinson”

1000 Step ups for Time

*20kg/10kg backpack/vest

*Expected time: more than 45min to 60min

Warmup

Mobility

10 x Inchworms

20 x Calf Stretches

Dynamics

20 x Walking Lunges

20 x Air Squats

20 x Down Ups

20 x Sweep Floor

The post DAY 17 appeared first on Andfit.

]]>
DAY 16 old https://www.andfit.co.nz/day16old/ Fri, 10 Apr 2020 04:00:56 +0000 https://www.andfit.co.nz/day15-copy/ The post DAY 16 old appeared first on Andfit.

]]>
Metcon

For Time – 18 min cap

1k Run / Row / Bike or 250 DU / 500 SU

Rest 5 mins

Repeat

Metcon

Midline

1 ME weighted plank

Rest 3 mins

Repeat

Score = total working time

Warmup

Tabata 10:10 – sprint on spot (8 times)

Mobility

50 x Hamstrings/Calves Stretch

Dynamics

Leg Swings x 12 (6 each legs)

Glute Pull In x 12 (6 each legs)

Quad Snaps x 12 (6 each legs)

Sweep Floors x 12 (6 each legs)

2 Rounds of 

12/15m High Knees & 12/15m Butt Kicks

Warm up Single Arm Snatch and Push Press with increasing weight

The post DAY 16 old appeared first on Andfit.

]]>
DAY 12 https://www.andfit.co.nz/day12/ Wed, 08 Apr 2020 03:18:19 +0000 https://www.andfit.co.nz/day14-copy/ The post DAY 12 appeared first on Andfit.

]]>
Strength

Bulgarian Squat

4×6 Weighted (L+R)

2×15 Jumping Bulgarians (L+R)

000,300,600,900,1200,1500

Metcon

For Time – 15 min cap

3-6-9-12-9-6-3

Devil Press

Implement Box Step Ups or Overs

Warmup

A. 400m Run or 3min

B. Tabata – 4min, 20sec ON 10sec OFF

Down Ups

Split Jumps

C. 3 Rounds

5 x Inchworms

20 x Mountain Climbers

D. Warm Up Bulg. Squats

The post DAY 12 appeared first on Andfit.

]]>
DAY 14 – old https://www.andfit.co.nz/day14/ Tue, 07 Apr 2020 02:19:32 +0000 https://www.andfit.co.nz/day13-copy/ The post DAY 14 – old appeared first on Andfit.

]]>
Metcon (Distance)
OPTION1 – Outdoor
Run (Row/Bike) away from home for 10 mins
Rest 5 mins
Get home before the 10 min cap
OPTION2 – Indoor
Jumping Jacks for 10min (count reps)
Rest 5 min
Jumping Jacks for 10min (beat number of reps in round 1)
Metcon

For Time – 11 min cap

100 Weighted Sit Ups
100 Wall Balls / Thrusters – light weight

@9/6 (20/14)

WARMUP

50 x Calf Stretches

50 x Mountain Climbers

50 x High Knees

50 x Butt Kicks

The post DAY 14 – old appeared first on Andfit.

]]>
DAY 08 https://www.andfit.co.nz/day08/ Mon, 06 Apr 2020 02:11:42 +0000 https://www.andfit.co.nz/day11-copy/ The post DAY 08 appeared first on Andfit.

]]>
Metcon

Push

4 Sets

15 Tricep Dips
+
10 Push Ups

000,300,600,900

Metcon

18.3

For Time (14 min cap)

2 rounds for time of:

100 double-unders
20 Goblet squats
100 double-unders
20 Hand Release Push Ups
100 double-unders
20 dumbbell snatches
100 double-unders
20 Burpees

WARMUP

2 rounds of

8 x Squat Flows

8 x Lunges with Torso Rotation

8 x Implement Single Arm Deadlift

8 x Implement Hang Power Snatch

_______________________________

2 min skipping Practice

The post DAY 08 appeared first on Andfit.

]]>
DAY 09 https://www.andfit.co.nz/day09/ Sun, 05 Apr 2020 03:31:08 +0000 https://www.andfit.co.nz/burninglegs-copy/ The post DAY 09 appeared first on Andfit.

]]>
Metcon
Strength Component
5 Rounds of

6 Heavy Bent Over Row

000,230,500,730,1000

Metcon

For Time 15 min cap

3 Rounds

30 Pistol Squats (Goblet Squats)
10 Implement Deadlifts
15 Shoulder Taps (L+R=1)

WARMUP

3 rounds of

10 Toy Soldiers Kicks 

10 Single Leg Deadlifts

10 Toe Touches

10 Scorpions Kick (front)

10 Scorpions Kick (back)

The post DAY 09 appeared first on Andfit.

]]>
DAY 11 https://www.andfit.co.nz/day11/ Fri, 03 Apr 2020 07:04:38 +0000 https://www.andfit.co.nz/runbabyrun-copy/ The post DAY 11 appeared first on Andfit.

]]>
Metcon

For Time

25 Devil Press

100 air squats
15 Devil Press
200 Step Back Lunges
25 Devil Press

100 Frog Jumps

*Use any implement for devil press

WARMUP

3 rounds of

8 Good Mornings

6 Single Leg Deadlift (per leg)

6 Hindu Push Ups

200m Run/10 burpees

The post DAY 11 appeared first on Andfit.

]]>
DAY 09 – old https://www.andfit.co.nz/09old/ Wed, 01 Apr 2020 21:50:13 +0000 https://www.andfit.co.nz/deadliftthursterscore-copy/ The post DAY 09 – old appeared first on Andfit.

]]>
Metcon

EMOM 10 mins

OPTION A

12 KB swings (American)

OPTION B

12 DB Snatches (6 per arm)

OPTION C

12 Backpack swings (Russian)

*Make this heavy

Metcon

For Time – 25 min cap

OPTION A – Run (weighted or not)

1k Run

50 Push Ups

1k Run 

50 Push Ups

OPTION B – At home (weighted or not)

50 Down Ups

50 Push Ups

50 Down Ups

50 Push Ups

*wear a vest or backpack

WARMUP

3 rounds of

8 Good Mornings

6 Single Leg Deadlift (per leg)

6 Hindu Push Ups

200m Run/10 burpees

The post DAY 09 – old appeared first on Andfit.

]]>
DAY 06 https://www.andfit.co.nz/day06/ Wed, 01 Apr 2020 00:28:43 +0000 https://www.andfit.co.nz/pullpushemom-copy/ The post DAY 06 appeared first on Andfit.

]]>
Metcon

TTB
5 Rounds

10 Strict laying leg raises
+
30 Bicycle crunches

000,200,400,600,800

Metcon

20 Min AMRAP

10 Implement Deadlift
15 Implement Thrusters
65 Double Unders/ 130 single unders

Deadlift- Use the heaviest implement you can find
Thruster: medium weight

WARMUP

3 rounds of

10 Hollow Rock

10 Superman Back Extensions

10 Implement Snatch

10 Implement Fro Squat

_______________________

3min warm up Skipping

The post DAY 06 appeared first on Andfit.

]]>
DAY 05 https://www.andfit.co.nz/day05/ Mon, 30 Mar 2020 22:38:00 +0000 https://www.andfit.co.nz/dufrontsquatsburpees-copy/ The post DAY 05 appeared first on Andfit.

]]>
Metcon
Pull + Push
5 Rounds

6 BW pull ups
+
8 Pike HSPU (Box, chair, couch etc)

000,300,600,900,1200

*Pull Ups, be as creative as possible, think ring row body position. Use a strong table, chairs, whatever you have

Metcon 
For Reps
E2MOM x 7 Rounds

75 Mountain Climbers
ME Shoulder to Overhead

*Shoulder to Overhead- Use any implement you have. load up a back back and work a push press for example.

WARMUP

6 rounds of

6 Dive Bombers

6 Spiderman Push Ups

6 Bent Over Rows

_______________________

3min warm up Push Press

The post DAY 05 appeared first on Andfit.

]]>
DAY 04 https://www.andfit.co.nz/day04/ Mon, 30 Mar 2020 05:57:59 +0000 https://www.andfit.co.nz/cardioandholds-copy/ The post DAY 04 appeared first on Andfit.

]]>
Metcon
5 Rounds

1 min on 1 min off

ME Double Unders

Metcon
For Time – 13 min cap

9-6-3
Front Squats
Implement Facing Burpees

15-12-9
Front Squats
Implement Facing Burpees

*Squats, use any implement you have make it heavy

*Implement facing burpees, treat it as you would a barbell

WARMUP

3 rounds of

20 seconds of skipping

10 Goblet Goodmornings

10 Floor Sweeps

then

1min Bottom Squat hold with torso rotation

The post DAY 04 appeared first on Andfit.

]]>
DAY 02 https://www.andfit.co.nz/day02/ Sun, 29 Mar 2020 01:46:48 +0000 https://www.andfit.co.nz/maxreps45sec-copy/ The post DAY 02 appeared first on Andfit.

]]>
Metcon 
For Time – 25 min cap

5 Rounds

400m Run/ 200m Shuttle Run / 20 Box Step Ups
30m Broad Jump
1 Minute HS Hold (accumulated)

Metcon 
Midline

3×90 Second Plank

Rest 90 seconds between sets

WARMUP

Ankle mobility – walk on heels, toes, outside and inside on foot x 10m each

Calf Stretches x 50

Forward Lunges x 10, Reverse Lunges x 10, 1min Bottom Squat

Handstand Wall Kick ups x 10

The post DAY 02 appeared first on Andfit.

]]>
DAY 01 https://www.andfit.co.nz/day01/ Fri, 27 Mar 2020 22:10:36 +0000 https://www.andfit.co.nz/3minbuyin-copy/ The post DAY 01 appeared first on Andfit.

]]>
Metcon

5 Rounds For

45 Seconds Max Reps Push Ups / Push Press

45 Seconds Max Reps Burpees / Devil Press

45 Seconds Max Reps Shoulder taps/ Pike shoulder taps

45 Seconds Max Rep Air Squats / Goblet Squat

Rest 1 Minute Between Rounds

Core Finisher

30 each movement x 9 (3 sets each)

Forearm side plank knee to elbow (right)

Forearm side plank knee to elbow (left)

Glute Bridges or Weighted Glute Bridges

WARMUP

2 Rounds of

8 x Squat Flow

3 x Lunge with 3 Thoracic Rotation (L+R)

10 x Single Arm Strict Press & 10 x Double Push Press

The post DAY 01 appeared first on Andfit.

]]>
DAY 03 – old https://www.andfit.co.nz/day03/ Fri, 27 Mar 2020 21:57:51 +0000 https://www.andfit.co.nz/20minamrapburpees-copy/ The post DAY 03 – old appeared first on Andfit.

]]>
Metcon (AMRAP – Reps)
5 Min AMRAP
3 Tricep Dips
3 Push Ups
6 Tricep Dips
6 Push Ups
9 Tricep Dips
9 Push Ups
etc
Metcon (AMRAP – Reps)
From 0:00 – 3:00 – 2 Rounds of
10 Squat Cleans
10 Pike Press or 5 HSPU
From 3:00 to 6:00 – 2 Rounds of
12 Squat Cleans
12 Pike Press or 6 HSPU
From 6:009:00 – 2 Rounds of
14 Squat Cleans
14 Pike Press or 7 HSPU
Continue this sequence adding 2 reps to each movement until you can no longer finish the 2 rounds in the 3 minute window.
WARMUP

3 SETS: 20 mountain climber + 20 star jumps + 20 jumping lunges + 20 seconds rest

FOLLOWED BY: 10 inchworms + 10 Scorpions kicks on back and 10 on front + 3 to 5 min warming up Squat Cleans (3 sets of 6)

The post DAY 03 – old appeared first on Andfit.

]]>
DAY 02 – old https://www.andfit.co.nz/day02old/ Fri, 27 Mar 2020 01:08:28 +0000 https://www.andfit.co.nz/deathby-copy/ The post DAY 02 – old appeared first on Andfit.

]]>
Metcon (AMRAP – Rounds and Reps)
20 min AMRAP
5 Burpees over or to implement
10 Jumping Lunges (step back) or Weighted Lunges
15 Sit Ups or V-Ups
1 min plank or handstand hold
Metcon (No Measure)
5 Rounds
40 Seconds on 20 Seconds off
Mountain climbers
Wall Sit
WARMUP

10 min EMOM: 10 DU + 10 alt. lunges + 10 air squats

Immediately followed by: 10 downward dogs to upward dog

The post DAY 02 – old appeared first on Andfit.

]]>
DAY 01 – old https://www.andfit.co.nz/day01old/ Fri, 27 Mar 2020 00:48:33 +0000 https://www.andfit.co.nz/cardioday-copy/ The post DAY 01 – old appeared first on Andfit.

]]>
Metcon (AMRAP – Rounds and Reps)

Buy In: 50 Push Ups for time

immediately followed by

Death By

Min 1- 1 Air Squat + 1 Down Up
Min 2- 2 Air Squat + 2 Down Up
Min 3- 3 Air Squats + 3 Down Ups

etc

immediately followed by

Buy Out: 50 Push Ups

CORE FINISHER

Tabata

20 on 10 off

8 Intervals

V-sit + Plank

WARMUP

EMOM 10 min 

8 inchworms + 10 alt lunges

The post DAY 01 – old appeared first on Andfit.

]]>
MOVEMENT TIP: The Burgener Warm Up Copy https://www.andfit.co.nz/movement-tip-the-burgener-warm-up-copy/ Wed, 25 Mar 2020 09:37:19 +0000 https://www.andfit.co.nz/movement-tip-the-burgener-warm-up-copy/ The post MOVEMENT TIP: The Burgener Warm Up Copy appeared first on Andfit.

]]>

The Snatch and the Clean and Jerk are the two movements contested in the sport of weightlifting (also known as Olympic weightlifting or even Oly by CrossFitters). A while back we looked at the Clean and Jerk and all the associated variations and over the next few weeks, we are going to look at the other movement, the Snatch.

Before we start, we’ll look this week at a demonstration of the Burgener warm-up, by CrossFit Seminar Staff member James Hobart. The Burgener warm-up is an Olympic Lifting warmup from the legendary Mike Burgener that has become a bit of a gold standard for weightlifting warmups in CrossFit.

Points Of Performance

  • Stand on feet with hip-width apart
  • Arms wide and hook grip on the bar
  • Bar at the high-hang
  • Dip, dive
  • Dip, dive, and shrug keeping torso vertical and arms straight
  • Dip, dive, shrug, and elbows pull high
  • Dip, dive, shrug and then pull the bar overhead
  • Feet move to shoulder-width stance
  • Overhead squat
  • Move feet to hip-width stance ; bar at the high-hang
  • Dip, dive and pull into the bottom of the overhead squat; stand
  • Snatch

The post MOVEMENT TIP: The Burgener Warm Up Copy appeared first on Andfit.

]]>
DAY 10 https://www.andfit.co.nz/day10/ Tue, 24 Mar 2020 14:38:22 +0000 http://demo.wodsites.co/movement-tip-the-dumbbell-swing-copy/ The post DAY 10 appeared first on Andfit.

]]>
Metcon (Time)

5 Rounds

100 Double Unders or 200 Single Unders
400m Run

*Rest as needed between sets

*Score is total time of 5 rounds
WARMUP

2 Rounds 

200m jog, 50 x Calf Stretches, 5 x 20m shuttle runs, 30 sec skipping

The post DAY 10 appeared first on Andfit.

]]>
CrossFit Basic Movements https://www.andfit.co.nz/crossfit-basic-movemetns/ Mon, 18 Dec 2017 06:20:07 +0000 http://demo.wodsites.co/9-foundational-movements-copy/ The post CrossFit Basic Movements appeared first on Andfit.

]]>

Have found and included alll the individual videos for these, so don’t need to do this video, although could include it as a ‘Review the most often used movements’ week

The post CrossFit Basic Movements appeared first on Andfit.

]]>
All 9 foundational movements https://www.andfit.co.nz/9-foundational-movements/ Mon, 18 Dec 2017 06:15:47 +0000 http://demo.wodsites.co/movement-tip-the-dumbbell-swing-copy/ The post All 9 foundational movements appeared first on Andfit.

]]>

CrossFit has defined 9 Foundational Movements, which provide a greatly rounded starting point for anybody starting out with CrossFit. These are niely combined in this video, which covers:
Air Squat
Front Squat
Overhead Squat
Shoulder Press
Push Press
Push Jerk
Deadlift
Sumo Deadlift High Pull
Medicine Ball Clean

The post All 9 foundational movements appeared first on Andfit.

]]>
MOVEMENT TIP: The Dumbbell Swing https://www.andfit.co.nz/movement-tip-the-dumbbell-swing/ Mon, 18 Dec 2017 03:45:37 +0000 http://demo.wodsites.co/movement-tip-dumbbell-hang-power-snatch-copy/ The post MOVEMENT TIP: The Dumbbell Swing appeared first on Andfit.

]]>

CrossFit Seminar Staff member Julie Foucher demonstrates the dumbbell swing, a movement that isn’t seen very much as it is not as favoured as the kettlebell swing. The Dumbell doesn’t lend itself to the swing in quite the way the ketttlebell does, but as you can see from the demonstration, it makes a perfectly good substitute if you don’t have a kettlebell to hand.

As with the Kettlebell Swing, keeping a neutral spine and being mindful of sending the hips back in a hinge rather than a squat, is important.

Points Of Performance

  • Stand on feet with shoulder-wisth apart of wider
  • Grip center of dumbbell with both hands
  • Hips descend back and down, but stay higher than the knees
  • Lumbar curve maintained
  • Knees in line with toes
  • Hips and legs extend rapidly, driving the dumbell overhead
  • Heels down until hips and legs extend
  • Arms remain straight, pulling the dumbbell over the middle of both feet
  • Hips sit back in a partial squat as the bell descends to begin next rep

The post MOVEMENT TIP: The Dumbbell Swing appeared first on Andfit.

]]>
MOVEMENT TIP: The Dumbbell Hang Power Snatch https://www.andfit.co.nz/movement-tip-dumbbell-hang-power-snatch/ Mon, 18 Dec 2017 03:24:04 +0000 http://demo.wodsites.co/movement-tip-the-dumbbell-power-snatch-copy/ The post MOVEMENT TIP: The Dumbbell Hang Power Snatch appeared first on Andfit.

]]>

This week CrossFit Seminar Staff member Julie Foucher demonstrates the Dumbell Hang Power Snatch for us. Just like with the barbell variation of this movement, you can make it simple by considering each of the individual words in this rather lengthy movement name!
1. Dumbell (not barbell)
2. Hang – starting from above the ground (usually just above the knee)
3. Power – don’t have to drop into a full squat position
4. Snatch (differentiates it from the Clean, the other Olympic Weightlifting movement)

Points Of Performance

  • Stand on feet with hip-width apart
  • Grip the center of the dumbbell
  • Lumbar curve maintained
  • Deadlift the dumbbell to the hang position
  • Extend hips and legs rapidly
  • Heels down until hips and legs extend
  • Shoulder shrugs, followed by a pull under with the arms
  • Dumbbell is received in a partial overhead squat
  • Complete at full hip, knee and arm extension with the dumbbell over the middle of both feet

The post MOVEMENT TIP: The Dumbbell Hang Power Snatch appeared first on Andfit.

]]>
MOVEMENT TIP: The Dumbbell Power Snatch https://www.andfit.co.nz/movement-tip-the-dumbbell-power-snatch/ Mon, 18 Dec 2017 03:05:13 +0000 http://demo.wodsites.co/movement-tip-the-dumbbell-hang-snatch-copy/ The post MOVEMENT TIP: The Dumbbell Power Snatch appeared first on Andfit.

]]>

The Dumbell Power Snatch is also very similar to the Dumbell Snatch – the only difference is that instead of dropping into the Dumbell Overhead Squat position, the athlete only needs to drop part way to catch the dumbells. CrossFit Seminar Staff member Julie Foucher demonstrates this movement for us.

Points Of Performance

  • Stand on feet with hip-width apart
  • Grip the center of the dumbbell
  • Dumbbells start on the ground in between both feet
  • Shoulders over or slightly in front of the dumbbell at set-up
  • Lumbar curve maintained
  • Hips and shoulders rise at the same rate
  • Hips extend rapidly
  • Heels stay down until hips and legs extend
  • Shoulder shrugs, followed by a pull under with the arms
  • Dumbbell is received in a partial overhead squat
  • Complete at full hip and knee extension with the dumbbell over the middle of both feet

The post MOVEMENT TIP: The Dumbbell Power Snatch appeared first on Andfit.

]]>
MOVEMENT TIP: The Dumbbell Hang Snatch https://www.andfit.co.nz/movement-tip-the-dumbbell-hang-snatch/ Mon, 18 Dec 2017 03:01:32 +0000 http://demo.wodsites.co/movement-tip-the-dumbbell-snatch-copy/ The post MOVEMENT TIP: The Dumbbell Hang Snatch appeared first on Andfit.

]]>

CrossFit Seminar Staff member James Hobart demonstrates the Dumbbell Hang Snatch, just like the Dumbell Snatch we looked at last week, except that the movement starts with the Dumbells in the ‘hang’ position i.e. off the ground.. Everything else pretty much remains the same.

Points Of Performance

  • Stand on feet with hip-width apart
  • Grip the center of the dumbbell
  • Lumbar curve maintained
  • Deadlift the dumbbell to the hang position
  • Extend hips and legs rapidly
  • Heels down until hips and legs extend
  • Shoulder shrugs, followed by a pull under with the arms
  • Dumbbell is received at the bottom of an overhead squat
  • Complete at full hip, knee and arm extension with the dumbbell over the middle of both feet

The post MOVEMENT TIP: The Dumbbell Hang Snatch appeared first on Andfit.

]]>
MOVEMENT TIP: The Dumbbell Snatch https://www.andfit.co.nz/movement-tip-the-dumbbell-snatch/ Mon, 18 Dec 2017 02:54:51 +0000 http://demo.wodsites.co/movement-tip-single-dumbell-overhead-squat-copy/ The post MOVEMENT TIP: The Dumbbell Snatch appeared first on Andfit.

]]>

Much like the barbell Snatch, the Dumbell Snatch, as demonstrated here by CrossFit Seminar Staff member James Hobart, requires driving the hips through to move the Dumbell upwards.

As you can see, James then drops under the weight as fast as possible, while punching up as he lands in a Squat.

The Dumbell Snatch is typically performed using just one arm .The use of single arm movements helps to build rotational strength in the core as you work to resist the twist of the body to one side.

Points Of Performance

  • Stand on feet with hip-width apart
  • Grip the center of the dumbbell
  • Dumbbells start on the ground in between both feet
  • Shoulders over or slightly in front of the dumbbell at set-up
  • Lumbar curve maintained
  • Hips and shoulders rise at the same rate
  • Hips extend rapidly
  • Heels stay down until hips and legs extend
  • Shoulder shrugs, followed by a pull under with the arms
  • Dumbbell is received at the bottom of an overhead squat
  • Complete at full hip, knee and arm extension with the dumbbell over the middle of both feet

The post MOVEMENT TIP: The Dumbbell Snatch appeared first on Andfit.

]]>
MOVEMENT TIP: The Single Dumbell Overhead Squat https://www.andfit.co.nz/movement-tip-single-dumbell-overhead-squat/ Mon, 18 Dec 2017 02:49:08 +0000 http://demo.wodsites.co/movement-tip-dumbbell-hang-power-clean-copy/ The post MOVEMENT TIP: The Single Dumbell Overhead Squat appeared first on Andfit.

]]>

CrossFit Seminar Staff member James Hobart demonstrates the Single-Dumbbell Overhead Squat., which is a great core exercise. Using just one arm forces the athlete to resist against the tendency of the body to rotate to one side to compensate. Instead, switch your core on and work to keep the hips squared to the front in this movement.

Ensuring a strong Overhead Squat position will result in a stronger Dumbell Snatch, which we will look at next week.

Points Of Performance

  • Stand on feet with shoulder-width apart
  • Shoulder pushes up into the dumbbell
  • Armpit of overhead arm faces forward
  • Hips descend back and down, lower than the knees
  • Lumbar curve maintained
  • Knees in line with toes
  • Heels down
  • Dumbbell stays over the middle of both feet
  • Complete at full hip and knee extension

The post MOVEMENT TIP: The Single Dumbell Overhead Squat appeared first on Andfit.

]]>
MOVEMENT TIP: The Dumbbell Hang Power Clean https://www.andfit.co.nz/movement-tip-dumbbell-hang-power-clean/ Mon, 18 Dec 2017 02:41:25 +0000 http://demo.wodsites.co/movement-tip-the-dumbbell-power-clean-copy/ The post MOVEMENT TIP: The Dumbbell Hang Power Clean appeared first on Andfit.

]]>

This week CrossFit Seminar Staff member Julie Foucher demonstrates the Dumbell Hang Power Clean for us. Just like with the barbell variation of this movement, you can make it simple by considering each of the individual words in this rather lengthy movement name!
1. Dumbell (not barbell)
2. Hang – starting from above the ground (usually just above the knee)
3. Power – don’t have to drop into a full squat position
4. Clean (differentiates it from the Snatch, the other Olympic Weightlifting movement)

Points Of Performance

  • Stand on feet with hip-width apart
  • Grip the center of the dumbbells
  • Dumbbells start on the ground at the outer sides of both feet
  • Shoulders over or slightly in front of the dumbbells at set-up
  • Lumbar curve maintained
  • Hips and shoulders rise at the same rate
  • Hips extend rapidly
  • Heels down until hips and legs extend
  • Shoulders shrug, followed by a pull under with the arms
  • Dumbbells are received in a partial squat position
  • Complete at full hip and knee extension with the dumbells on the shoulders

The post MOVEMENT TIP: The Dumbbell Hang Power Clean appeared first on Andfit.

]]>
MOVEMENT TIP: The Dumbbell Power Clean https://www.andfit.co.nz/movement-tip-the-dumbbell-power-clean/ Mon, 18 Dec 2017 02:37:24 +0000 http://demo.wodsites.co/movement-tip-the-dumbbell-hang-clean-copy/ The post MOVEMENT TIP: The Dumbbell Power Clean appeared first on Andfit.

]]>

The Dumbell Power Clean is also very similar to the Dumbell Clean – the only difference is that instead of dropping iinto the Front Rack Squat position, the athlete only needs to drop part way to catch the dumbells. CrossFit Seminar Staff member Julie Foucher demonstrates this movement for us.

Points Of Performance

  • Stand on feet with hip-width apart
  • Grip the center of the dumbbells
  • Dumbbells start on the ground at the outer sides of both feet
  • Shoulders over or slightly in front of the dumbbells at set-up
  • Lumbar curve maintained
  • Hips and shoulders rise at the same rate
  • Hips extend rapidly
  • Heels down until hips and legs extend
  • Shoulders shrug, followed by a pull under with the arms
  • Dumbbells are received in a partial squat position
  • Complete at full hip and knee extension with the dumbells on the shoulders

The post MOVEMENT TIP: The Dumbbell Power Clean appeared first on Andfit.

]]>
MOVEMENT TIP: The Dumbbell Hang Clean https://www.andfit.co.nz/movement-tip-the-dumbbell-hang-clean/ Mon, 18 Dec 2017 02:33:23 +0000 http://demo.wodsites.co/movement-tip-the-dumbbell-clean-copy/ The post MOVEMENT TIP: The Dumbbell Hang Clean appeared first on Andfit.

]]>

CrossFit Seminar Staff member James Hobart demonstrates the Dumbbell Hang Clean, just like the Dumbell Clean we looked at last week, except that the movement starts with the Dumbells in the ‘hang’ position i.e. off the ground.. Everything else pretty much remains the same.

Points Of Performance

  • Stand on feet with hip-width apart
  • Grip the center of the dumbbells
  • Lumbar curve maintained
  • Deadlift the dumbbells to the hang position
  • Extend hips and legs rapidly
  • Heels down until hips and legs extend
  • Shoulders shrug, followed by a pull under with the arms
  • Dumbbells are received at the bottom of a front squat position
  • Complete at full hip and knee extension with the dumbells on the shoulders

The post MOVEMENT TIP: The Dumbbell Hang Clean appeared first on Andfit.

]]>
MOVEMENT TIP: The Dumbbell Clean https://www.andfit.co.nz/movement-tip-the-dumbbell-clean/ Mon, 18 Dec 2017 02:29:20 +0000 http://demo.wodsites.co/movement-tip-dumbell-overhead-walking-lunge-copy/ The post MOVEMENT TIP: The Dumbbell Clean appeared first on Andfit.

]]>

CrossFit Seminar Staff member James Hobart demonstrates the the Dumbbell Clean. Like the barbell Clean, the weights are lifted from the floor, the hips are fully extended to create some momentum for the weight to move and the athlete then drops under the weights, in this case the dumbells, to catch them in a Front Rack Squat position.

Points Of Performance

  • Stand on feet with hip-width apart
  • Grip the center of the dumbbells
  • Dumbbells start on the ground at the outer sides of both feet
  • Shoulders over or slightly in front of the dumbbells at set-up
  • Lumbar curve maintained
  • Hips and shoulders rise at the same rate
  • Hips extend rapidly
  • Heels down until hips and legs extend
  • Shoulders shrug, followed by a pull under with the arms
  • Dumbbells are received at the bottom of a front squat
  • Complete at full hip and knee extension with the dumbells on the shoulders

The post MOVEMENT TIP: The Dumbbell Clean appeared first on Andfit.

]]>
MOVEMENT TIP: Dumbell Overhead Walking Lunge https://www.andfit.co.nz/movement-tip-dumbell-overhead-walking-lunge/ Mon, 18 Dec 2017 02:24:31 +0000 http://demo.wodsites.co/movement-tip-the-dumbbell-split-jerk-copy/ The post MOVEMENT TIP: Dumbell Overhead Walking Lunge appeared first on Andfit.

]]>

CrossFit Seminar Staff member Julie Foucher demonstrates the Dumbbell Overhead Walking Lunge – here we are adding two elements of instabiility – first holding the weight overhead and second, using dumbells instead of barbells. Barbells do create more stability and allow one arm to compensate for the other, while dumbells force each arm to hold up it’s fair share of the weight.

This added instability helps to strengthen the core and also the smaller stabilising muscles in the shoulders, but progress your weights carefully so as not to destabilise the shoulder joint before it has had a chance to strengthen.

If you are struggling, you could replace the dumbells with a plate in the overhead position, which may feel more comfortable.

Points Of Performance

  • Hold dumbbells at full arm extension
  • Maintain lockout throughout movement
  • One leg steps forward
  • Keep heel of forward leg down
  • Raise heel of back leg
  • Lower torso until back knee touches the ground
  • Forward leg shin remains relatively vertical
  • Complete at full hip and knee extension
  • Opposite leg begins next step
  • Can be performed with 1 or 2 dumbbells

The post MOVEMENT TIP: Dumbell Overhead Walking Lunge appeared first on Andfit.

]]>
MOVEMENT TIP: The Dumbbell Split Jerk https://www.andfit.co.nz/movement-tip-the-dumbbell-split-jerk/ Mon, 18 Dec 2017 02:22:35 +0000 http://demo.wodsites.co/movement-tip-the-dumbell-push-jerk-copy/ The post MOVEMENT TIP: The Dumbbell Split Jerk appeared first on Andfit.

]]>

Moving on from the Dumbell Push Jerk, CrossFit Seminar Staff member James Hobart demonstrates the Dumbbell Split Jerk, which builds on our Dumbell Push Jerk by dropping into a lunge rather than a semi-dip. This allows us to drop to a greater depth and thus lift a heavier weight.

Points Of Performance

  • Stand on feet with hip-width apart
  • Dumbbells rest on the shoulders
  • Elbows slightly in front of the body in level with the shoulders
  • Torso dips straight down
  • Hips and legs extend rapidly then press under
  • Receive the dumbbells in a lunge position
  • Heels stay down until hips and legs extend
  • Bring feet together, one foot at a time

The post MOVEMENT TIP: The Dumbbell Split Jerk appeared first on Andfit.

]]>
MOVEMENT TIP: The Dumbell Push Jerk https://www.andfit.co.nz/movement-tip-the-dumbell-push-jerk/ Mon, 18 Dec 2017 02:20:12 +0000 http://demo.wodsites.co/movement-tip-the-dumbell-thruster-copy/ The post MOVEMENT TIP: The Dumbell Push Jerk appeared first on Andfit.

]]>

CrossFit Seminar Staff member James Hobart demonstrates the Dumbbell Push Jerk. Very similarly to the barbell Push Jerk, we are aiming to drop under the dumbells as we press them up (but only after the hips are fully extended). This makes it easier to lift more weight, as the arms don’t need to work as hard.

Points Of Performance

  • Stand on feet with hip-width apart
  • Dumbbells rest on the shoulders
  • Elbows slightly in front of the body in level with the shoulders
  • Torso dips straight down
  • Hips and legs extend rapidly then press under
  • Receive the dumbbells in a partial overhead squat
  • Heels stay down until hips and legs extend
  • Dumbbells move over the middle of both feet
  • Complete at full hip, knee and arm extension

The post MOVEMENT TIP: The Dumbell Push Jerk appeared first on Andfit.

]]>
MOVEMENT TIP: The Dumbell Thruster https://www.andfit.co.nz/movement-tip-the-dumbell-thruster/ Mon, 18 Dec 2017 02:17:23 +0000 http://demo.wodsites.co/movement-tip-the-dumbell-push-press-copy/ The post MOVEMENT TIP: The Dumbell Thruster appeared first on Andfit.

]]>

CrossFit Seminar Staff member James Hobart demonstrates the Dumbbell Thruster, which is really just a combination of the Dumbell Front Rack Squat and the Dumbell Push Press.

Initially squatting, with the dumbells racked on the shoulders, you drive through the heels to create an explosive upward movement once the hips fully extend, at which point you press upwards with the arms to end with the dumbells in an overhead position.

Points Of Performance

  • Stand on feet with shoulder-width apart
  • Dumbbells rest on the shoulders
  • Elbows slightly in front of the body in level with the shoulders
  • Hips descend back down, lower than the knees
  • Lumbar curve maintained
  • Knees in line with toes
  • Make sure elbows don’t touch the knees
  • Hips and legs extend rapidly, then press
  • Heels down until hips and legs extend
  • Dumbbells move over the middle of both feet
  • Complete at full hip, knee and arm extension

The post MOVEMENT TIP: The Dumbell Thruster appeared first on Andfit.

]]>
MOVEMENT TIP: The Dumbell Push Press https://www.andfit.co.nz/movement-tip-the-dumbell-push-press/ Mon, 18 Dec 2017 02:14:22 +0000 http://demo.wodsites.co/movement-tip-the-dumbell-press-copy/ The post MOVEMENT TIP: The Dumbell Push Press appeared first on Andfit.

]]>

Following on from the Dumbell Overhead Press last week, today CrossFit Seminar Staff member James Hobart demonstrates the Dumbbell Push Press, where we dip and drive from the heels in order to generate momentum with the hip extension, thereby making it easier to press up with the arms.

As well as providing more instability, using dumbells can be more comfortable for those who are tight in the shoulders as you don’t have hold the arms in the same position as you would when holiding a barbell. You can rotate the shoulder slightly if needs be.

Points Of Performance

  • Stand on feet with hip-width apart
  • Dumbbells rest on the shoulders
  • Elbows slightly in front of the body in level with the shoulders
  • Torso dips straight down
  • Heels down, hips and legs extend, then press
  • Dumbbells move over the middle of both feet
  • Complete at full hip, knee and arm extension

The post MOVEMENT TIP: The Dumbell Push Press appeared first on Andfit.

]]>
MOVEMENT TIP: The Dumbell Press https://www.andfit.co.nz/movement-tip-the-dumbell-press/ Mon, 18 Dec 2017 02:10:45 +0000 http://demo.wodsites.co/movement-tip-dumbell-front-rack-lunge-copy/ The post MOVEMENT TIP: The Dumbell Press appeared first on Andfit.

]]>

CrossFit Seminar Staff member James Hobart demonstrates the Dumbbell Press. Using dumbells for any overhead movement creates an element of instability and forces each arm to work independently. With the barbell, the stronger arm can sometimes compensate for the weaker arm and so varying your style of weights can help to address this.

In this movement, just like with the barbell Shoulder Press, it is important to keep the core tight and active to stop the spine from overextending.

Points Of Performance

  • Stand on feet with hip-width apart
  • Dumbbells rest on the shoulders
  • Elbows slightly in front of the body in level with the shoulders
  • Dumbbells move over the middle of both feet
  • Torso and legs remain static
  • Heels down
  • Shoulders push up into the dumbbells
  • Complete at full arm extension

The post MOVEMENT TIP: The Dumbell Press appeared first on Andfit.

]]>
MOVEMENT TIP: Dumbell Front Rack Lunge https://www.andfit.co.nz/movement-tip-dumbell-front-rack-lunge/ Mon, 18 Dec 2017 02:05:46 +0000 http://demo.wodsites.co/movement-tip-the-kettlebell-snatch-copy/ The post MOVEMENT TIP: Dumbell Front Rack Lunge appeared first on Andfit.

]]>

Dumbells haven’t featured heavily in CrossFit, at least not as much as Barbells, but all that changed at the 2017 CrossFit Open. In 2017, not a single barbell was featured at either the CrossFit Open or the CrossFit Regionals – Dumbells, and to some extent kettlebells, were used instead. Since it looks like dumbells are here to stay, over the next few weeks, we’ll be looking at each of these movments in our dumbell series.

First up, CrossFit Seminar Staff member Julie Foucher demonstrates the Dumbbell Front Rack lunge. Just as with the Front Rack Barbell Lunges, remember to keep the knees aligned to the toes and the weight on the heel of the front foot.

This front rack position can also be used for Squats.

Points Of Performance

  • Hold dumbbels at the shoulders
  • One leg steps forward
  • Keep heel of forward leg down
  • Raise heel of back leg
  • Lower torso until back knee touches the ground
  • Forward leg shin remains relatively vertical
  • Complete at full hip and knee extension
  • Opposite leg begins next step
  • Can be performed with 1 or 2 dumbbells

The post MOVEMENT TIP: Dumbell Front Rack Lunge appeared first on Andfit.

]]>
MOVEMENT TIP: The Kettlebell Snatch https://www.andfit.co.nz/movement-tip-the-kettlebell-snatch/ Mon, 18 Dec 2017 02:00:33 +0000 http://demo.wodsites.co/movement-tip-the-muscle-snatch-copy/ The post MOVEMENT TIP: The Kettlebell Snatch appeared first on Andfit.

]]>

The Kettlebell Snatch, as demonstrated here by CrossFit Seminar Staff member James Hobart, is a great single arm exercise for developing all the similar strength and movement technique as the barbell Snatch, but with a few extra benefits:
– strengthens the stabiliser muscles in the shoulders
– addresses any left-right imbalances that may compensate for each other with barbell work
– works the core as it works against the tendency for the body to rotate with single arm work

So don’t see the kettlebell version of the Snatch as the easy option!

Points Of Performance

  • Deadlift kettlebell to the hip
  • Knees flex slightly, while hips push back
  • Lumbar curve maintained
  • Extend hips and legs
  • Heels down until hips and legs extend
  • Shoulder shrugs, followed by a pull under with the arms
  • Arms extend overhead, catching kettlebell on wrist
  • Complete at full hip, knee and arm extension

The post MOVEMENT TIP: The Kettlebell Snatch appeared first on Andfit.

]]>
MOVEMENT TIP: The Muscle Snatch https://www.andfit.co.nz/movement-tip-the-muscle-snatch/ Mon, 18 Dec 2017 01:54:11 +0000 http://demo.wodsites.co/movement-tip-the-snatch-balance-copy/ The post MOVEMENT TIP: The Muscle Snatch appeared first on Andfit.

]]>

CrossFit Seminar Staff member James Hobart demonstrates the Snatch Balance, which is a great exercise for developing speed, timing and precision dropping under the bar and strength in the catch position for the snatch.

As with the Overhead Squat, it needs a strong mobility throughout the body and most people would perform this exercise at fairly light weights as a drill until they had developed strength and mobility in the Overhead Squat position.

Points Of Performance

  • Stand on feet with hip-width apart
  • Bar rests on upper back
  • Overhead squat grip on the bar
  • Torso dips straight down
  • Hips and legs extend rapidly
  • Press under so the bar does not move significantly
  • Feet move to shoulder-width stance
  • Bar is received at the bottom of an overhead squat
  • Complete at full hip, knee and arm extension

The post MOVEMENT TIP: The Muscle Snatch appeared first on Andfit.

]]>
MOVEMENT TIP: The Snatch Balance https://www.andfit.co.nz/movement-tip-the-snatch-balance/ Mon, 18 Dec 2017 01:49:52 +0000 http://demo.wodsites.co/movement-tip-hang-power-snatch-copy/ The post MOVEMENT TIP: The Snatch Balance appeared first on Andfit.

]]>

CrossFit Seminar Staff member James Hobart demonstrates the Snatch Balance, which is a great exercise for developing speed, timing and precision dropping under the bar and strength in the catch position for the snatch.

As with the Overhead Squat, it needs a strong mobility throughout the body and most people would perform this exercise at fairly light weights as a drill until they had developed strength and mobility in the Overhead Squat position.

Points Of Performance

  • Stand on feet with hip-width apart
  • Bar rests on upper back
  • Overhead squat grip on the bar
  • Torso dips straight down
  • Hips and legs extend rapidly
  • Press under so the bar does not move significantly
  • Feet move to shoulder-width stance
  • Bar is received at the bottom of an overhead squat
  • Complete at full hip, knee and arm extension

The post MOVEMENT TIP: The Snatch Balance appeared first on Andfit.

]]>
MOVEMENT TIP: The Hang Power Snatch https://www.andfit.co.nz/movement-tip-hang-power-snatch/ Mon, 18 Dec 2017 01:41:05 +0000 http://demo.wodsites.co/movement-tip-the-power-snatch-copy/ The post MOVEMENT TIP: The Hang Power Snatch appeared first on Andfit.

]]>

This week CrossFit Seminar Staff member Julie Foucher demonstrates the Hang Power Snatch for us. By this stage you may be getting a little confused as the length of the movement name grows longer and longer! But if you break it down, it’s a fairly simple combination of the last 3 variations of the Snatch that we covered:
1. Hang – starting from above the ground (usually just above the knee)
2. Power – don’t have to drop into a full squat position
3. Snatch

Points Of Performance

  • Hip-width stance
  • Hands wide enough that the bar rests in crease of hips when legs and hips are extended
  • Hook grip on the bar
  • Shoulders over or slightly in front of the bar at set-up
  • Lumbar curve maintained
  • Hips and shoulders rise at the same rate
  • Then hips extrend rapidly
  • Heels down until hips and legs extend
  • Shoulders shrug, followed by a pull under with the arms
  • Bar is received in a partial overhead squat
  • Complete at full hip, knee and arm extension with the bar over the middle of both feet

The post MOVEMENT TIP: The Hang Power Snatch appeared first on Andfit.

]]>
MOVEMENT TIP: The Power Snatch https://www.andfit.co.nz/movement-tip-the-power-snatch/ Mon, 18 Dec 2017 01:32:50 +0000 http://demo.wodsites.co/movement-tip-the-hang-snatch-copy/ The post MOVEMENT TIP: The Power Snatch appeared first on Andfit.

]]>

The Power Snatch, as demonstrated here by CrossFit Seminar Staff member Julie Foucher, is simply a Snatch where you don’t have to hit full depth on the Squat.

In weightlifting, this exercise is used to develop power in the pulls of the Snatch, but in Crossit, it has become a fully fledged movement on it’s own and often features in workouts. Theoretically, you should be able to Snatch more weight than you can Power Snatch, but in CrossFit it is typical for athletes to be able to Power Snatch more, due to the fact it is less technical in nature.

Points Of Performance

  • Stand on feet with hip-width apart
  • Hands wide enough that the bar rests in crease of hips when legs and hips are extended
  • Hook grip on the bar
  • Shoulders slightly in front of the bar at set-up
  • Lumbar curve maintained
  • Hips and shoulders rise at the same rate
  • Hips extrend rapidly
  • Heels stay down until hips and legs extend
  • Shoulders shrug, followed by a pull under with the arms
  • Bar is received in a partial overhead squat
  • Squat complete at full hip, knee and arm extension with the bar over the middle of both feet

The post MOVEMENT TIP: The Power Snatch appeared first on Andfit.

]]>
MOVEMENT TIP: The Hang Snatch https://www.andfit.co.nz/movement-tip-the-hang-snatch/ Mon, 18 Dec 2017 01:25:13 +0000 http://demo.wodsites.co/movement-tip-the-snatch-copy/ The post MOVEMENT TIP: The Hang Snatch appeared first on Andfit.

]]>

While the Snatch is executed from the ground, the Hang Snatch, demonstrated here by CrossFit Seminar Staff member James Hobart, is a variation of the movement which is started from a ‘hanging’ position i.e. above ground level in any of the following start points:

High-Hang: Upper thigh
Mid-hang: Mid-thigh
Hang: Top of knee caps
Knee: Bar at knee caps
Low: Bar just below knees

If nothing is specified, the hang snatch is typically done from just above the knee.

The hang snatch is often used in the initial months of working on the snatch to ensure proper positioning and balance and by more experienced athletes as a training exercise to produce more explosive force in the hip extension.

Points Of Performance

  • Stand on feet with hip-width apart
  • Hands wide enough that the bar rests in crease of hips when legs and hips are extended
  • Hook grip on the bar
  • Lumbar curve maintained
  • Deadlift the bar to hang position
  • Extrend hips and legs rapidly
  • Heels stay down until hips and legs extend
  • Shoulders shrug, followed by a pull under with the arms
  • Bar is received at the bottom of an overhead squat
  • Complete at full hip, knee and arm extension with the bar over the middle of both feet

The post MOVEMENT TIP: The Hang Snatch appeared first on Andfit.

]]>
MOVEMENT TIP: The Snatch https://www.andfit.co.nz/movement-tip-the-snatch/ Mon, 18 Dec 2017 01:15:29 +0000 http://demo.wodsites.co/movement-tip-handstand-walk-copy/ The post MOVEMENT TIP: The Snatch appeared first on Andfit.

]]>

The Snatch, demonstrated here by CrossFit Seminar Staff member Julie Foucher, is the first of the two lifts contested in the sport of weightlifting. The athlete lifts the barbell from the floor to overhead in a single action. It is also used by athletes in other sports to develop power, speed, precision and mobility.

In CrossFit, the Snatch is usually learnt later than the clean as, while the initial pulls from the ground follow the same pattern (with a wider grip), there is a big difference in the catch. With the clean, we catch the barbell on the shoulders in a Front Squat, while with the Snatch we catch the barbell overhead in an Overhead Squat. We talked previously about how important it is to develop good ankle, thoracic and shoulder mobility for the Overhead Squat, and this is just as, if not more, important for the Snatch, because here we are dropping into the Overhad Squat position at speed.

So don’t be in a hurry to master the Snatch – taking time to work on the components and mobility will not only protect you from injury, but will improve your performance in the longer term.

Points Of Performance

  • Hip-width stance
  • Hands wide enough that the bar rests in crease of hips when legs and hips are extended
  • Hook grip on the bar
  • Shoulders slightly in front of the bar at set-up
  • Lumbar curve maintained
  • Hips and shoulders rise at the same rate
  • Then hips extend rapidly
  • Heels down until hips and legs extend
  • Shoulders shrug, followed by a pull under with the arms
  • Bar is received at the bottom of an overhead squat
  • Squat complete at full hip, knee and arm extension with the bar over the middle of both feet

The post MOVEMENT TIP: The Snatch appeared first on Andfit.

]]>
MOVEMENT TIP: The Handstand Walk https://www.andfit.co.nz/movement-tip-handstand-walk/ Mon, 18 Dec 2017 01:02:49 +0000 http://demo.wodsites.co/movement-tip-kipping-handstand-push-up-copy/ The post MOVEMENT TIP: The Handstand Walk appeared first on Andfit.

]]>

Everybody wants to handstand walk! CrossFit Seminar Staff member Julie Foucher does a great and balanced demonstration for us here.

Like most gymnastics movement, the handstand walk needs a lot of consistent strength and mobility work to get there. The most important aspect of the Handstand or Handstand Walk is having a strong Hollow Position, so work on Hollow holds and rocks at every opportunity you get. At the same time, work on handstand progressions such as Wall Walks, Pike Handstands with you feet or knees on a box, Shoulder Taps and as many core exercises as you can. Naturally any overhead strength work is also useful.

Points Of Performance

  • Stand on hands positioned shoulder-width apart
  • Arms remain extended
  • Abdominals remain braced, spine neutral
  • Allow weight to shift from one side to another
  • Move unloaded arm forward

The post MOVEMENT TIP: The Handstand Walk appeared first on Andfit.

]]>
MOVEMENT TIP: The Kipping Handstand Push-Up https://www.andfit.co.nz/movement-tip-kipping-handstand-push-up/ Mon, 18 Dec 2017 00:58:53 +0000 http://demo.wodsites.co/movement-tip-strict-handstand-pushup-copy/ The post MOVEMENT TIP: The Kipping Handstand Push-Up appeared first on Andfit.

]]>

The Kipping Handstand Push-Up, demonstrated here by CrossFit Seminar Staff member James Hobart is a movement best left to the competitive CrossFit athletes. While it does make it easier to complete a handstand pushup, the lack of control required for the Strict Handstand Pushup means there is a reasonably high risk of hitting your head on the ground and injuring your neck.

Approach with caution and work with your coaches to ensure you have the strength to always remain in control in this position before attempting the Kipping Handstand Push-Up.

Points Of Performance

  • Hands just outside shoulder-width
  • Start with arms extended
  • Descend until head touches the ground
  • Elbows move forward during the descent
  • Hips and legs flex into a tucked position
  • Hips and legs extend rapidly, then arms press
  • Abdominals remain braced
  • Complete at full arm extension with a straight line of the body

The post MOVEMENT TIP: The Kipping Handstand Push-Up appeared first on Andfit.

]]>
MOVEMENT TIP: The Strict Handstand Pushup https://www.andfit.co.nz/movement-tip-strict-handstand-pushup/ Mon, 18 Dec 2017 00:21:00 +0000 http://demo.wodsites.co/movement-tip-the-wall-walk-copy/ The post MOVEMENT TIP: The Strict Handstand Pushup appeared first on Andfit.

]]>

CrossFit Seminar Staff member James Hobart demonstrates the handstand push-up. For some of us, getting upside down is something we haven’t done since we were kids, so your first step may be to simply turn upside down with your feet or knees on a box or a Handstand against the wall.

There are plenty of ways to build more strength for the actual Handstand Pushup – start with Pushups in a down dog position and then start lifting your feet onto progressively higher boxes. Using dumbells or kettlebells overhead (particularly the controlled lowering of heavier weights) is also a great way to get stronger for Handstand Pushups.

Once you are actually doing the Handstand Pushups, you may start by lowering yourself just to one or two abmats, but make sure you don’t neglect building strength in that last part of the movement (using one of the other progressions mentioned).

Points Of Performance

  • Stand on hands positioned shoulder-width apart
  • Start with arms extended
  • Descend body until head touches the ground
  • Elbows bend forward during the descent
  • Abdominals remain braced
  • Complete at full arm extension with a straight line of the body

The post MOVEMENT TIP: The Strict Handstand Pushup appeared first on Andfit.

]]>
MOVEMENT TIP: The Wall Walk https://www.andfit.co.nz/movement-tip-the-wall-walk/ Mon, 18 Dec 2017 00:16:04 +0000 http://demo.wodsites.co/movement-tip-the-split-jerk-copy/ The post MOVEMENT TIP: The Wall Walk appeared first on Andfit.

]]>

We take a break from Olympic Weightlifting for a few weeks as we look again at some Gymnastics or Bodyweight skills.

The Wall Walk is challenging and fun way to build up core and handstand strength, as demonstrated here by CrossFit Seminar Staff member James Hobart. Key with this movement is to keep the core nice and tight and the shoulders active, so you don’t risk hurting the back, neck or shoulders if the back starts to arch.

If you find this a little challenging, start with first your knees and then just your feet on a box as you walk your hands back.

Points Of Performance

  • Start prone on the floor
  • Extend arms
  • Maintain neutral spine
  • Feet climb up the wall as hands walk closer to the wall
  • Arms remain extended
  • Continue until chest and thighs touch the wall
  • Return to prone position on the floor

The post MOVEMENT TIP: The Wall Walk appeared first on Andfit.

]]>
MOVEMENT TIP: The Split Jerk https://www.andfit.co.nz/movement-tip-the-split-jerk/ Sun, 17 Dec 2017 23:19:27 +0000 http://demo.wodsites.co/movement-tip-the-push-jerk-copy/ The post MOVEMENT TIP: The Split Jerk appeared first on Andfit.

]]>

As the two Olympic Lifts require the barbell to move from the floor to an overhead position, we will need to add something to the Clean to get the barbell from the shoulders to the overhead position and so we reach the second part of the Clean and Jerk – the Split Jerk – demonstrated here by CrossFit Seminar Staff member Julie Foucher.

The Split Jerk is very similar to the Push Jerk we looked at last week, except that we increase the depth we can drop (and hence the weight we can lift), but splitting the legs into a lunge position.

To protect your knees and hips, make sure that your feet are in the correct position – in particular the back foot should be slightly turned inwards.

Points Of Performance

  • Stand on feet with hip-width apart
  • Position hands on the sides of both shoulders
  • Elbows slightly in front of the bar
  • Hold the bar with a full grip
  • Torso dips stright down
  • Hips and legs extend rapidly then press under
  • Receive the bar in a lunge position
  • Heels stay down until hips and legs extend
  • Bring feet together, one foot at a time
  • Complete when both feet are together with full hip, knee and arm extension

The post MOVEMENT TIP: The Split Jerk appeared first on Andfit.

]]>
MOVEMENT TIP: The Push Jerk https://www.andfit.co.nz/movement-tip-the-push-jerk/ Sun, 17 Dec 2017 23:13:43 +0000 http://demo.wodsites.co/movement-tip-muscle-clean-copy/ The post MOVEMENT TIP: The Push Jerk appeared first on Andfit.

]]>

The Push Jerk, demonstrated here by Julie Foucher, CrossFit Level 1 Seminar Staff member, is similar to the Push Press in that we have the same set-up, we dip and drive through the heels, hit full hip extension and then use this hip generated momentum to press the barbell overhead. However as soon as the barbell starts to move, we add in one tricky little extra movement – we let the knees and hips bend and the body drop a little as fast as possible. This means that we don’t have to press the barbell quite as high as if we were standing upright, which in turn means we can lift heavier weights.

You may feel very unco-ordinated when you first start playing with the Push Jerk – it feels like you should be moving in several different directions at once and the more you think about it, the more it falls apart! But don’t worry, it’s really just a timing issue and with a bit of practise, you will find it falling into place and you’ll be moving that bar like a pro! Key to getting this movement right is making sure you have a solid Push Press (i.e. driving through the heels and not pressing with the arms until the hips reach full extension). If you don’t have the Push Press nailed down, then likely your body will be trying to do several things at once when you start working on the Push Jerk.

Points Of Performance

  • Stand on feet with hip-width apart
  • Position hands on the sides of both shoulders
  • Elbows slightly in front of the bar
  • Hold the bar with a full grip
  • Torso dips stright down
  • Hips and legs extend rapidly then press under
  • Receive the bar in a partial overhead
  • Heels stay down until hips and legs extend
  • Bar moves over the middle of both feet
  • Complete at full hip, knee and arm extension

The post MOVEMENT TIP: The Push Jerk appeared first on Andfit.

]]>
MOVEMENT TIP: The Muscle Clean https://www.andfit.co.nz/movement-tip-muscle-clean/ Sat, 16 Dec 2017 02:55:44 +0000 http://demo.wodsites.co/movement-tip-hang-power-clean-copy/ The post MOVEMENT TIP: The Muscle Clean appeared first on Andfit.

]]>

CrossFit Seminar Staff member Julie Foucher demonstrates the Muscle Clean for us this week. With the Muscle Clean, the legs do not bend after the hips extend. This means you can’t drop your body under the bar and effectively need to use your arms more. You do this by bringing the elbows high enough to turnover into the Front Squat.

As the arms tend to be a lot weaker than the hips and legs, it’s likely that you would use a much lighter weight for your Muscle Clean than for a Clean.

Points Of Performance

  • Stand on feet with hip-width apart
  • Hands about one thumb’s distance from hips
  • Hook grip on the bar
  • Shoulders slightly in front of the bar at set-up
  • Lumbar curve maintained
  • Hips and shoulders rise at the same rate, then hips extend rapidly
  • Heels down until hips and legs extend
  • Shoulders shrug, followed by a pull under with the arms
  • Bar is pulled to rack position keeping the legs straight
  • Complete at full hip and knee extension with the bar in the front rack position

The post MOVEMENT TIP: The Muscle Clean appeared first on Andfit.

]]>
MOVEMENT TIP: The Hang Power Clean https://www.andfit.co.nz/movement-tip-hang-power-clean/ Sat, 16 Dec 2017 02:53:21 +0000 http://demo.wodsites.co/movement-tip-power-clean-copy/ The post MOVEMENT TIP: The Hang Power Clean appeared first on Andfit.

]]>

This week CrossFit Seminar Staff member Julie Foucher demonstrates the Hang Power Clean for us. By this stage you may be getting a little confused with all the different names and variations on the clean! But don’t panic just yet – it’s fairly straightforward when you break it down using the ideas of Hang and Power that we learnt in the previous weeks i.e.:
1. Hang – starting from above the ground (usually just above the knee)
2. Power – don’t have to drop into a full squat position
3. Clean (differentiates it from the Snatch, the other Olympic Weightlifting movement)

Points Of Performance

  • Stand on feet with hip-width apart
  • Hands about one thumb’s distance from hips
  • Hook grip on the bar
  • Lumbar curve maintained
  • Deadlift the bar to the hang position
  • Extend hips and legs rapidly
  • Heels down until hips and legs extend
  • Shoulders shrug, followed by a pull under with the arms
  • Bar is received in a partial front squat
  • Complete at full hip and knee extension with the bar in the front rack position

The post MOVEMENT TIP: The Hang Power Clean appeared first on Andfit.

]]>
MOVEMENT TIP: The Power Clean https://www.andfit.co.nz/movement-tip-power-clean/ Sat, 16 Dec 2017 02:50:20 +0000 http://demo.wodsites.co/movement-tip-hang-clean-copy/ The post MOVEMENT TIP: The Power Clean appeared first on Andfit.

]]>

The Power Clean, as demonstrated here by CrossFit Seminar Staff member Julie Foucher, is simply a Clean where you don’t have to hit full depth on the Squat part of the movement.

In weightlifting, this exercise is used to develop power in the pulls of the Clean, but in Crossit, it has become a fully fledged movement on it’s own and often features in workouts. Theoretically, you should be able to Clean more weight than you can Power Clean, but in CrossFit it is typical for athletes to be able to Power Clean more, due to the fact it is less technical in nature.

Points Of Performance

  • Stand on feet with hip-width apart
  • Hands about one thumb’s distance from hips
  • Hook grip on the bar
  • Shoulders slightly in front of the bar at set-up
  • Lumbar curve maintained
  • Hips and shoulders rise at the same rate, then hips extend rapidly
  • Heels down until hips and legs extend
  • Shoulders shrug, followed by a pull under with the arms
  • Bar is received in a partial squat
  • Complete at full hip and knee extension with the bar in the front rack position

The post MOVEMENT TIP: The Power Clean appeared first on Andfit.

]]>
MOVEMENT TIP: The Hang Clean https://www.andfit.co.nz/movement-tip-hang-clean/ Sat, 16 Dec 2017 02:47:19 +0000 http://demo.wodsites.co/movement-tip-the-clean-copy/ The post MOVEMENT TIP: The Hang Clean appeared first on Andfit.

]]>

While the Clean is executed from the ground, the Hang Clean, demonstrated here by CrossFit Seminar Staff member James Hobart, is a variation of the movement, which is started from a ‘hanging’ position i.e. above ground level in any of the following start points:

High-Hang: Upper thigh
Mid-hang: Mid-thigh
Hang: Top of knee caps
Knee: Bar at knee caps
Low: Bar just below knees

If nothing is specified, the Hang Clean is typically done from just above the knee and this is the point that everybody should work from in the initial months of learning and developing the Clean. More experienced athletes work the hang positions as a training exercise to produce more explosive force in the hip extension.

Points Of Performance

  • Stand on feet with hip-width apart
  • Hands about one thumb’s distance from hips
  • Hook grip on the bar
  • Lumbar curve maintained
  • Deadlift the bar to the hang position
  • Extend hips and legs rapidly
  • Heels down until hips and legs extend
  • Shoulders shrug, followed by a pull under with the arms
  • Bar is received at the bottom of a front squat
  • Complete at full hip and knee extension with the bar in the front rack position

The post MOVEMENT TIP: The Hang Clean appeared first on Andfit.

]]>
MOVEMENT TIP: The Clean https://www.andfit.co.nz/movement-tip-the-clean/ Sat, 16 Dec 2017 02:43:55 +0000 http://demo.wodsites.co/movement-tip-medicine-ball-clean-copy/ The post MOVEMENT TIP: The Clean appeared first on Andfit.

]]>

CrossFit Seminar Staff member James Hobart demonstrates the clean, which is the first of a two part Olympic Lift, the Clean and Jerk. When done correctly, this is a highly skilled movement to the point of being a wonderful combination of art and science. It is worth spending time to perfect the various components of this movement before working on the full movement of the Clean. These components include:
– The Front Squat
– Using hip extension to ‘throw’ the bar rather than arms to ‘pull’ the bar, although it can be quite confusing when we talk about the pulls
– The shrug and resisting the urge to use your arms
Once your components are solid, putting them together is fairly straightforward and just a matter of timing.

Points Of Performance

  • Stand on feet with hip-width apart
  • Hands about one thumb’s distance from hips
  • Hook grip on the bar until rack position
  • Shoulders slightly in front of the bar at set-up
  • Lumbar curve maintained
  • Hips and shoulders rise at the same rate
  • Hips extrend rapidly
  • Heels down until hips and legs extend
  • Shoulders shrug, followed by a pull under with the arms
  • Bar is received at the bottom of a front squat
  • Complete at full hip and knee extension with the bar in the front rack position

The post MOVEMENT TIP: The Clean appeared first on Andfit.

]]>
MOVEMENT TIP: Medicine Ball Clean https://www.andfit.co.nz/movement-tip-medicine-ball-clean/ Sat, 16 Dec 2017 02:41:10 +0000 http://demo.wodsites.co/movement-tip-skin-the-cat-copy/ The post MOVEMENT TIP: Medicine Ball Clean appeared first on Andfit.

]]>

CrossFit Seminar Staff member Julie Foucher demonstrates the medicine-ball clean, which is one of CrossFit’s 9 Foundational Movements. This is a great little exercise, along with the Kettlebell Swing, to start building up those concepts used in the Olympic Lifts i.e. the Snatch and the Clean and Jerk. Over the next few weeks, we will be looking at the various expressions and components of the second of these movements, the Clean and Jerk.

With the Medicine Ball Clean, we focus on a couple of things, first is using your hips to move the ball, rather than simply picking the ball up with our hands. Given the relative ease you could lift the ball with your arms, this is sometimes a tricky concept to grasp, but it is the single most useful concept you can master, not just for Olympic Weightlifting, but also for all functional movement as it is how children move, using their core and bigger hip muscles to pick things up rather than the extremities such as the arms. In CrossFit terms, this is called ‘Core to Extremity’.

The other concept to grasp while playing with the Medball Clean is to try and keep the Medball from turning. Let the logo on the Medball face upwards at the start and try to keep it facing that way when you are finished. This helps you to understand that it is not the ball (and later the barbell) that moves around you, but rather it is you who needs to move your body around the ball (and later the barbell).

Points Of Performance

  • Stand on feet shoulder-width apart
  • Ball in between both feet with palms on the ball
  • Knees in line with the toes
  • Shoulders over teh ball at set-up
  • Lumbar curve maintained
  • Hips extend rapidly, then shoulders shrug
  • Arms pull the ball upward coming from the bottom of the squat
  • Heels down until hips and legs extend
  • Ball moves over the middle of both feet

The post MOVEMENT TIP: Medicine Ball Clean appeared first on Andfit.

]]>
MOVEMENT TIP: The Skin the Cat https://www.andfit.co.nz/movement-tip-skin-the-cat/ Sat, 16 Dec 2017 02:37:15 +0000 http://demo.wodsites.co/movement-tip-kipping-bar-muscle-up-copy/ The post MOVEMENT TIP: The Skin the Cat appeared first on Andfit.

]]>

This week, CrossFit Seminar Staff member James Hobart demonstrates the skin the cat for us. Skin the Cat is typically a more advanced gymnastics movement. Although it can be quite easy to flip over into the Skin the Cat position, the move really requires the strength to move into and out of the position with perfect control. Without the strength to move in a controlled way, you effectively dump the bodyweight into an extreme end of range position for the shoulders, which obviously a very risky position for the shoulders.

Points Of Performance

  • Start hanging with arms extended
  • Keep arms extended throughout the movement
  • Pull toes towards the rings until the body is in a pike position
  • Slowly lower the feet towards the floor with control
  • Allow rings to rotate as the legs descend
  • Allow the feet to descend as low as the shoulders can control
  • Reverse the motion by using the abs and shoulders to pull the legs up
  • Perform with bent legs to lessen difficulty

The post MOVEMENT TIP: The Skin the Cat appeared first on Andfit.

]]>
MOVEMENT TIP: The Kipping Bar Muscle-up https://www.andfit.co.nz/movement-tip-kipping-bar-muscle-up/ Sat, 16 Dec 2017 02:33:10 +0000 http://demo.wodsites.co/movement-tip-strict-muscle-up-copy/ The post MOVEMENT TIP: The Kipping Bar Muscle-up appeared first on Andfit.

]]>

Like the kipping Pull-Up, the Kipping Bar Muscle-Up is easier to achieve than the Strict Muscle-Up as it uses momentum to help throw your bodyweight up and over the bar. CrossFit Seminar Staff member James Hobart demonstrates the kipping bar muscle-up in this video.

Just like with other kipping movements, we do caution you to build strength and flexibility in the upper body to reduce the stress on the shoulders and upper back before working on the Kipping Bar Muscle-Up.

Points Of Performance

  • Position hands on the bar wider than the shoulder
  • Full grip on the bar
  • Start hanging with arms extended
  • Initiate swing with shoulders
  • Alternate between arched and hollow positions
  • Drive hips towards the bar while in the hollow position
  • At the same time, push down on the bar with straight arms
  • Torso leans forward
  • Complete at full arm extension at support position

The post MOVEMENT TIP: The Kipping Bar Muscle-up appeared first on Andfit.

]]>
MOVEMENT TIP: The Strict Muscle-Up https://www.andfit.co.nz/movement-tip-strict-muscle-up/ Sat, 16 Dec 2017 02:22:09 +0000 http://demo.wodsites.co/movement-tip-butterfly-pull-up-copy/ The post MOVEMENT TIP: The Strict Muscle-Up appeared first on Andfit.

]]>

The Strict Muscle-Up is an impressive skill by anyone’s standards – take a look at this video of CrossFit Seminar Staff member Julie Foucher, demonstrating the strict muscle-up. Not only does this movement require a lot of upper body strength, but it also needs a fair degree of shoulder mobility to move through the deeper than usual ring dip position.

The muscle up can broadly be divided into three sections:
1) The chest to bar pull
2) The transition
3) The Ring Dip

The range of motion for the pull-up and ring dip are more than would normally be done for those movements, so if you are training towards a muscle up, then make sure when you train these movements, you train the full range of motion you will need for the muscle-up.

To make it a little easier when you start out, support some of your bodyweight by having your feet or toes on the ground or a box as you work through the movement.

Points Of Performance

  • Rings set approximately shoulder-width apart
  • False grip on the rings
  • Start with arms extended
  • Pull rings to sternum as torso leans back
  • Move the chest over the rings, hands and elbows stay close to the body
  • Complete at full arm extension at support position

The post MOVEMENT TIP: The Strict Muscle-Up appeared first on Andfit.

]]>
MOVEMENT TIP: The Butterfly Pull-Up https://www.andfit.co.nz/movement-tip-butterfly-pull-up/ Sat, 16 Dec 2017 02:19:56 +0000 http://demo.wodsites.co/movement-tip-kipping-chest-to-bar-pull-up-copy/ The post MOVEMENT TIP: The Butterfly Pull-Up appeared first on Andfit.

]]>

Like the kipping pull-up, the Butterfly Pull-Up, demonstrated here by CrossFit Seminar Staff member James Hobart, uses momentum to lift yourself over the bar. The difference with the Butterfly Pull-up is that instead of pushing yourself back from the bar at the top of the movement, you following the momentum of your pulling movement down and forwards under the bar.

This allows you to perform the pull-ups faster, but is still subject to all the cautions we discussed earlier about building up the necessary strength and flexibility in your shoulders and upper back before asking too much of your shoulders.

Points Of Performance

  • Position hands on the bar wider than the shoulder
  • Start hanging with arms extended
  • Initiate swing with shoulders
  • Alternate between arched and hollow positions
  • From the arched position, drive legs towards the bar
  • At the same time, push down on the bar with straight arms
  • Then pull with the arms
  • Pull the body up until chin is higher than the bar
  • Allow torso to move forward while descending
  • Legs move back, placing body into arched position for the next rep

The post MOVEMENT TIP: The Butterfly Pull-Up appeared first on Andfit.

]]>
MOVEMENT TIP: The Kipping Chest-To-Bar Pull Up https://www.andfit.co.nz/movement-tip-kipping-chest-to-bar-pull-up/ Sat, 16 Dec 2017 02:17:04 +0000 http://demo.wodsites.co/movement-tip-kipping-pull-up-copy/ The post MOVEMENT TIP: The Kipping Chest-To-Bar Pull Up appeared first on Andfit.

]]>

Following on from last week’s kipping pull-up, CrossFit Seminar Staff member James Hobart demonstrates the kipping chest-to-bar pull-up for us this week. This is pretty much just like the kipping pull-up, except you’re working a little harder to create enough momentum to get your chest to the bar instead of just your chin over the bar.

Just like the kipping pull-up, you are well advised to develop strength and flexibility in the shoulders and thoracic area before kipping, in order to protect your shoulder joints, particularly in the position when your bodyweight is thrown forward and your arms lifted overhead and behind you.

Points Of Performance

  • Position hands on the bar wider than the shoulder
  • Full grip on the bar
  • Start hanging with arms extended
  • Initiate swing with shoulders
  • Alternate between arched and hollow positions
  • Drive hips towards the bar while in the hollow position
  • At the same time, push down on the bar with straight arms
  • Rapidly extend hips, then pull with arms
  • Pull until chest touches the bar just below the collarbone
  • Chest stays up with eyes looking forward

The post MOVEMENT TIP: The Kipping Chest-To-Bar Pull Up appeared first on Andfit.

]]>
MOVEMENT TIP: The Kipping Pull-Up https://www.andfit.co.nz/movement-tip-kipping-pull-up/ Sat, 16 Dec 2017 02:15:11 +0000 http://demo.wodsites.co/movement-tip-kipping-toes-to-bar-copy/ The post MOVEMENT TIP: The Kipping Pull-Up appeared first on Andfit.

]]>

Today, CrossFit Seminar Staff member James Hobart demonstrates the kipping pull-up. The kipping pull-up differs from the strict Pull-up in that it uses momentum to propel the chin over the bar instead of strict arm pulling strength.

Before kipping, it is advisable to work on building the following to protect from injury::
– core strength, particularly in the hollow position
– shoulders that are strong in the extreme end ranges of motion
– strength to perform at least 2-3 strict pullups

If you jump ahead to kipping pullups because they are easier than strict pull-ups, then you risk injuring yourself by throwing your bodyweight into those extreme ranges of motion (especially shoulder flexion) before building up strength in those positions.

Points Of Performance

  • Position hands on the bar wider than the shoulder
  • Full grip on the bar
  • Start hanging with arms extended
  • Initiate swing with shoulders
  • Alternate between arched and hollow positions
  • Drive hips towards the bar while in the hollow position
  • At the same time, push down on the bar with straight arms
  • Rapidly extend hips, then pull with arms
  • Pull until chin is higher than the bar
  • Descend down pushing body away from the bar

The post MOVEMENT TIP: The Kipping Pull-Up appeared first on Andfit.

]]>
MOVEMENT TIP: The Kipping Toes to Bar https://www.andfit.co.nz/movement-tip-kipping-toes-to-bar/ Sat, 16 Dec 2017 02:12:32 +0000 http://demo.wodsites.co/movement-tip-strict-chest-to-bar-pull-up-copy/ The post MOVEMENT TIP: The Kipping Toes to Bar appeared first on Andfit.

]]>

The Toes to Bar, demonstrated here by CrossFit Seminar Staff member James Hobart is very often the first kipping movement you come across in CrossFit. Kipping is really just the act of generating more movement through swinging, much like you did on the playground swing when you were a kid.

However, one caution when doing any kind of kipping is to be aware that it tends to throw your bodyweight into a more extreme range of motion than you might ordinarily move. Overstressing any joint at the extreme range of motion is high risk, not only for an acute injuiry, but for longer term damange to the ligaments and tendons, which don’t tend to repair as well as muscle.

For that reason, you may prefer to work on modifications that help you to develop core and shoulder strength before you start swinging around on the barbell.

Points Of Performance

  • Position hands on the bar wider than the shoulder
  • Full grip on the bar
  • Start hanging with arms extended
  • Initiate swing with shoulders
  • Alternate between arched and hollow positions
  • Lift feet towards bar while in hollow position
  • At the same time, push down on the bar with straight arms
  • Both feet touch the bar in between the hands

The post MOVEMENT TIP: The Kipping Toes to Bar appeared first on Andfit.

]]>
MOVEMENT TIP: The Strict Chest-to-Bar Pull-up https://www.andfit.co.nz/movement-tip-strict-chest-to-bar-pull-up/ Sat, 16 Dec 2017 02:09:34 +0000 http://demo.wodsites.co/movement-tip-pull-up-copy/ The post MOVEMENT TIP: The Strict Chest-to-Bar Pull-up appeared first on Andfit.

]]>

CrossFit Seminar Staff member James Hobart demonstrates the strict chest-to-bar pull-up, which is exactly like the strict pull-up, but you need to pullyourself higher, so that your chest can touch the bar, rather than just getting your chin over the bar.

It is worth including this extra bit of height when working your supported and negative pullup progressions, so that you build up strength in this extra range of the movement sooner, rather than later, especially if you would like to perform a muscle up in future.

Points Of Performance

  • Full grip on the bar
  • Start hanging with arms extended
  • Pull the body up until teh chest touches the bar and just below the collarbone
  • Chest stays up with eyes looking forward
  • Complete at full arm extension

The post MOVEMENT TIP: The Strict Chest-to-Bar Pull-up appeared first on Andfit.

]]>
MOVEMENT TIP: The Pull-up https://www.andfit.co.nz/movement-tip-pull-up/ Sat, 16 Dec 2017 02:05:41 +0000 http://demo.wodsites.co/movement-tip-ring-row-copy/ The post MOVEMENT TIP: The Pull-up appeared first on Andfit.

]]>

A fundamental movement and one on the wish list of many, the pull-up, often known in CrossFit as the ‘strict’ pullup to distinguish it from the kipping pullup. The strict pull-up, demonstrated here by CrossFit Seminar Staff member James Hobart, is not an easy movement to master and it requires a consistent effort to build up the strength to lift your own bodyweight high enough to get your chin over the bar.

However, it is an impressive indicator of upper body strength and well worth the effort. The initial progressions of your journey towards that first pull-up should include supported pullups (with feet on the floor or a box to give you a little extra support) and negatives, where you lower yourself down slowly. Work with your coaches to put together a program so that you can work towards mastering the pull-up.

Points Of Performance

  • Position hands on the bar wider than the shoulder
  • Full grip on teh bar
  • Start hanging with arms extended
  • Pull the body up until chin is higher than the bar
  • Chest stays up with eyes looking forward
  • Complete at full extension

The post MOVEMENT TIP: The Pull-up appeared first on Andfit.

]]>
MOVEMENT TIP: The Ring Row https://www.andfit.co.nz/movement-tip-ring-row/ Sat, 16 Dec 2017 02:02:40 +0000 http://demo.wodsites.co/movement-tip-the-pistol-copy/ The post MOVEMENT TIP: The Ring Row appeared first on Andfit.

]]>

We are back to gymnastics for our next series of Movement Tips and over the next few weeks we will be looking at pull-ups and variations on the pull-up.

The Ring Row, demonstrated here by CrossFit Seminar Staff member James Hobart, is a fantastic movement to help counter the daily hunching over your computer, phone or desk. It helps to strengthen the muscles between the shoulder blades and shift the shoulders back into a healthier position.

It’s also often used as a first step to building strength for a pull-up – to make the most of the strength building qualities of the movement, keep your core active (i.e. don’t let the lower ribs start to lift or flare out) and ensure that the shoulder blades are pulled back and down in order to activate the lats – try and maintain those activations throughout the ring row.

Walking your feet forward (and your body into a more horizontal position) will make the movement more challenging, but make sure you keep to a level that keeps your core and back muscles engaged.

Points Of Performance

  • Rings set approximately shoulder-width apart
  • Full grip on the rings
  • Start with arms and legs extended
  • Pull elbows back until rings touch sides of chest
  • Arms move close to the body
  • Body remains rigid
  • Complete at full arm extension
  • Scale by moving body into a less horizontal position

The post MOVEMENT TIP: The Ring Row appeared first on Andfit.

]]>
MOVEMENT TIP: The Pistol https://www.andfit.co.nz/movement-tip-the-pistol/ Sat, 16 Dec 2017 02:00:28 +0000 http://demo.wodsites.co/movement-tip-turkish-get-up-copy/ The post MOVEMENT TIP: The Pistol appeared first on Andfit.

]]>

The Pistol Squat, as demonstrated here by CrossFit Seminar Staff member James Hobart, is a one legged squat that, like the Overhead Squat, requires a high degree of mobility, that is, both flexibility and strength in those end of range positions. The Pistol is an advanced movement and it is important to develop the requisite ankle, hip and spine mobility before training this movement. Otherwise you risk potential injury, especially of the back, which is forced to flex (round forwards) to compensate for tightness or weakness in other areas.

Your coach will have many options for you to do instead that will work on building flexibility and strength in the different aspects of the Pistol. Working consistently on these modified versions will bring about your Perfect Pistol sooner than you might think!

Points Of Performance

  • Stand and balance on one leg, with the other leg in front of the body
  • Slowly bend standing leg with hips descending back down, lower than the knee
  • Keep bent knee in line with the toes, and heels in contact with the floor
  • Keep the other leg off the ground
  • Complete at full hip and knee extension of standing leg
  • Keep the chest up as much as possible

The post MOVEMENT TIP: The Pistol appeared first on Andfit.

]]>
MOVEMENT TIP: The Turkish Get-Up https://www.andfit.co.nz/movement-tip-turkish-get-up/ Sat, 16 Dec 2017 01:58:15 +0000 http://demo.wodsites.co/movement-tip-overhead-lunge-copy/ The post MOVEMENT TIP: The Turkish Get-Up appeared first on Andfit.

]]>

CrossFit Seminar Staff member James Hobart demonstrates the Turkish get-up. The Turkish Get-up is a fantastic exercise, that you could do with practically any heavy object, although kettlebells and dumbells are mostly used. This exercise provides excellent torso stabilisation and general strength and mobility and is particularly great at addressing any left vs right muscle imbalances.

Initially this is a tricky move to get right – at the very least you will feel unco-ordinated at the start. The best way to learn the Turkish Get Up is to count your way through each of the positions i.e.:
1. Seated Position
2. Hips lifted to full extension
3. Kneeling Lunge
4. Standing

and then ensure you hit each of those positions on the way down again.

For all over benefits it offers, if you were only allowed to ever do one exercise for the rest of your life, this would most definitely be one of the top choices.

Points Of Performance

  • Start lying on your back with arm extended to teh ceiling
  • Use leg on the same side as the extended arm to push into a seated position
  • Free arm braces
  • Opposite leg moves backward into a lunge position
  • Stand to full hip and leg extension
  • Dumbell/Kettlebell remains overhead with shoulder pushing up
  • Reverse steps to return to start position
  • Keep eye on your dumbell/kettlebell throughout, except when standing – then look straight ahead

The post MOVEMENT TIP: The Turkish Get-Up appeared first on Andfit.

]]>
MOVEMENT TIP: The Overhead Lunge https://www.andfit.co.nz/movement-tip-overhead-lunge/ Sat, 16 Dec 2017 01:56:12 +0000 http://demo.wodsites.co/movement-tip-back-rack-lunge-copy/ The post MOVEMENT TIP: The Overhead Lunge appeared first on Andfit.

]]>

CrossFit Seminar Staff member James Hobart demonstrates the Overhead Lunge here, which is a more challenging version of the back and front rack lunges we looked at previously. The instability of moving forward, while also shifting up and down while you lunge, makes it very difficult to hold the barbell overhead.

Keeping your feet hip width apart thoughout your lunging steps is good for creating more stability in all forms of the lunge, but especially so with the Overhead Lunge.

As with the other forms of the lunge, you could start with lunging on the spot and stepping backwards to create a bit more stability and work up to full depth once all your alignment is in place. A great modification for those starting out with this movement is to hold a plate overhead instead of the barbell.

Points Of Performance

  • Wide grip on the bar
  • Shoulder push up into the bar, exposing the armpits
  • One leg steps forward
  • Keep heel of front leg down
  • Lower torso until back knee touches the ground
  • Forward leg shin remains relatively vertical
  • Complete at full hip and knee extension
  • Opposite leg begins next step

The post MOVEMENT TIP: The Overhead Lunge appeared first on Andfit.

]]>
MOVEMENT TIP: The Back Rack Lunge https://www.andfit.co.nz/movement-tip-back-rack-lunge/ Sat, 16 Dec 2017 01:53:11 +0000 http://demo.wodsites.co/movement-tip-front-rack-lunge-copy/ The post MOVEMENT TIP: The Back Rack Lunge appeared first on Andfit.

]]>

CrossFit Seminar Staff member James Hobart demonstrates the back rack lunge here, which is pretty much, as you’ve no doubt guessed by now, just another lunge, but this time the barbell is placed across the upper back, as it would be for a Back Squat.

Remember to ensure the barbell sits across the top of the upper back muscles, not on the verterbrae. Ensure your knees are aligned with the toes and the weight is on the heel of the front foot. If you are struggling to keep aligned, or the barbell on your back feels like it is forcing your chest forward and down, then just stick to some of the kettlebell and plate options we discussed with the Front Rack Lunge, until you build up your strength.

Points Of Performance

  • Bring barbell to a back rack position
  • One leg steps forward
  • Keep heel of forward leg down
  • Raise heel of back leg
  • Lower torso until back knee touches the ground
  • Forward leg shin remains relatively vertical
  • Complete at full hip and knee extension
  • Opposite leg begins next step

The post MOVEMENT TIP: The Back Rack Lunge appeared first on Andfit.

]]>
MOVEMENT TIP: The Front Rack Lunge https://www.andfit.co.nz/movement-tip-front-rack-lunge/ Sat, 16 Dec 2017 01:50:15 +0000 http://demo.wodsites.co/movement-tip-walking-lunge-copy/ The post MOVEMENT TIP: The Front Rack Lunge appeared first on Andfit.

]]>

Building on from the Walking Lunge last week, this week all we are doing is adding some weight with a barbell in the Front Rack position. Just as we considered with the Front Squat, not everybody has the mobility to hold the elbows up in a good front rack position, so don’t be afraid to ask your coach for suitable modifications if you are feeling uncomfortable or your wrists are bent too far back to compensate. Other options include holding a kettlebell in the goblet position, two kettlebells in the front rack position or holding a plate at your chest.

Your coach will also be able to provide you with suitable mobility to work to help you to lift your elbows higher in the front rack position.

Points Of Performance

  • Hands positioned on the sides of the shoulders
  • Hold the bar with a loose grip
  • Elbows high, at the level of the shoulder
  • One leg steps forward
  • Keep heel of forward leg down
  • Maintain a straight back
  • Lower torso until back knee touches the ground
  • Forward leg shin remains relatively vertical
  • Complete at full hip and knee extension
  • Opposite leg begins next step

The post MOVEMENT TIP: The Front Rack Lunge appeared first on Andfit.

]]>
MOVEMENT TIP: The Walking Lunge https://www.andfit.co.nz/movement-tip-walking-lunge/ Sat, 16 Dec 2017 01:47:15 +0000 http://demo.wodsites.co/movement-tip-rope-climb-legless-copy/ The post MOVEMENT TIP: The Walking Lunge appeared first on Andfit.

]]>

Over the next four weeks we are going to look at different variations on single leg movements starting with variations on the lunge. Single leg movements can be particularly unforgiving at strength imbalances between the left and right. And the flip side of that is they can be great at addressing left-right imbalances, which is important as any muscle imbalances tend to lead to problems and potentially injury further down the track.

Let’s get started with a simple bodyweight walking lunge, demonstrated here by CrossFit Seminar Staff member Julie Foucher.

The lunge is a relatively straightforward movement that you have no doubt executed many times before, but there are a few important subtleties that you should note in order to protect yourself from knee issues further down the track. Keeping the knee aligned to the toes is important – any sideways tracking and you’re causing unecessary wear and tear on the knee cartilage and ligaments around the knee joint. And this is exacerbated if you let the weight on your front foot shift forward onto the ball of the foot – make sure you keep the weight on your heel. This is, in fact, very hard to do when you are moving forward. It may be best to work initially on the spot and stepping the leg backwards, which makes it easier to keep on the heel of the front leg.

Lastly, don’t be in a rush to touch the knee to the floor – ensure all your alignments are perfect, hitting the right depth can come later.

Points Of Performance

  • One leg steps forward
  • Keep heel of forward leg down
  • Maintain a straight back
  • Lower torso until back knee touches the ground
  • Forward leg shin remains relatively vertical
  • Complete at full hip and knee extension
  • Opposite leg begins next step

The post MOVEMENT TIP: The Walking Lunge appeared first on Andfit.

]]>
MOVEMENT TIP: The Rope Climb (Legless) https://www.andfit.co.nz/movement-tip-rope-climb-legless/ Sat, 16 Dec 2017 01:44:06 +0000 http://demo.wodsites.co/movement-tip-rope-climbing-wrapping-copy/ The post MOVEMENT TIP: The Rope Climb (Legless) appeared first on Andfit.

]]>

This week CrossFit Seminar Staff member James Hobart demonstrates the legless rope climb, which most definitely does require more upper body strength than the leg focused rope climb techniques we looked at over the last two weeks.

To master this rope climb, you need to build up enough upper body strength to lift your bodyweight up the rope without any support from the legs. Initially, we suggest you start with your feet on the floor for a bit of support, working up towards your feet on a box until eventually you are able to work your way up the rope without any support from the legs.

Once you’ve mastered the basic legless climb, work towards keeping the legs in an L-sit position and walking your hands down the rope instead of sliding down using the feet.

Points Of Performance

  • Grip the rope overhead
  • One arm reaches up the rope while the other hand holds
  • Lead arm pulls the body as high as possible
  • Bottom arm reaches up thh rope further than the lead arm
  • Continue to pull body upwards with alternationg arm reach

The post MOVEMENT TIP: The Rope Climb (Legless) appeared first on Andfit.

]]>
MOVEMENT TIP: Rope Climbing (Wrapping) https://www.andfit.co.nz/movement-tip-rope-climbing-wrapping/ Sat, 16 Dec 2017 01:37:12 +0000 http://demo.wodsites.co/movement-tip-the-l-sit-copy-2/ The post MOVEMENT TIP: Rope Climbing (Wrapping) appeared first on Andfit.

]]>

Anybody can climb a rope, even if you don’t have a lot of upper body strength! Over the next couple of weeks, we look at some rope climbing techniques and one form of rope climb that does require a lot of upper body strength!

The first technique we look at is a wrapping technique that allows an athlete to climb a rope without having to use arms to pull up the rope. Key to mastering this technique is being able to ‘wrap’ the rope around your dominant foot, clamping it between the two feet and then simply standing up as you walk your hands up the rope.

The tricky part is getting the wrapping technique right – you may like to practise the foot work by sitting on a box so you don’t have to practise it while hanging from the rope!

Next week we look in more detail at how to use the feet tin a slightly different version of the rope climb.

Points Of Performance

  • Grip the rope
  • Knees move as close as possible to chest
  • Keep rope in the centre of your body
  • Rope wraps around the leg and on top of dominant leg’s foot
  • Free foot catches the rope steps on rope, pinching the rope between the feet
  • Pull with arms to reach them overhead while extending the hips and knees (staniding up)
  • Release the wrapped rope from the feet to bring legs up and repeat

The post MOVEMENT TIP: Rope Climbing (Wrapping) appeared first on Andfit.

]]>
MOVEMENT TIP: The Rope Climb (Basket) https://www.andfit.co.nz/movement-tip-rope-climbing-basket/ Sat, 16 Dec 2017 01:37:00 +0000 http://demo.wodsites.co/movement-tip-the-l-sit-copy/ The post MOVEMENT TIP: The Rope Climb (Basket) appeared first on Andfit.

]]>

In today’s video, CrossFit Seminar Staff member James Hobart demonstrates the basket rope climb. This is similar to the wrapping technique we looked at last week, in that the feet lock the rope tight so that you can ‘stand up’ without relying on the arms to pull you up the rope.

This method of locking the rope between the feet is slightly different, however. The rope simply rests across the foot of the dominant leg (running from the inside of the knee to the outside of the ankle) – then use the OTHER leg to pick the rope up, wrap it around the foot and clamp it down.

Tip: If you bring the dominant knee up as high as possible and then tip the leg slightly outwards, the rope will naturally fall so it lies inside the knee and outside the ankle.

Points Of Performance

  • Grip the rope overhead
  • Knees move to the chest as close as possible
  • Cross feet
  • Keep the rope longitudinal along the center of the body
  • Uncross feet to twist and wrap the rope with both feet
  • Pull with the arms while extending hips and legs
  • Reach arms overhead and release the wrapped rope to repeat
  • Spread feet to slide down

The post MOVEMENT TIP: The Rope Climb (Basket) appeared first on Andfit.

]]>
MOVEMENT TIP: The L-Sit https://www.andfit.co.nz/movement-tip-the-l-sit/ Sat, 16 Dec 2017 01:33:24 +0000 http://demo.wodsites.co/movement-tip-the-v-up-copy/ The post MOVEMENT TIP: The L-Sit appeared first on Andfit.

]]>

CrossFit Seminar Staff members Julie Foucher and James Hobart demonstrate the L-sit, which is a challenging core and hip flexor exercise. It can be performed on bars or rings – first you will need to develop strength in a front support position, then you can bring your legs into the chest and eventually you should be able to take first one and then both legs out in front of you into a full L-sit.

Tucking your tail bone under and leaning into the L-sit rather than tipping slightly backwards will help to engage the deep core muscles and hold this position.

Points Of Performance

  • Bars or rings set approximately shoulder-width apart
  • Arms remain extended
  • Push into the bars or rings with shoulders down
  • Keep legs extended and raise feet to hip level or above
  • Modify difficulty by bending one, or both, legs to the chest

The post MOVEMENT TIP: The L-Sit appeared first on Andfit.

]]>
MOVEMENT TIP: The V Up https://www.andfit.co.nz/movement-tip-the-v-up/ Sat, 16 Dec 2017 01:29:20 +0000 http://demo.wodsites.co/movement-tip-single-copy-copy/ The post MOVEMENT TIP: The V Up appeared first on Andfit.

]]>

CrossFit Seminar Staff member Julie Foucher demonstrates the V-up, a great abdominal strengthener, primarily targetting the rectus abdominis or the ‘six pack’ muscle. It’s not an exercise for beginners, or anybody with back, neck or abdominal separation after pregnancy. Build up core strength and stability through crunches and other deep core exercises from your coach before trying this move!

Points Of Performance

  • Start in supine position
  • Keep arms and legs extend extended
  • Squeeze legs together
  • Trunk and hips flex to pull torso and legs together
  • Arms reach forward during the ascent
  • Complete wtih the hands touching the toes at the top

The post MOVEMENT TIP: The V Up appeared first on Andfit.

]]>
MOVEMENT TIP: The Hollow Rock https://www.andfit.co.nz/movement-tip-hollow-rock/ Sat, 16 Dec 2017 01:18:30 +0000 http://demo.wodsites.co/movement-tip-single-copy/ The post MOVEMENT TIP: The Hollow Rock appeared first on Andfit.

]]>

The Hollow position and Hollow Rock are staples for all gymnastics work and gymnasts spend literally hours drilling variations on this movement. To maximise the benefits to your core strength, ensure you build up to a great hollow position before you practise the rocking option.

If you struggle to keep your lower back strongly pressed flat into the ground, then work on progressions, which include deadbugs, hollow hold with bent legs and hands reaching towards feet instead of overhead. As soon as you feel your lower back wanting to lift off the ground, then pull back a little and work the position you are (just) able to keep the core nicely active.

Points Of Performance

  • Start in supine position
  • Arms extend overhead
  • Legs extend and press together
  • Eliminate space below lumbar spine by contracting the abdominals
  • Rock in this position, minimising movement and the hips and shoulders

The post MOVEMENT TIP: The Hollow Rock appeared first on Andfit.

]]>
MOVEMENT TIP: The Abmat Situp https://www.andfit.co.nz/movement-tip-abmat-situp/ Tue, 05 Dec 2017 06:12:06 +0000 http://demo.wodsites.co/?p=8466 The post MOVEMENT TIP: The Abmat Situp appeared first on Andfit.

]]>

The ABMAT situp, demonstrated here by CrossFit Seminar Staff member Julie Foucher is a great little core exercise. As with most core exercises, where the back muscles typically have to compensate for lack of core activation, it is important to protect your spine and the mat provides a cushion in the neutral curve of your lumbar (lower) back. However, everybody has different body shapes so you may find using the abmat doesn’t work for you. Another way to protect your spine is to keep the back upright in the top position as Julie does in the video. You may be a little tight in the hips and forced to hunch over to reach the feet, in which case it is best to focus on a straight spine and don’t worry about reaching for the feet until you have developed a little more flexibility.

Points Of Performance

  • AbMat fills the space between the lumbar curve and the ground
  • Keep both soles of feet together
  • Hands touch the ground overhead at the beginning
  • Flex the abdominals pulling the torso to seated position
  • Reach the arms forward during the ascent
  • Complete with the shoulders above hips and spine extended

The post MOVEMENT TIP: The Abmat Situp appeared first on Andfit.

]]>
MOVEMENT TIP: The Bench Press https://www.andfit.co.nz/movement-tip-bench-press/ Tue, 05 Dec 2017 06:08:33 +0000 http://demo.wodsites.co/?p=8463 The post MOVEMENT TIP: The Bench Press appeared first on Andfit.

]]>

A staple powerlifting movement, the Bench Press, demonstrated here by CrossFit Seminar Staff member James Hobart, is a great at developing chest strength. However CrossFit tends to favour overhead rather than bench pressing, most likely due to the carry over of overhead work into Olympic Lifting, but possibly also due to the potential for developing bad posture and tight shoulders from doing too much bench work. With the high degree of mobility required in CrossFit skills such as Olympic Lifting and gymnastics), this could be counter productive. So just make sure you balance any Bench work with plenty of posterior chain work.

Points Of Performance

  • Grip bar with hands positioned slightly wider than shoulder-width
  • Begin with arms extended, bar over the chest
  • Shoulders remain in contact with the bench
  • Pull elbows down moving closer to the side of the hips
  • Bar lowers to bottom of the chest
  • Forearms remain vertical
  • Complete at full arm extension

The post MOVEMENT TIP: The Bench Press appeared first on Andfit.

]]>
MOVEMENT TIP: The Ring Dip https://www.andfit.co.nz/movement-tip-ring-dip/ Tue, 05 Dec 2017 05:47:39 +0000 http://demo.wodsites.co/?p=8457 The post MOVEMENT TIP: The Ring Dip appeared first on Andfit.

]]>

Following on from last week’s dips on the bar, this week we look at the Ring Dip, demonstrated here by CrossFit Seminar Staff member James Hobart. The Ring Dip is more commonly used in CrossFit. The rings add instabiility to the movement, which builds up strength in the smaller stablising shoulder and chest muscles.

However, that instability could also lead to injury or strain on these smaller muscle groups if you haven’t yet built up the necessary strength for the movement. So best to start off with some additional support, such as feet on the floor or bands, while you build up your shoulder strength, especially at the bottom of the movement, which may not be the best position for your shoulder joint if you already have tight shoulder and chest muscles.

Points Of Performance

  • Rings set approximately shoulder-width apart
  • Full grip on the rings
  • Start with arms extended and push down into the rings
  • Chest drops forward as elbows move back
  • Shoulders descend lower than elbows
  • Hands stay close to the body
  • Complete at full arm extension

The post MOVEMENT TIP: The Ring Dip appeared first on Andfit.

]]>
MOVEMENT TIP: The Bar Dip https://www.andfit.co.nz/movement-tip-bar-dip/ Tue, 05 Dec 2017 05:14:00 +0000 http://demo.wodsites.co/?p=8444 The post MOVEMENT TIP: The Bar Dip appeared first on Andfit.

]]>

Following on from our bodyweight pushing movement theme, CrossFit Seminar staff member, James Hobart, demonstrates the Bar Dip. The bar dip is a great way to strengthen shoulders, chest and triceps and is often considered superior to the pushup as it involves moving your entire body weight.

It is also a great precursor to dips on the rings, which we shall look at next week.

Points Of Performance

  • Bars set approximately shoulder-width apart
  • Full grip on the bars
  • Start with arms extended and push down into the bars
  • Chest drops forward as elbows move back
  • Shoulders descend lower than elbows
  • Elbows stay close to the body
  • Complete at full arm extension

The post MOVEMENT TIP: The Bar Dip appeared first on Andfit.

]]>
MOVEMENT TIP: The Ring Push-Up https://www.andfit.co.nz/movement-tip-ring-push/ Tue, 05 Dec 2017 05:11:22 +0000 http://demo.wodsites.co/?p=8440 The post MOVEMENT TIP: The Ring Push-Up appeared first on Andfit.

]]>

CrossFit Seminar Staff member James Hobart demonstrates the ring push-up. Like a normal puishup, the ring push up works to strengthen the chest, shoulder and tricep muscles, but the instability of the rings brings more of the smaller stabiliser muscles into play as well as develops more core strength. Ring push-ups are a great way to build your pushup strength even from beginner level as you can alter the height of the rings to control the exercise difficulty.

Points Of Performance

  • Full grip the rings with palms facing each other
  • Legs together with only the balls of the feet on the ground
  • Start with arms extended
  • Lower chest and thighs to the ground
  • Body remains rigid
  • Elbows move closer to the hips than the shoulders
  • Complete at full arm extension

The post MOVEMENT TIP: The Ring Push-Up appeared first on Andfit.

]]>
MOVEMENT TIP: The Pushup https://www.andfit.co.nz/movement-tip-pushup/ Tue, 05 Dec 2017 05:03:59 +0000 http://demo.wodsites.co/?p=8435 The post MOVEMENT TIP: The Pushup appeared first on Andfit.

]]>

You’ve most likely done a Push-up at some point in your life before starting CrossFit, but you might not have done the full range of motion Pushup we use in CrossFit. At the top, your arms should be completely straight and at the bottom your chest should make contact with the ground. CrossFit Seminar Staff member James Hobart demonstrates this for us in the attached video. The most important part is making sure to keep your core and shoulders active to protect your spine and shoulder joints. When starting out, you may need to modify your pushups. Rather than working from your knees, work on your toes, but place your hands on a box so your upper body is elevated. Start as high as you need to in order to get your chest to the box with each pushup and over time you can lower the box height until eventually you are knocking out pushups on your toes at ground level like an army trooper!

Points Of Performance

  • Hands on the ground, shoulder-width apart
  • Legs straight with only the balls of the feet on the ground
  • Start with arms extended
  • Lower chest and thighs to the ground
  • Body remains rigid
  • Elbows move closer to the hips than the shoulders
  • Complete at full arm extension

The post MOVEMENT TIP: The Pushup appeared first on Andfit.

]]>
MOVEMENT TIP: The Box Jump https://www.andfit.co.nz/movement-tip-box-jump/ Tue, 05 Dec 2017 05:00:01 +0000 http://demo.wodsites.co/?p=8429 The post MOVEMENT TIP: The Box Jump appeared first on Andfit.

]]>

The Box Jump is a great movement for developing explosive power and jumping ability. It literally does what is says on the.. well… box. From a standing position on the ground, you just take a big leap onto a box, stand up straight and then step back down again. The great thing about Box Jumps is playing with the height – we suggest you start off low as your first few box jumps may feel a little intimidating and you can gradually built the height up as you feel more comfortable. When starting out, or trying a higher box, don’t use one with hard, sharp edges as hitting the box with your shins can lead to a nasty gash on the shins. CrossFit Seminar Staff member Julie Foucher demonstrates the box jump and takes us through the performance points.

Points Of Performance

  • Stand on feet with hip-width apart
  • Jump onto the box using a two-foot take-off
  • Both feet land on the box simultaneously
  • Keep the knees in line with the toes
  • Complete at full hip and knee extension
  • Jump or step down to begin the next repetition

The post MOVEMENT TIP: The Box Jump appeared first on Andfit.

]]>
MOVEMENT TIP: Rowing https://www.andfit.co.nz/movement-tip-rowing/ Tue, 05 Dec 2017 04:52:04 +0000 http://demo.wodsites.co/?p=8423 The post MOVEMENT TIP: Rowing appeared first on Andfit.

]]>

As much as rowing looks like an arm exercise, most of your power for each stroke actually comes from the leg drive. It is also important to remember that it is not about how many strokes per minute you can do, but the quality of each stroke and how much distance you can generate with each stroke. Remember, if you were rowing on water, you would expect to glide through the water after each stroke – if you brought your oar back too soon, you would actually slow yourself down and the Concept 2 mimics this very well – so don’t be afraid to take a good pause at the end of each leg drive, letting the arms return to a straight position before you start bending at the knees to move forward. CrossFit Seminar Staff member Julie Foucher takes us through the points of performance of rowing on the Concept 2.

Points Of Performance

  • Arms extended and hips slightly behind shoulders at catch
  • Legs extend while maintaining the hip angle
  • Hips extend until torso leans backwards
  • Arms pull the handle to the sternum keeping the elbows back
  • Lumbar curve maintained
  • To return, extend arms, lean torso forward, then bend knees as much as possible

The post MOVEMENT TIP: Rowing appeared first on Andfit.

]]>
MOVEMENT TIP: The Sumo Deadlift High Pull https://www.andfit.co.nz/movement-tip-sumo-deadlift-high-pull/ Tue, 05 Dec 2017 04:44:33 +0000 http://demo.wodsites.co/?p=8420 The post MOVEMENT TIP: The Sumo Deadlift High Pull appeared first on Andfit.

]]>

Like the Kettlebell Swing, the Sumo Deadlift High Pull is a more explosive hinge movement, creating more momentum in the barbell and making it easier to pull the barbell to chest height. Make sure you wait until the hips and knees are fully extended before shrugging the barbell higher, or you will lose out on all that powerful hip extension. In this video, Level 1 Seminar Staff members James Hobart and Adrian Bozman break down parts of the sumo deadlift high pull for us.

Points Of Performance

  • Stand on feet with with stance slightly wider than shoulder width apart
  • Hands in between bent legs with a full grip on the bar
  • Knees in line with toes
  • Shoulders slightly in front of the bar at set-up
  • Lumbar curve maintained
  • Hips extend forward and shoulders rise at the same rate
  • Heels down until hips and legs extend
  • Shoulders shrug, followed by a pull of the arms
  • Elbows move high and outwards pointing to opposite directions
  • Bar moves over the middle of both feet
  • Complete at full hip and knee extension with the bar pulled up just below the chin

The post MOVEMENT TIP: The Sumo Deadlift High Pull appeared first on Andfit.

]]>
MOVEMENT TIP: The Kettlebell Swing https://www.andfit.co.nz/movement-tip-kettlebell-swing/ Tue, 05 Dec 2017 04:25:52 +0000 http://demo.wodsites.co/?p=8414 The post MOVEMENT TIP: The Kettlebell Swing appeared first on Andfit.

]]>

The Kettlebell Swing is a firm favourite with many people, not just because it’s fun and it feels good, but because of it’s all over strength building qualiities, particularly for the posterior chain and it’s ability to build a powerful hip extension, which translates very well to Olympic Lifting. CrossFit Seminar Staff member James Hobart demonstrates the American kettlebell swing in this version, which brings the kettlebell directly overhead, but you may like to start out with the Russian Swing, which just requires you to swing the kettlebell to a height in line with the eyes. This is especially advisable if you are not very mobile in the shoulders or need to build up strength in your back and core. Remember to focus on keeping a neutral spine and a switched on core in order to protect your back.

Points Of Performance

  • Stand on feet with shoulder width apart (or slightly wider)
  • Hips descend back and down, but stay higher than the knees
  • Lumbar curve maintained
  • Knees in line with the toes
  • Hips and legs extend rapidly, driving the kettlebell overhead
  • Heels down until hips and legs extend
  • Arms remain straight
  • Arms pull the kettlebell to over the middle of both feet
  • Hips sit back in a partial squat as the bell descends to begin next rep

The post MOVEMENT TIP: The Kettlebell Swing appeared first on Andfit.

]]>
MOVEMENT TIP: The Good Morning https://www.andfit.co.nz/movement-tip-good-morning/ Tue, 05 Dec 2017 04:21:56 +0000 http://demo.wodsites.co/?p=8409 The post MOVEMENT TIP: The Good Morning appeared first on Andfit.

]]>

CrossFit Seminar Staff member Julie Foucher demonstrates another hinge movement, the Good Morning. The Good Morning is an excellent exercise to strengthen the back, the glutes and the hamstrings. With the knees are only slightly bent in this exercise, it is also a great one to use when warming up and gently stretching the hamstrings. Too keep your spine safe, make sure the barbell sits across your traps and NOT on your spine (watch as it may roll as you bend forward) and also ensure that you keep your spine neutral (i.e. in almost a slight back bend working against gravity and the weight of the barbell).

Points Of Performance

  • Hip-width stance
  • Bar rests on upper back, hands just outside the shoulders
  • Knees flex slightly
  • Hips push back
  • Lumbar curve maintained
  • Knees in line with toes
  • Heels down
  • Descent until chest is parallel with floor
  • Complete at full hip and knee extension

The post MOVEMENT TIP: The Good Morning appeared first on Andfit.

]]>
MOVEMENT TIP: The Sumo Deadlift https://www.andfit.co.nz/movement-tip-sumo-deadlift/ Tue, 05 Dec 2017 03:02:45 +0000 http://demo.wodsites.co/?p=8402 The post MOVEMENT TIP: The Sumo Deadlift appeared first on Andfit.

]]>

The Deadlift is another big fundamental movement and differs from the squat in that is it a hinge movement. This means that instead of moving the hips mostly downwards, we shift them back, causing the spine to hinge forward at the hips. CrossFit Seminar Staff member James Hobart demonstrates the deadlift in the accompanying video. The Deadlift has the advantage of really working the posterior chain i..e. the muscles at the back of your body (think spinal support muscles, hamstrings, glutes). Spend a little time getting the setup of this movement correct and from there, all it requires if for you to stand up! Over the coming weeks we look at some other hip hinge movements, culminating in an explosive power form of hip hinge, the kettlebell swing.

Points Of Performance

  • Hands inside legs with a full grip on the bar
  • Knees in line with toes
  • Shoulders slightly in front of the bar at set-up
  • Lumbar curve maintained
  • Hips ad shoulders rise at the same rate
  • Then hips extend
  • Complete at full hip and knee extension

The post MOVEMENT TIP: The Sumo Deadlift appeared first on Andfit.

]]>
MOVEMENT TIP: The Deadlift https://www.andfit.co.nz/movement-tip-deadlift/ Tue, 05 Dec 2017 02:46:11 +0000 http://demo.wodsites.co/?p=8396 The post MOVEMENT TIP: The Deadlift appeared first on Andfit.

]]>

The Deadlift is another big fundamental movement and differs from the squat in that is it a hinge movement. This means that instead of moving the hips mostly downwards, we shift them back, causing the spine to hinge forward at the hips. CrossFit Seminar Staff member James Hobart demonstrates the deadlift in the accompanying video. The Deadlift has the advantage of really working the posterior chain i..e. the muscles at the back of your body (think spinal support muscles, hamstrings, glutes). Spend a little time getting the setup of this movement correct and from there, all it requires if for you to stand up! Over the coming weeks we look at some other hip hinge movements, culminating in an explosive power form of hip hinge, the kettlebell swing.

Points Of Performance

  • Stand on feet with hip-width apart
  • Position both hands on each side of the hips
  • Full grip on the bar
  • Position shoulders slightly in front of the bar
  • Lumbar curve maintained
  • Hips and shoulders rise at the same rate
  • Bar moves up and down over the middle of both feet
  • Heels down
  • Complete at full hip and knee extension

The post MOVEMENT TIP: The Deadlift appeared first on Andfit.

]]>
MOVEMENT TIP: The Thruster https://www.andfit.co.nz/movement-tip-thruster/ Tue, 05 Dec 2017 02:43:13 +0000 http://demo.wodsites.co/?p=8392 The post MOVEMENT TIP: The Thruster appeared first on Andfit.

]]>

The Thruster is sort of a barbell version of the Wall Ball that we looked at last week (but please don’t let go of your Barbell to send it flying overhead – the results could be catastrophic)! In this video, CrossFit Seminar Staff member Julie Foucher demonstrates the Thruster – notice how she starts with a perfect squat and then uses the upward ‘thrust’ in a manner similar to the Push Press to drive the barbell overhead. The Thruster is a fantastic full body and high intensity movement, guaranteed to push you to your mental and physical limits. It’s one of the two movements used in that most famous of CrossFit WODs “Fran”

Points Of Performance

  • Stand on feet with shoulder width apart
  • Bar rests on front rack
  • Hands positioned on the sides of the shoulders
  • Hold the bar with a full grip
  • Elbows in front of the bar
  • Hips descend back and down, lower than the knees
  • Lumbar curve maintained
  • Knees in line with the toes
  • Make sure elbows don’t touch the knees
  • Hips and legs extend rapidly, then press
  • Heels down until hips and legs extend
  • Bar moves overhead inline with the middle of the foot
  • Complete at full hip, knee and arm extension

The post MOVEMENT TIP: The Thruster appeared first on Andfit.

]]>
MOVEMENT TIP: The Wall Ball https://www.andfit.co.nz/movement-tip-wall-ball/ Tue, 05 Dec 2017 02:21:53 +0000 http://demo.wodsites.co/?p=8382 The post MOVEMENT TIP: The Wall Ball appeared first on Andfit.

]]>

The Wall Ball is a great little movement that you will encounter fairly early in your Crossit journey. It looks simple enough, a bit of a cross between the Squat and the Push Press, as demonstrated here by CrossFit Seminar Staff member James Hobart. Start the movement with that perfect squat you learnt in our squatting series, then drive up through the heels to create some upwards momentum with your hip extension like you did with the push press, making it much easier to throw the ball up to touch the wall or marker at the designated height. In your quest for height, don’t neglect the performance points of that perfect squat you worked so hard to achieve previously!

Points Of Performance

  • Hold dumbbells at full arm extension
  • Maintain lockout througout movement
  • One leg steps forward
  • Keep heel of forward leg down
  • Raise heel of back leg
  • Lower torso until back knee touches the ground
  • Forward leg shin remains relatively vertical
  • Complete at full hip and knee extension
  • Opposite leg begins next step
  • Can be performed with 1 or 2 dumbbells

The post MOVEMENT TIP: The Wall Ball appeared first on Andfit.

]]>
MOVEMENT TIP: The Push Press https://www.andfit.co.nz/movement-tip-push-press/ Tue, 05 Dec 2017 02:06:40 +0000 http://demo.wodsites.co/?p=8378 The post MOVEMENT TIP: The Push Press appeared first on Andfit.

]]>

The Push Press, which CrossFit Seminar Staff member Julie Foucher demonstrates for us in this video, is very similar to the Shoulder Press, except now we use the hips to help us so that we can shift a heavier load overhead. We start the movement with a small downwards dip, then drive out of our heels to extend the hips fully. If it is explosive enough, this hip extension (i.e. straightening out of the hips and knees) transfers some momentum to the barbell, making it easier to press the barbell overhead. You can even test it out without using your hands and see how the barbell bounces up a little. It is important to remember not to press upwards with your arms too early – you want to wait until the hips fully extend in order to ‘catch’ that extra momentum generated by the hips before you use the arms to push upwards.

Points Of Performance

  • Stand on feet with hip-width apart
  • Hands positioned on the sides of the shoulders
  • Elbows slightly in front of the bar
  • Hold the bar with a full grip
  • Bar rests on torso
  • Torso dips stright down
  • Hips and legs extend, then press
  • Heels down until hips and legs extend

The post MOVEMENT TIP: The Push Press appeared first on Andfit.

]]>
MOVEMENT TIP: The Shoulder Press https://www.andfit.co.nz/movement-tip-shoulder-press/ Tue, 05 Dec 2017 02:04:56 +0000 http://demo.wodsites.co/?p=8374 The post MOVEMENT TIP: The Shoulder Press appeared first on Andfit.

]]>

Also known as the Strict Press or Overhead Press, and demonstrated here by CrossFit Seminar Staff member Julie Foucher, the Shoulder Press is the starting point of all our overhead work. It is a straightforward movement, that relies primarly on shoulder and tricep strength, rather than skills or timing, but making sure to nail down the detail in the performance points will help you to engage more core strength and protect your back. It also means you will be better prepared to build the Shoulder Press out to more complex overhead movements.

Points Of Performance

  • Stand on feet with hip-width apart
  • Hands positioned on the sides of the shoulders
  • Elbows slightly in front of the bar
  • Hold the bar with a full grip
  • Bar moves overhead inline with the middle of the foot
  • Torso and legs remain static
  • Heels down
  • Shoulders push up into the bar
  • Complete at full arm extension

The post MOVEMENT TIP: The Shoulder Press appeared first on Andfit.

]]>
MOVEMENT TIP: The Double-Under https://www.andfit.co.nz/movement-tip-double/ Tue, 05 Dec 2017 01:32:48 +0000 http://demo.wodsites.co/?p=8369 The post MOVEMENT TIP: The Double-Under appeared first on Andfit.

]]>

Once you’ve perfected all the performance points of the single under, you’re ready to try your hand at the infamous Double-Under, demonstrated here by CrossFit Seminar Staff member Julie Foucher. A double under is a skip where the rope rotates around the body twice for each single jump. A few people somehow manage to get this elusive skill straight away, but for the majority of us, it could take weeks, or sometimes even months, before you consistently get that rope around twice without having it whip your arms and legs. Try not to be too urgent about it as that sense of urgency will cause you to rush the jump, leaving too little time for the rope to spin around twice. Instead keep relaxed and the only thing to speed up (relative to your single skips) is the rotation of the wrists, so the jump stays nice and smooth, while the rope spins faster. And try to keep consistent with your body position on each jump – if your hands start moving even a little way out, forwards or backwards, it is just a matter of time before you trip on the rope.

Points Of Performance

  • Position hands slightly in front of hips.
  • Jump a few inches off the ground keeping torso upright with body straight
  • Holding the rope on both ends, spin wrists so the rope passes the feet twice with every jump

The post MOVEMENT TIP: The Double-Under appeared first on Andfit.

]]>
MOVEMENT TIP: The Single-Under https://www.andfit.co.nz/movement-tip-single/ Tue, 05 Dec 2017 01:29:48 +0000 http://demo.wodsites.co/?p=8365 The post MOVEMENT TIP: The Single-Under appeared first on Andfit.

]]>

The Single-Under is really just a single skip. If it has been some time since you picked up a skipping rope, then working on getting a good relaxed rythm going with single skips will give you a good base when it comes to tackling the much trickier double under, which we will look at next week. As CrossFit Seminar Staff member Julie Foucher demonstrates in this video, you can expect the best results with a nice relaxed jump, rotating at the wrists rather than the shoulders or elbows and keeping the core nice and tight. Get this and you will be all set to try out the Double Under next week!

Points Of Performance

  • Hold hands slightly in front of hips
  • Jump a few inches off the ground, keeping torso upright with body straight
  • Spin wrists so the rope passes the feet once with every jump

The post MOVEMENT TIP: The Single-Under appeared first on Andfit.

]]>
MOVEMENT TIP: The Burpee https://www.andfit.co.nz/movement-tip-burpee/ Tue, 05 Dec 2017 01:03:12 +0000 http://demo.wodsites.co/?p=8361 The post MOVEMENT TIP: The Burpee appeared first on Andfit.

]]>

The infamous Burpee, as demonstrated here by CrossFit Seminar Staff member James Hobart, is often the movement we all love to hate the most. And that is no surprise considering how quickly you can get puffed doing this movement. But it’s a skill we want to retain for as long as possible throughout our lives, simply because of the importance of being able to get yourself back up when you are on the ground. So even if you find the movement the movement too challenging, ask your coach to give you a modified version that will keep you picking yourself up off the floor whenever you need. If you have core or back issues, then most definitely find a modified version that works for you as it is possible to hurt your back if you are fatigued and throwing yourself up and down to the ground.

Points Of Performance

  • Place hands on the ground shoulder-width apart
  • Jump to push-up position
  • Lower chest and thighs to the ground
  • Jump feet towards the hands
  • Jump vertically with full hip and knee extension
  • Arms extend overhead during the jump

The post MOVEMENT TIP: The Burpee appeared first on Andfit.

]]>
MOVEMENT TIP: The Overhead Squat https://www.andfit.co.nz/movement-tip-overhead-squat/ Tue, 05 Dec 2017 00:43:56 +0000 http://demo.wodsites.co/?p=8356 The post MOVEMENT TIP: The Overhead Squat appeared first on Andfit.

]]>

The Overhead Squat, demonstrated here by CrossFit Seminar Staff member James Hobart, is the most unforgiving of all the squat movements, so it not for everybody when they first start out. The overhead squat requires a high degree of mobility (when we talk about mobiility, we mean not just flexibility i.e. good range of motion, but also strength in those end range of motion positions). In particular, you need great ankle mobility, good hip opening, strong core and posterior chain and strong, flexible thoracic (the area at around shoulder blade level) spine and shoulders. Most of us fail at the ankles, before we even look at anything else! So make sure you’re doing all the mobility work your coach gives you, so that you prep yourself to be able to hit each of the performance point in this amazing movement. It can be a lot of work to get there, but it is well worth persisting, because this movement not only helps you to move better in eery direction, but it really is a prerequisite for the Snatch, if you are keen to train the Olympic Lifts.

Points Of Performance

  • Stand on feet with shoulder-width apart
  • Wide grip on the bar
  • Shoulders push up into the bar, exposing armpits
  • Hips descend back and down, lower than the knees
  • Lumbar curve maintained
  • Heels down
  • Bar moves over the middle of both feet
  • Knees in line with the toes
  • Complete at full hip and knee extension

The post MOVEMENT TIP: The Overhead Squat appeared first on Andfit.

]]>
MOVEMENT TIP: The Back Squat https://www.andfit.co.nz/movement-tip-back-squat/ Tue, 05 Dec 2017 00:37:15 +0000 http://demo.wodsites.co/?p=8351 The post MOVEMENT TIP: The Back Squat appeared first on Andfit.

]]>

Last week we looked at the Front Squat, this week CrossFit Seminar Staff member James Hobart shows us the Back Squat. This differs from the Front Squat in that the Barbell is placed behind the head. To protect the spine, it’s important to avoid placing the barbell directly on the vertebrae, but to activate the upper back muscles to act as a cushion on which the barbell can rest. Like with the Front Squat, it’s important to ensure that you aren’t distracted by the barbell on your back and keep all of the points of performance in mind for your perfect squat. If you’re finding this hard, it’s always better to reduce the weight, or go back to the less complex Air or Goblet Squat, so you can concentrate on those points of performance that tend to be lost when you add the distraction of new elements in the Front or Back Squat.

Points Of Performance

  • Stand on feet with shoulder width apart
  • Hands positioned on the sides of the shoulders
  • Hold the bar with a loose grip
  • Elbows high, at the level of the shoulder
  • Hips slightly move back, and descend down
  • Hips descend lower than the knees
  • Lumbar curve maintained
  • Heels stay in contact with the floor all the time
  • Bend knees inline with the toes
  • Complete at full hip and knee extension

The post MOVEMENT TIP: The Back Squat appeared first on Andfit.

]]>
MOVEMENT TIP: The Front Squat https://www.andfit.co.nz/movement-tip-front-squat/ Tue, 05 Dec 2017 00:09:37 +0000 http://demo.wodsites.co/?p=8347 The post MOVEMENT TIP: The Front Squat appeared first on Andfit.

]]>

Once we’ve nailed the perfect Air Squat, we can start to add some weight. This can be done with a kettlebell in the form of a Goblet Squat, or a barbell in the form of a Front Squat, which CrossFit Seminar Staff member Julie Foucher demonstrates for us here, or a Back Squat, which we look at next week. Adding weight can often mean your perfect squat starts to fall apart, so don’t get too distracted by the barbell – keep your focus on knees out, chest lifted and a great neutral spine.- all the things that made your air squat perfect! The rack position is an important feature of the Front Squat – it’s important to get your elbows up to create a ledge of shoulder muscle for the barbell to rest across. With tight lats, shoulders and triceps, a lot of people don’t quite have the mobility for this rack position, so start working with your coaches on developing a good rack position as early as possible.

Points Of Performance

  • Stand on feet with shoulder width apart
  • Hands positioned on the sides of the shoulders
  • Hold the bar with a loose grip
  • Elbows high, at the level of the shoulder
  • Hips slightly move back, and descend down
  • Hips descend lower than the knees
  • Lumbar curve maintained
  • Heels stay in contact with the floor all the time
  • Bend knees inline with the toes
  • Complete at full hip and knee extension

The post MOVEMENT TIP: The Front Squat appeared first on Andfit.

]]>
MOVEMENT TIP: The Air Squat https://www.andfit.co.nz/movement-tip-air-squat/ Mon, 04 Dec 2017 23:22:37 +0000 http://demo.wodsites.co/?p=8341 The post MOVEMENT TIP: The Air Squat appeared first on Andfit.

]]>

We start our movement series with that most fundamental and ubiquitous of CrossFit movements, the humble air squat, demonstrated here by CrossFit HQ seminar staff member, James Hobart. This is often the very first movement you learn when starting CrossFit, because it forms the base of so many other movements. And while the squat may appear pretty straightforward, as a full body exercise, it actually has a lot of moving parts. So it’s well worth making sure you get all the performance points of the air squat perfect before building up to a weighted barbell front or back squat, which we will be looking at in the coming weeks.

Points Of Performance

  • Stand on feet with shoulder width apart
  • Hips slightly move back, and descend down
  • Hips descend lower than the knees
  • Lumbar curve maintained
  • Heels stay in contact with the floor all the time
  • Bend knees inline with the toes
  • Complete at full hip and knee extension

The post MOVEMENT TIP: The Air Squat appeared first on Andfit.

]]>
CROSSFIT FUNDAMENTALS #9: The Medicine Ball Clean https://www.andfit.co.nz/crossfit-fundamentals-9-medicine-ball-clean/ Thu, 30 Nov 2017 07:59:21 +0000 http://demo.wodsites.co/?p=8263 The post CROSSFIT FUNDAMENTALS #9: The Medicine Ball Clean appeared first on Andfit.

]]>

Take a look at the final Fundamental CrossFit move.

The Medicine Ball Clean is the ninth and final Fundamental CrossFit move.

When done correctly, this move works your hamstrings, glutes, thighs and core. It also helps develop your arm, shoulder and back strength.

That’s a full body workout!

Here’s a demonstration of a Medicine Ball Clean from CrossFit expert Julie Foucher:

Keep these positioning tips in mind when performing a Sumo Deadlift High Pull:

  1. Shoulder-width stance
  2. Ball between the feet with palms on the ball
  3. Knees in line with toes
  4. Shoulders over the ball at setup
  5. Lumbar curve maintained
  6. Hips extend rapidly
  7. Then shoulders shrug
  8. Then arms pull under to the bottom of the squat
  9. Heels down until hips and legs extend
  10. Ball moves over the middle of the foot
  11. Complete at full hip and knee extension with ball at the rack position

Practice this move and you’ll be on your way to perfecting your form.

Now you have mastered all 9 Fundamental CrossFit moves, you’re on your way to making the most of every single training session. The more you train, the faster you will see results, so come and see us in the gym very soon!

Need a refresh?: Check out Fundamental Movement #1 The Air Squat

The post CROSSFIT FUNDAMENTALS #9: The Medicine Ball Clean appeared first on Andfit.

]]>
CROSSFIT FUNDAMENTALS #8: The Sumo Deadlift High Pull https://www.andfit.co.nz/crossfit-fundamentals-8-sumo-deadlift-high-pull/ Thu, 30 Nov 2017 07:55:04 +0000 http://demo.wodsites.co/?p=8259 The post CROSSFIT FUNDAMENTALS #8: The Sumo Deadlift High Pull appeared first on Andfit.

]]>

Take A Look At The Eighth Of 9 Fundamental CrossFit Moves.

Build on the Deadlift move and fast-track your strength with the Sumo Deadlift High Pull.

Start off light with this one then gradually add weight as you continue your CrossFit journey.

Here’s a demonstration of a Sumo Deadlift High Pull from CrossFit expert James Hobart:

Keep these positioning tips in mind when performing a Sumo Deadlift High Pull:

  1. Hip-width stance
  2. Hands inside legs with full grip on the bar
  3. Knees in line with toes
  4. Shoulders slightly in front of bar at set up
  5. Lumbar curve maintained
  6. Hips and shoulders rise at the same rate
  7. Hips then extend
  8. Heels down until hips and legs extend
  9. Shoulders then shrug, followed by a pull of the arms
  10. Elbows move high and outside
  11. Bar moves over the middle of the foot
  12. Complete at full hip and knee extension with bar pulled under the chin

Twelve steps for one move! It seems like a lot but the fact is if you don’t position your body correctly you are putting yourself at risk of injury.

Have a trainer watch you performing the Sumo Deadlift High Pull so he or she can point out how to optimise your strength building and limit the possibility of hurting yourself.

Next: Check out Fundamental Movement #9 The Medicine Ball Clean 

The post CROSSFIT FUNDAMENTALS #8: The Sumo Deadlift High Pull appeared first on Andfit.

]]>
CROSSFIT FUNDAMENTALS #7: The Deadlift https://www.andfit.co.nz/crossfit-fundamentals-7-deadlift/ Thu, 30 Nov 2017 07:50:34 +0000 http://demo.wodsites.co/?p=8254 The post CROSSFIT FUNDAMENTALS #7: The Deadlift appeared first on Andfit.

]]>

Take a look at the seventh of 9 Fundamental CrossFit moves.

The Deadlift move builds strength in your legs, glutes, back, arms and core.

Once you have mastered the basic move, you can continue to challenge yourself by increasing the weight you lift. Your trainer will be able to guide you as to how much weight to add.

Here’s a demonstration of a Deadlift from James Hobart:

Keep these positioning tips in mind when performing a Push Jerk:

  1. Slightly wider than shoulder width stance
  2. Hands just outside of hips
  3. Full grip on the bar
  4. Shoulders slightly in front of bar
  5. Lumbar curve maintained
  6. Hips and shoulders rise at the same rate
  7. Bar moves over the middle of the foot
  8. Heels down
  9. Complete at full hip and knee extension

Performing your deadlifts correctly as part of your CrossFit training will propel your strength to incredible heights.

Next: Check out Fundamental Movement #8 The Sumo Deadlift High Pull

The post CROSSFIT FUNDAMENTALS #7: The Deadlift appeared first on Andfit.

]]>
CROSSFIT FUNDAMENTALS #6: The Push Jerk https://www.andfit.co.nz/crossfit-fundamentals-6-push-jerk/ Thu, 30 Nov 2017 07:35:10 +0000 http://demo.wodsites.co/?p=8251 The post CROSSFIT FUNDAMENTALS #6: The Push Jerk appeared first on Andfit.

]]>

Take a look at the sixth of 9 Fundamental CrossFit moves.

The Push Jerk is one of CrossFit’s most powerful moves.

It may look straightforward, however you need to know the right technique to master it and build your strength more quickly.

Here’s a demonstration of a Push Jerk from CrossFit Seminar Staff member Julie Foucher

Keep these positioning tips in mind when performing a Push Jerk:

  1. Hip-width stance
  2. Hands just outside shoulders
  3. Elbows slightly in front of bar
  4. Full grip on the bar
  5. Torso dips straight down
  6. Hips and legs extend rapidly then press under
  7. Receive the bar in a partial overhead
  8. Heels stay down until hips and legs extend
  9. Bar moves over the middle of the foot
  10. Complete at full hip, knee and arm extension

Your trainer will be able to show you how to perfect this move – you’ll be doing it a lot!

Next: Check out Fundamental Movement #7 The Deadlift

The post CROSSFIT FUNDAMENTALS #6: The Push Jerk appeared first on Andfit.

]]>
CROSSFIT FUNDAMENTALS #5: The Push Press https://www.andfit.co.nz/crossfit-fundamentals-5-push-press/ Thu, 30 Nov 2017 07:31:06 +0000 http://demo.wodsites.co/?p=8245 The post CROSSFIT FUNDAMENTALS #5: The Push Press appeared first on Andfit.

]]>

Take a look at the fifth of 9 Fundamental CrossFit moves.

Now you are getting serious about your CrossFit training, it is time to master the Push Press.

In time, you will be able to build up the amount you are able to lift. For now, start small in order to get the hang of the move itself.

Here’s a demonstration of a Push Press from CrossFit Seminar Staff member Julie Foucher

Keep these positioning tips in mind when performing a Push Press:

  1. Hip-width stance
  2. Hands just outside shoulders
  3. Elbows slightly in front of bar
  4. Full grip on the bar
  5. Bar rests on torso
  6. Torso dips straight down
  7. Hips and legs extend, then press
  8. Heels down until hips and legs extend
  9. Bar moves over the middle of the foot
  10. Complete at full hip, knee and arm extension

Work with a trainer to make sure you have your body positioning correct when performing this move and you will be able to build up the weight more quickly.

Next: Check out Fundamental Movement #6 The Push Jerk

The post CROSSFIT FUNDAMENTALS #5: The Push Press appeared first on Andfit.

]]>
CROSSFIT FUNDAMENTALS #4: The Shoulder Press https://www.andfit.co.nz/crossfit-fundamentals-4-shoulder-press/ Thu, 30 Nov 2017 06:49:11 +0000 http://demo.wodsites.co/?p=8237 The post CROSSFIT FUNDAMENTALS #4: The Shoulder Press appeared first on Andfit.

]]>

Take a look at the fourth of 9 Fundamental CrossFit moves.

Build your biceps, lats and pectoral muscles with this Fundamental CrossFit move.

The Shoulder Press must be mastered if you are going to make the most of your training sessions.

Although it is an upper body move, you still need to be aware of the placement of your lower body in order to maximise the effectiveness of this move.

Here’s a demonstration from CrossFit Seminar Staff member Julie Foucher

Keep these positioning tips in mind when performing an Overhead Squat:


  1. Hip-width stance

  2. Hands just outside shoulders

  3. Elbows slightly in front of bar

  4. Full grip on the bar

  5. Torso and legs static

  6. Heels down

  7. Shoulders push up into the bar

  8. Complete at full arm extension


As the video shows, the position of your body is very important when completing this move. Keep thinking about where your feet are, how your hands are placed on the bar and about the positioning of your elbows.

While full arm extension is recommended, controlled, careful moves will prevent you from injuring your elbows or shoulders while you are getting started.

You’ll be amazed at how quickly you build your strength by using the Shoulder Press in your CrossFit training.

Next: Check out Fundamental Movement #5 The Push Press

The post CROSSFIT FUNDAMENTALS #4: The Shoulder Press appeared first on Andfit.

]]>
CROSSFIT FUNDAMENTALS #3: The Overhead Squat https://www.andfit.co.nz/crossfit-fundamentals-3-overhead-squat/ Wed, 29 Nov 2017 08:01:54 +0000 http://demo.wodsites.co/?p=8229 The post CROSSFIT FUNDAMENTALS #3: The Overhead Squat appeared first on Andfit.

]]>

Take a look at the third of 9 Fundamental CrossFit moves.

As you have probably noticed, squats make up a big part of the CrossFit stable of moves. This is because they are an excellent way of building your core strength as well as your leg strength.

Take a look below at the Overhead Squat, the third of the 9 Fundamental CrossFit moves.

Here’s CrossFit expert James Hobart demonstrating an Overhead Squat.

Keep these positioning tips in mind when performing an Overhead Squat:

  1.  Shoulder-width stance
  2. Wide grip on the bar
  3. Shoulders push up into the bar
  4. Armpits face forward
  5. Hips descend back and down
  6. Hips descend lower than knees
  7. Maintain lumbar curve
  8. Heels down
  9. Bar moves over the middle of the foot
  10. Knees in line with toes
  11. Complete at full hip and knee extension

You can see in the video how James maintains symmetry and how the bar is directly above his head.

Holding the bar the correct way serves to reduce the risk of injury and allows you to work the muscles intended to benefit from this move.

Next: Check out Fundamental Movement #4 The Shoulder Press

The post CROSSFIT FUNDAMENTALS #3: The Overhead Squat appeared first on Andfit.

]]>
CROSSFIT FUNDAMENTALS #2: The Front Squat https://www.andfit.co.nz/crossfit-fundamentals-2-front-squat/ Wed, 29 Nov 2017 07:47:53 +0000 http://demo.wodsites.co/?p=8223 The post CROSSFIT FUNDAMENTALS #2: The Front Squat appeared first on Andfit.

]]>

Take a look at the second of 9 Fundamental CrossFit moves.

Once you have mastered the Air Squat you will be able to quickly get the hang of the Front Squat. This is basically the same move but adds a weight lifting bar.

In the short video below, CrossFit Seminar Staff member Julie Foucher demonstrates the front squat.

Keep these positioning tips in mind when performing a Front Squat:

  1. Shoulder-width stance
  2. Hands just outside of shoulders
  3. Loose, fingertip grip on the bar
  4. Elbows high
  5. Hips descend back and down
  6. Hips descend lower than knees
  7. Maintain lumbar curve
  8. Heels down
  9. Knees in line with toes
  10. Complete at full hip and knee extension

As with the Air Squat, the Front Squat is an important foundation move in CrossFit. Getting it right means you reduce the strain on your body and reduce the risk of injury.

Get used to Front Squats! You’ll be doing a lot of them.

Next: Check out Fundamental Movement #3 The Overhead Squat

The post CROSSFIT FUNDAMENTALS #2: The Front Squat appeared first on Andfit.

]]>
CROSSFIT FUNDAMENTALS #1: The Air Squat https://www.andfit.co.nz/crossfit-fundamentals-1-air-squat/ Wed, 29 Nov 2017 07:21:19 +0000 http://demo.wodsites.co/?p=8215 The post CROSSFIT FUNDAMENTALS #1: The Air Squat appeared first on Andfit.

]]>

Take a look at the first of 9 Fundamental CrossFit moves.

The Air Squat is one of the first 9 fundamental CrossFit moves you will learn. This move acts as a foundation, setting you up to perform more technical exercises down the track.

In the video below, 4 x CrossFit Games competitor James Hobart gives you a clear demo of how to correctly perform an Air Squat:

Keep these positioning tips in mind when performing an Air Squat:

  1. Feet shoulder-width apart
  2. Hips descend back and down
  3. Hips descend lower than knees
  4. Maintain lumbar curve
  5. Heels down
  6. Knees in line with toes
  7. Complete at full hip and knee extension

That may seem like a lot of advice for a basic move! However, getting an air squat right reduces the amount of pressure going into your body where it shouldn’t. By keeping the correct stance, you are reducing your risk of injury while maximising your strength and efficiency.

If it feels difficult the first time you attempt an Air Squat, don’t worry. It can be challenging to get the hang of it, particularly if you have not done much training in the past. With a little practice you will be surprised at how quickly you are able to master this move.

Next: Fundamental Movement #2 Front Squats

The post CROSSFIT FUNDAMENTALS #1: The Air Squat appeared first on Andfit.

]]>
What Does A CrossFit Session Involve? https://www.andfit.co.nz/crossfit-session-involve/ Wed, 29 Nov 2017 06:30:55 +0000 http://demo.wodsites.co/?p=8208 The post What Does A CrossFit Session Involve? appeared first on Andfit.

]]>

This is a workout like no other! Here’s what to expect

Welcome to CrossFit!

You’ve signed up because you love a challenge and you want to push yourself and see how far you can go.

People sign up to CrossFit to reach their fitness goals, but they stay for the camaraderie and the ‘high’ you get from intense workouts.

If you’re feeling apprehensive about your first class, here’s what you can expect:

Before Class

We encourage members to arrive 5 – 10 minutes early. This gives you time to catch up and get to know some of the people at your gym. Arriving early also allows you to start your workout in the right frame of mind.

Class Brief

Before you get going, your coach will run everyone through the workout of the day (WOD). He / she will explain the intent of the class, run you through the movements and make time for any questions you might have.

Warm Up

To perform at your best and avoid injury, it is important to warm up. You’ll be taken through a thorough warm up before your workout truly gets underway.

Strength

Strength training is a huge part of CrossFit. But don’t worry! You won’t be expected to lift like Arnold Schwarzenegger on your first session.
What’s more important is to get a handle on the right technique, even if it means lifting a broomstick to begin with.

Skill

Every class includes a skill. Sometimes it will be part of the strength section and other times it will be related to the WOD.
Skills might include gymnastic moves like handstands or basic push up / pull ups. You could also focus on maximising the results from a specific lifting movement.

WOD (Metcon)

Get ready for it! This is the main piece of work for the day. Sometimes you’ll be let off ‘easy’ with a 7 minute AMRAP (as many reps as possible), while others will have you feeling the burn with 20 minutes+ of intense training.

Warm down

Stretch out and recover from all your hard work. During this part of the class you will have time to chat and get to know your classmates.

Class Debrief

Discuss any challenges and celebrate any wins from the session. You may have achieved a personal best or finally mastered your first pull up.
Every success is important and celebrating yours will get you pumped for your next class.

The post What Does A CrossFit Session Involve? appeared first on Andfit.

]]>
How to overcome muscle soreness https://www.andfit.co.nz/overcome-muscle-soreness/ Wed, 29 Nov 2017 06:26:26 +0000 http://demo.wodsites.co/?p=8204 The post How to overcome muscle soreness appeared first on Andfit.

]]>

Taking care of your body is an important part of CrossFit. Here’s how to ease the pain of tired muscles.

Feeling the burn? When you do CrossFit, muscle soreness is part of the process.

Don’t be put off by those aches and pains! Instead, learn how to take care of yourself to minimise the impact of your workout.

These tips will help you recover from your workouts faster: 

  1. Stretch. Every day.
    Even if you’re not hitting the gym, gentle stretching will keep your muscles in good condition. Not sure what works best? Check out this video.
  2.   Get plenty of sleep.
    When you’re snoozing, your muscles take the opportunity to repair and rebuild themselves. Put your feet up and make sure you get enough.
  1.  Keep coming in for class
    The best thing you can do for aching muscles is keep moving! This prevents you from   becoming stiff and even more sore.
    If the thought of walking into the gym is giving you heart palpitations, don’t be a stranger! Talk to your trainer about adjusting the intensity while you are getting used to your new fitness routine.
  1. Eat good, clean food
    You’re wasting all that effort if you hit the drive-through after a CrossFit workout. Do some research into getting enough fresh veg, lean protein and carbs to help your body perform at its best.
    Staying healthy doesn’t have to be all about expensive supplements. A balanced, healthy diet that is right for you will do the trick.
  2. Drink lots of water
    Every drop counts! Staying hydrated helps your muscles recover and keeps your body functioning at its optimum level. Keep up your consumption throughout the day, not just while you train.  CrossFit is not about taking it easy! As the saying goes, “No Pain, No Gain!” However, there is a difference between soreness and injury. You know your body best so if you’re worried you have pushed yourself too far, give your trainer a call.

The post How to overcome muscle soreness appeared first on Andfit.

]]>
10 CrossFit terms you need to know https://www.andfit.co.nz/10-crossfit-terms-need-know/ Wed, 29 Nov 2017 06:16:59 +0000 http://demo.wodsites.co/?p=8195 The post 10 CrossFit terms you need to know appeared first on Andfit.

]]>

What’s a WOD? Here’s your guide to the language of CrossFit

CrossFit is a highly addictive workout that will take your fitness to extreme levels.

Developed in 2001, the technique combines a series of high-intensity exercises to give you a full-body workout. Fans can’t get enough… there are now thousands of CrossFit gyms around the world.

It can be easy to feel intimidated when you are starting out, which is why it helps to get your head around the lingo we use to describe different moves or exercises.

Take a look at the following terms then head to your box with more confidence:

  1. WOD
    Your Workout of the Day. Your CrossFit coach will set you up with a WOD designed to maximise your strength and fitness.
  2. AMRAP
    As Many Reps / Rounds as Possible. Feel the burn!
  3. The Box
    Traditionally, CrossFit gyms are located in industrial warehouses. Early trainers started calling these locations ‘The Box’ and the name has stuck.
  4. EMOM
    Every Minute on the Minute. CrossFitters work to the clock. Get ready to keep an eye on it as you perform those muscle-building repetitions.
  5. MetCon
    Metabolic Conditioning Workout. These exercises will get your breathing heavy and push up your heart rate.
  6. The Girls
    According to CrossFit Founder Greg Glassman, “Workouts are like storms – they wreak havoc.” Hence the classic CrossFit benchmark workouts being given female names. Kelly, Isabel, Helen and their pals are going to keep you on your toes!
  7. Heroes
    Several CrossFit benchmark workouts are named after actual military, law enforcers and firefighters who have died in the line of duty. Typically very difficult, these workouts were created to honor such heroes. Unfortunately, the list of Hero WODs continues to grow.
  8. Rep
    Repetition. This refers to one performance of an exercise. But brace yourself, there’s no way you’re only going to be doing one!
  9. 1RM, 3RM, 10RM etc
    Your 1RM is your max lift for one rep.
    Your 10RM is the most you can lift 10 times.
  10. RX or RX’d
    As prescribed. This means you tackle your WOD without any adjustments in weight and  / or movement.

There are plenty more terms to add to your CrossFit vocabulary but these will get you off to a good start.

Happy training!

Next: Feeling sore? This will help

The post 10 CrossFit terms you need to know appeared first on Andfit.

]]>
How CrossFit can change your life https://www.andfit.co.nz/crossfit-can-change-life/ Wed, 29 Nov 2017 05:01:36 +0000 http://demo.wodsites.co/?p=8185 The post How CrossFit can change your life appeared first on Andfit.

]]>

Christine was over 200 pounds overweight and unhappy. Find out what happened next.

For 34 year old Christine Perera, being overweight was something she did not believe she could change.

Weighing more than 200 pounds, she was miserable and “everything was impossible”. She felt helpless believed she was going to be stuck in a body she was unhappy with for the rest of her life.

Then Christine discovered CrossFit. Check out the video below to see her story:

What’s inspiring about Christine’s story is that she is not the six-pack sporting, muscle-bound athlete you may expect to see at a CrossFit gym. She is still on her journey towards peak fitness but has completely overhauled her attitude and belief in what she can achieve.

As Christine describes, when she visits her local box she feels supported. The message she has for anyone considering Crossfit is simple – “You can do it”.

Want to change your life? Book an introductory session today.

The post How CrossFit can change your life appeared first on Andfit.

]]>
Think CrossFit is not for you? Think again https://www.andfit.co.nz/think-crossfit-not-think/ Wed, 29 Nov 2017 04:47:59 +0000 http://demo.wodsites.co/?p=8181 The post Think CrossFit is not for you? Think again appeared first on Andfit.

]]>

Being a lean, mean fitness machine is your end goal. You don’t have to start out that way

We get it!

The world of CrossFit can seem intimidating. It can be easy to think you’re not going to fit in unless you have rock-solid abs and can lift twice your own body weight.

But let us assure you… that’s the end goal. And everyone has to start somewhere.

CrossFitters come from all walks of life. They can be accountants, bus drivers and primary school teachers. What they have in common is their goal – to be their best self.

If you’re feeling like perhaps CrossFit is not for you, take a look at the video below. It will show you how this training philosophy can enable you to change your life, one step at a time.

.codegena{position:relative;width:100%;height:0;padding-bottom:56.27198%;}.codegena iframe{position:absolute;top:0;left:0;width:100%;height:100%;}/*Youtube Embed Code : Created with Codegena.com */

Tim’s story proves you can come to CrossFit at any weight and at any fitness level. What’s important is the commitment you make to your training.

Want to change your life? Book an introductory session today.

The post Think CrossFit is not for you? Think again appeared first on Andfit.

]]>